주요 콘텐츠로 건너뛰기

Assembling the case

필요한 것

    • Reinstall the left side panel.

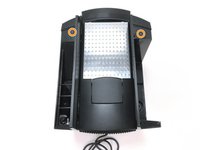
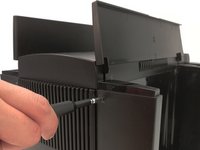
    • Put on the side wall and make sure that the lugs are snapped into the slots provided. Then slide the side panel slightly forward. The side panel should audibly snap into place when pushed forward.

    • Reinstall the right side panel.

    • First attach the side wall and make sure that the lugs have snapped into the slots provided. Then slide the side panel slightly forward. The side panel should audibly snap into place when pushed forward.

  1. Assembling the case: 3 단계, 이미지 1/1
    • Place the housing cover back on the coffee maker.

  2. Assembling the case: 4 단계, 이미지 1/2 Assembling the case: 4 단계, 이미지 2/2
    • Use the Torx T15 screwdriver to tighten the 2 countersunk screws on the housing cover.

  3. Assembling the case: 5 단계, 이미지 1/2 Assembling the case: 5 단계, 이미지 2/2
    • Using the oval head wrench, tighten the 4 oval head screws on the back of the machine.

  4. Assembling the case: 6 단계, 이미지 1/3 Assembling the case: 6 단계, 이미지 2/3 Assembling the case: 6 단계, 이미지 3/3
    • Replace the water tank,

    • the drip tray with drip tray, pulp tray and pulp container,

    • and place the aroma protection cover back on.

결승점

다른 한 분이 해당 안내서를 완성하였습니다.

다음 번역가들에게 특별히 감사 드립니다:

de en

100%

oldturkey03님은 저희가 세상을 수리하는데 동참하신 분입니다! 기여하시겠습니까?
번역 시작하기 ›

Natalie

회원 가입일: 05/08/19

738 평판

안내서 4개 작성하였습니다

KMM 2019SS KMM 2019SS 회원

Community

11 회원들

안내서 8개 작성하였습니다

댓글 0개

댓글 쓰기

조회 통계:

24 시간 전: 1

7일 전: 6

30일 전: 20

전체 시간: 830