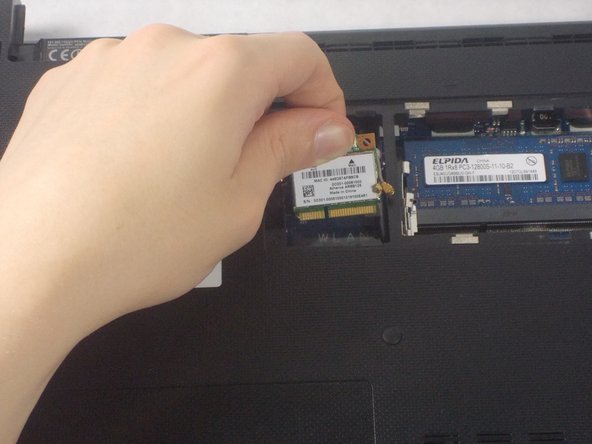
주요 콘텐츠로 건너뛰기

Asus A53U-ES21 Wireless Card Replacement

필요한 것

  1. Asus A53U-ES21 Wireless Card Replacement, Battery: 1 단계, 이미지 1/2 Asus A53U-ES21 Wireless Card Replacement, Battery: 1 단계, 이미지 2/2
    • Make sure the laptop is off.

    • Flip the laptop upside down so that the battery is facing you.

  2. Asus A53U-ES21 Wireless Card Replacement: 2 단계, 이미지 1/2 Asus A53U-ES21 Wireless Card Replacement: 2 단계, 이미지 2/2
    • Move the two sliders towards the outer edge of the laptop.

    • Pull the battery out with your left hand while holding the right slider.

  3. Asus A53U-ES21 Wireless Card Replacement, Wireless Card: 3 단계, 이미지 1/3 Asus A53U-ES21 Wireless Card Replacement, Wireless Card: 3 단계, 이미지 2/3 Asus A53U-ES21 Wireless Card Replacement, Wireless Card: 3 단계, 이미지 3/3
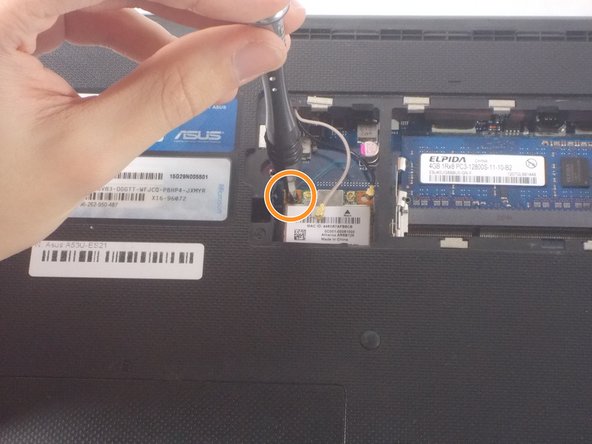
    • Remove the 5mm screw using a Phillips #1 screwdriver.

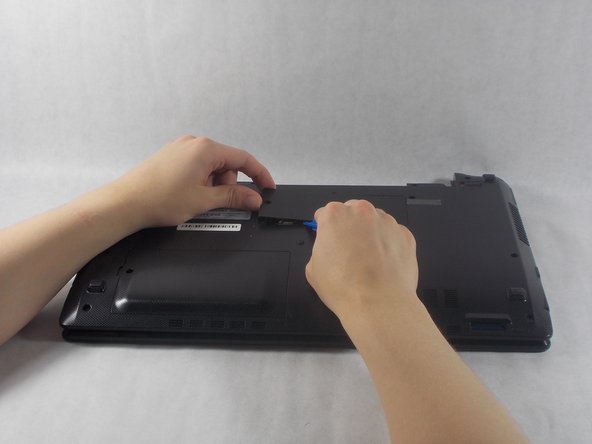
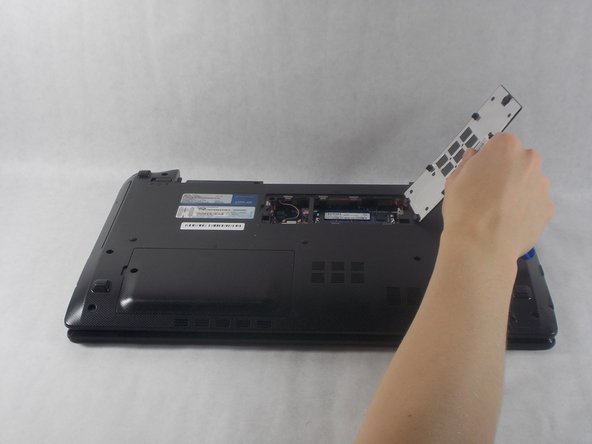
    • Use the iFixit opening tools to remove the panel.

  4. Asus A53U-ES21 Wireless Card Replacement: 4 단계, 이미지 1/3 Asus A53U-ES21 Wireless Card Replacement: 4 단계, 이미지 2/3 Asus A53U-ES21 Wireless Card Replacement: 4 단계, 이미지 3/3
    • Detach the two cables connected to the wireless card (the opening tool works well for this).

    • Remove the 4mm screw (highlighted in orange).

    • Pull the wireless card up and remove it from the device.

결론

To reassemble your device, follow these instructions in reverse order.

Chase Poirier

회원 가입일: 10/23/18

544 평판

안내서 5개 작성하였습니다

UMass Dartmouth, Team S1-G3, Simcock Fall 2018 UMass Dartmouth, Team S1-G3, Simcock Fall 2018 회원

UMASSD-SIMCOCK-F18S1G3

3 회원들

안내서 7개 작성하였습니다

댓글 0개

댓글 쓰기

조회 통계:

24 시간 전: 0

7일 전: 0

30일 전: 3

전체 시간: 237