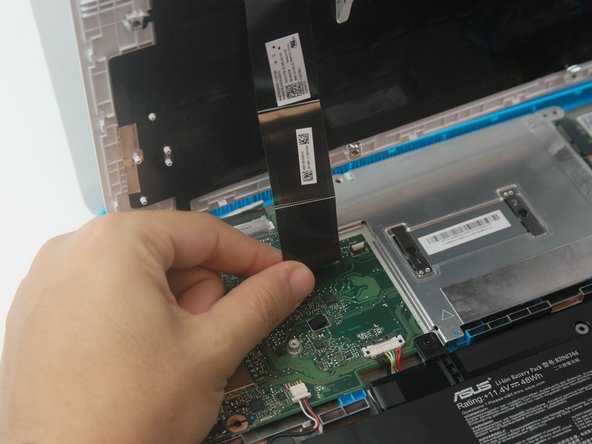
주요 콘텐츠로 건너뛰기

Asus Chromebook C300MA-DH02 Motherboard Replacement

필요한 것

  1. Asus Chromebook C300MA-DH02 Motherboard Replacement, Keyboard Panel: 1 단계, 이미지 1/3 Asus Chromebook C300MA-DH02 Motherboard Replacement, Keyboard Panel: 1 단계, 이미지 2/3 Asus Chromebook C300MA-DH02 Motherboard Replacement, Keyboard Panel: 1 단계, 이미지 3/3
    • Flip the Chromebook over so that the underside is facing up.

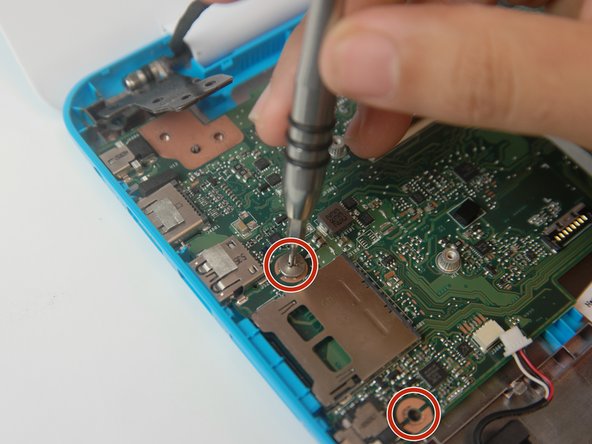
    • Using the Phillips PH #000 screwdriver, remove the 11 "4mm" screws on the back of the device.

  2. Asus Chromebook C300MA-DH02 Motherboard Replacement: 2 단계, 이미지 1/1
    • Wedge the plastic opening tool between the bottom cover of the laptop and the keyboard panel.

    • Apply pressure and move the plastic opening tool around the border of the laptop until it pops out.

  3. Asus Chromebook C300MA-DH02 Motherboard Replacement: 3 단계, 이미지 1/2 Asus Chromebook C300MA-DH02 Motherboard Replacement: 3 단계, 이미지 2/2
    • Once the keyboard panel pops out, slowly move it upwards so that the keyboard connection is visible.

    • Remove the keyboard connection from the motherboard by pulling it outwards from the connector.

  4. Asus Chromebook C300MA-DH02 Motherboard Replacement, Motherboard: 4 단계, 이미지 1/2 Asus Chromebook C300MA-DH02 Motherboard Replacement, Motherboard: 4 단계, 이미지 2/2
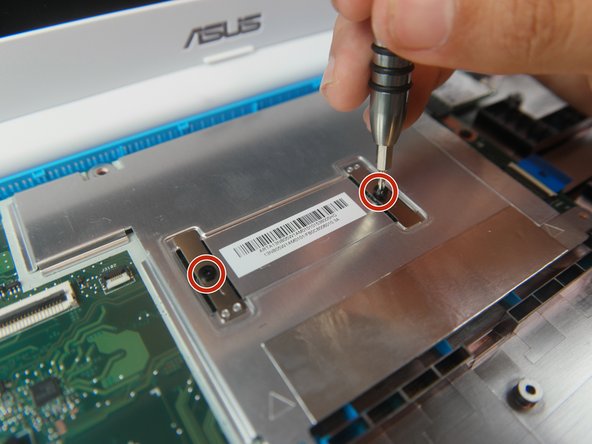
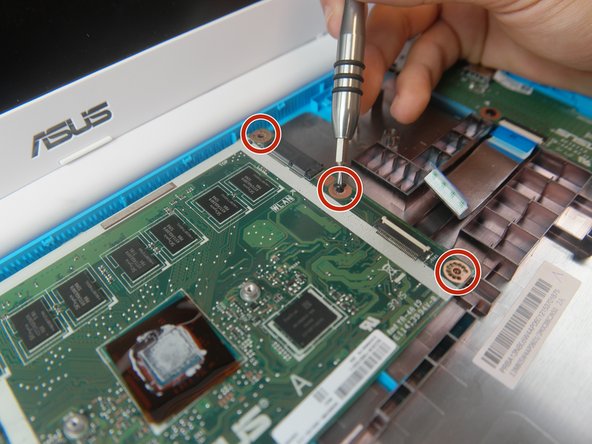
    • Remove the 4 "4mm" screws on the silver motherboard cover with the Phillips #000 Screwdriver.

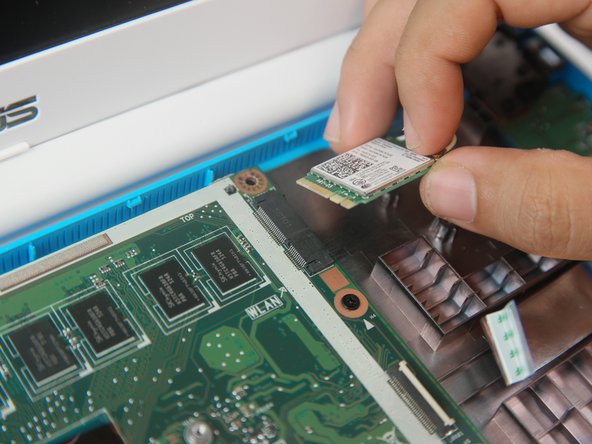
    • Remove the motherboard silver mount.

  5. Asus Chromebook C300MA-DH02 Motherboard Replacement: 5 단계, 이미지 1/1
    • Use a plastic opening tool to remove the connection from sound driver on the bottom left of the motherboard.

  6. Asus Chromebook C300MA-DH02 Motherboard Replacement: 6 단계, 이미지 1/1
    • Gently remove the blue connector to the right side of the motherboard.

  7. Asus Chromebook C300MA-DH02 Motherboard Replacement: 7 단계, 이미지 1/2 Asus Chromebook C300MA-DH02 Motherboard Replacement: 7 단계, 이미지 2/2
    • Use the Phillips #000 Screwdriver to remove the screw on right side of wireless card.

    • Remove the wireless card.

  8. Asus Chromebook C300MA-DH02 Motherboard Replacement: 8 단계, 이미지 1/1
    • Start by lifting tape up off of the connection. Remove the connection to display.

  9. Asus Chromebook C300MA-DH02 Motherboard Replacement: 9 단계, 이미지 1/3 Asus Chromebook C300MA-DH02 Motherboard Replacement: 9 단계, 이미지 2/3 Asus Chromebook C300MA-DH02 Motherboard Replacement: 9 단계, 이미지 3/3
    • Remove (3) three "4mm" screws that connect the hinge to the motherboard using the Phillips #000 Screwdriver.

    • Remove (5) five "4mm" screws around two sides of motherboard using the Phillips #000 Screwdriver.

  10. Asus Chromebook C300MA-DH02 Motherboard Replacement: 10 단계, 이미지 1/1
    • Gently remove motherboard from the Asus Chromebook.

결론

To reassemble your device, follow these instructions in reverse order.

다른 2명이 해당 안내서를 완성하였습니다.

Giang Le Nam Dang

회원 가입일: 10/02/17

149 평판

안내서 1개 작성함

USF Tampa, Team S6-G4, Remmell Fall 2017 USF Tampa, Team S6-G4, Remmell Fall 2017 회원

USFT-REMMELL-F17S6G4

4 회원들

안내서 12개 작성하였습니다

댓글 0개

댓글 쓰기

조회 통계:

24 시간 전: 2

7일 전: 3

30일 전: 9

전체 시간: 253