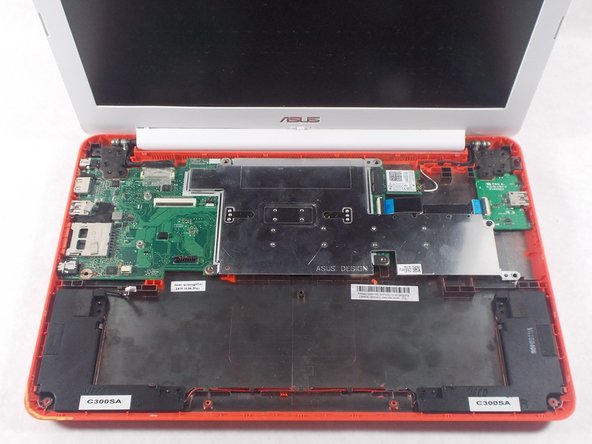
주요 콘텐츠로 건너뛰기

Asus Chromebook C300SA-DS02 VECO Speakers Replacement

필요한 것

  1. Asus Chromebook C300SA-DS02 VECO Speakers  Replacement, Keyboard: 1 단계, 이미지 1/2 Asus Chromebook C300SA-DS02 VECO Speakers  Replacement, Keyboard: 1 단계, 이미지 2/2
    • Power the laptop off and make sure the charger is unplugged before starting.

    • Remove the eight 8.0mm Phillips #0 screws on the bottom of the laptop.

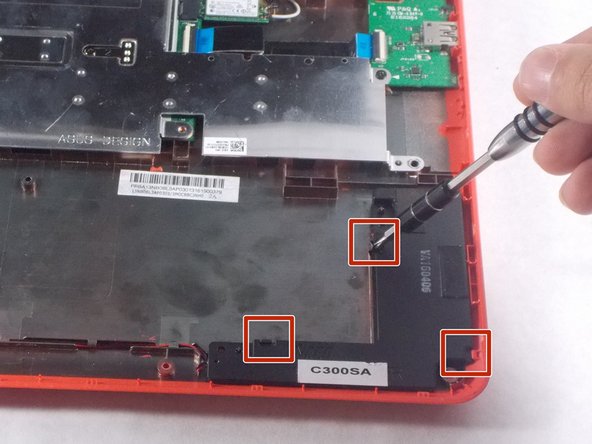
    • Remove the three 6.0mm Phillips #0 screws.

  2. Asus Chromebook C300SA-DS02 VECO Speakers  Replacement: 2 단계, 이미지 1/3 Asus Chromebook C300SA-DS02 VECO Speakers  Replacement: 2 단계, 이미지 2/3 Asus Chromebook C300SA-DS02 VECO Speakers  Replacement: 2 단계, 이미지 3/3
    • Open the laptop.

    • Using an iFixit opening tool, pry along the edges of the keyboard.

    • Lift the keyboard and slide it gently towards you.

    • Do not completely remove the keyboard. It is still connected to the back panel by a pair of ribbon cables.

  3. Asus Chromebook C300SA-DS02 VECO Speakers  Replacement: 3 단계, 이미지 1/3 Asus Chromebook C300SA-DS02 VECO Speakers  Replacement: 3 단계, 이미지 2/3 Asus Chromebook C300SA-DS02 VECO Speakers  Replacement: 3 단계, 이미지 3/3
    • Disconnect the two ZIF connectors by prying up the locking bar with a spudger and removing the ribbon cable.

  4. Asus Chromebook C300SA-DS02 VECO Speakers  Replacement: 4 단계, 이미지 1/1
    • Remove the keyboard from the laptop.

  5. Asus Chromebook C300SA-DS02 VECO Speakers  Replacement, Battery: 5 단계, 이미지 1/2 Asus Chromebook C300SA-DS02 VECO Speakers  Replacement, Battery: 5 단계, 이미지 2/2
    • Remove the six 5.6mm Phillips #0 screws around the battery.

  6. Asus Chromebook C300SA-DS02 VECO Speakers  Replacement: 6 단계, 이미지 1/2 Asus Chromebook C300SA-DS02 VECO Speakers  Replacement: 6 단계, 이미지 2/2
    • Using your thumb and index finger, pinch the multi-color cable and disconnect it from the motherboard.

  7. Asus Chromebook C300SA-DS02 VECO Speakers  Replacement: 7 단계, 이미지 1/1
    • Lift the battery out of the laptop.

  8. Asus Chromebook C300SA-DS02 VECO Speakers  Replacement, VECO Speakers: 8 단계, 이미지 1/1
    • Unplug the speaker cable from the motherboard.

  9. Asus Chromebook C300SA-DS02 VECO Speakers  Replacement: 9 단계, 이미지 1/2 Asus Chromebook C300SA-DS02 VECO Speakers  Replacement: 9 단계, 이미지 2/2
    • Start by removing the right speaker first.

    • There are two metal clips and one plastic clip holding the right speaker in place. Push them back and lift speaker out of the laptop.

    • Use a screwdriver to gently push back the metal clips.

  10. Asus Chromebook C300SA-DS02 VECO Speakers  Replacement: 10 단계, 이미지 1/2 Asus Chromebook C300SA-DS02 VECO Speakers  Replacement: 10 단계, 이미지 2/2
    • Untangle the wire connecting the right speaker to the left speaker.

    • Move right speaker and wires away from your working space.

    • Do not lift wire straight up, there are five interlocking ribs holding this wire in place.

  11. Asus Chromebook C300SA-DS02 VECO Speakers  Replacement: 11 단계, 이미지 1/1
    • There are two metal clips and one plastic clip holding the right speaker in place. Push them back and lift speaker out of the laptop.

    • You can use a screwdriver to push back the clips if needed.

  12. Asus Chromebook C300SA-DS02 VECO Speakers  Replacement: 12 단계, 이미지 1/1
    • Lift speakers and cable away from the laptop.

결론

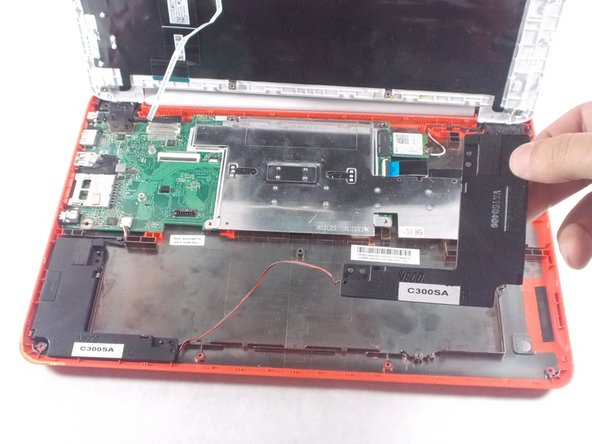
To reassemble your device, follow these instructions in reverse order.

다른 한 분이 해당 안내서를 완성하였습니다.

Sam LaBelle

회원 가입일: 10/17/17

107 평판

안내서 1개 작성함

UMass Dartmouth, Team S1-G7, Simcock Fall 2017 UMass Dartmouth, Team S1-G7, Simcock Fall 2017 회원

UMASSD-SIMCOCK-F17S1G7

3 회원들

안내서 9개 작성하였습니다

댓글 0개

댓글 쓰기

조회 통계:

24 시간 전: 0

7일 전: 2

30일 전: 9

전체 시간: 348