주요 콘텐츠로 건너뛰기

Asus Chromebook C523N Keyboard Replacement

필요한 것

  1. Asus Chromebook C523N Keyboard Replacement, Back Cover: 1 단계, 이미지 1/2 Asus Chromebook C523N Keyboard Replacement, Back Cover: 1 단계, 이미지 2/2
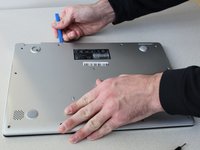
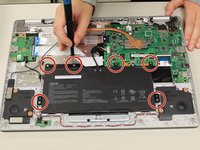
    • Remove the four 0.5mm JIS #00 screws from the bottom edge of the Chromebook and one in the center.

    • Remove the six 1.7mm JIS #00 screws from the sides and top edge of the Chromebook.

  2. Asus Chromebook C523N Keyboard Replacement: 2 단계, 이미지 1/2 Asus Chromebook C523N Keyboard Replacement: 2 단계, 이미지 2/2
    • Using a spudger, lift the top left base pad and remove it to reveal a final screw underneath.

    • Remove the one 0.5mm JIS #00 screw underneath the base pad.

  3. Asus Chromebook C523N Keyboard Replacement: 3 단계, 이미지 1/2 Asus Chromebook C523N Keyboard Replacement: 3 단계, 이미지 2/2
    • Use an opening tool to gently pry the base enclosure up and remove from the laptop.

  4. Asus Chromebook C523N Keyboard Replacement, Speaker: 4 단계, 이미지 1/3 Asus Chromebook C523N Keyboard Replacement, Speaker: 4 단계, 이미지 2/3 Asus Chromebook C523N Keyboard Replacement, Speaker: 4 단계, 이미지 3/3
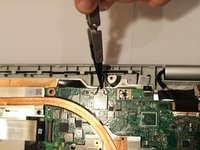
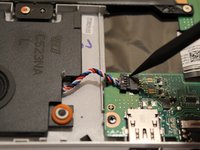
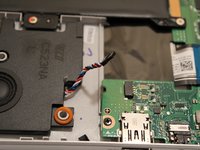
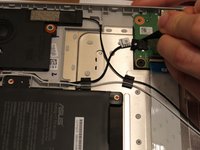
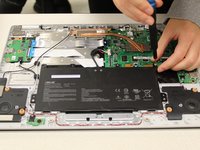
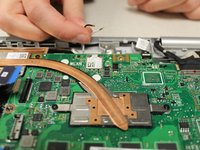
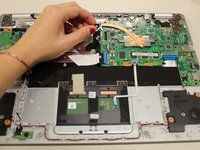
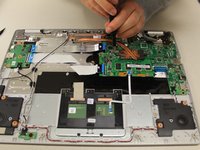
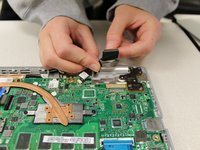
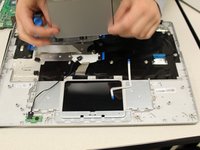
    • Using the nylon tipped tweezers, gently pry the black and white wires from the wireless card and lift.

  5. Asus Chromebook C523N Keyboard Replacement: 5 단계, 이미지 1/3 Asus Chromebook C523N Keyboard Replacement: 5 단계, 이미지 2/3 Asus Chromebook C523N Keyboard Replacement: 5 단계, 이미지 3/3
    • Use a spudger to pry the small tangle of black, red, white, and blue wires from the audio connector, pushing the wires back toward the speaker.

  6. Asus Chromebook C523N Keyboard Replacement: 6 단계, 이미지 1/2 Asus Chromebook C523N Keyboard Replacement: 6 단계, 이미지 2/2
    • Use a spudger to pry the black wire from the audio connector, pushing the wires back toward the left speaker.

  7. Asus Chromebook C523N Keyboard Replacement: 7 단계, 이미지 1/1
    • Gently grab both speakers and lift them from the Chromebook to remove.

  8. Asus Chromebook C523N Keyboard Replacement, Battery: 8 단계, 이미지 1/3 Asus Chromebook C523N Keyboard Replacement, Battery: 8 단계, 이미지 2/3 Asus Chromebook C523N Keyboard Replacement, Battery: 8 단계, 이미지 3/3
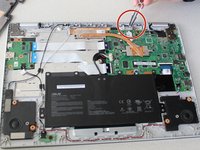
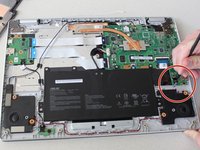
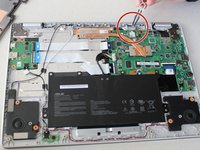
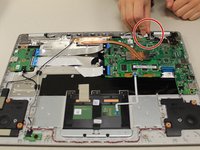
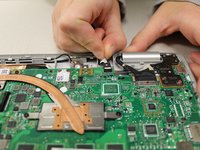
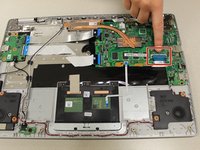
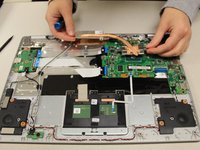
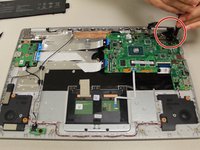
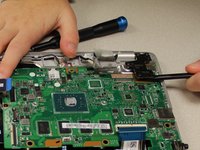
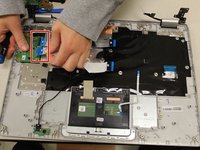
    • To disconnect the cable, use the tip of a spudger or your fingernail to flip up the small locking flap.

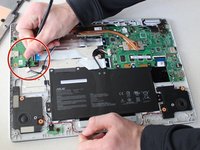
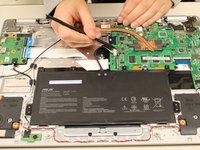
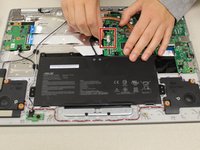
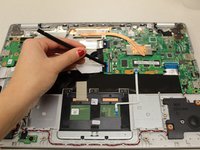
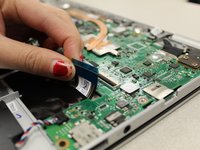
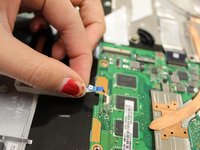
    • Gently disconnect the battery cable from the motherboard.

  9. Asus Chromebook C523N Keyboard Replacement: 9 단계, 이미지 1/2 Asus Chromebook C523N Keyboard Replacement: 9 단계, 이미지 2/2
    • Remove six 1.4 mm JIS #00 screws from the battery.

  10. Asus Chromebook C523N Keyboard Replacement: 10 단계, 이미지 1/1
    • Remove the battery from the laptop.

  11. Asus Chromebook C523N Keyboard Replacement, Motherboard: 11 단계, 이미지 1/3 Asus Chromebook C523N Keyboard Replacement, Motherboard: 11 단계, 이미지 2/3 Asus Chromebook C523N Keyboard Replacement, Motherboard: 11 단계, 이미지 3/3
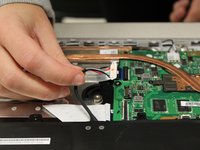
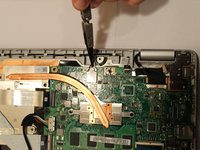
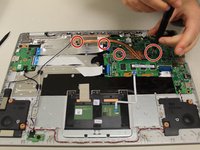
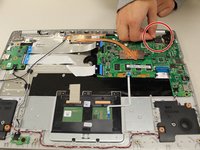
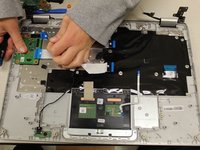
    • Using tweezers, gently pry the black and white wires from the wireless card and lift.

  12. Asus Chromebook C523N Keyboard Replacement: 12 단계, 이미지 1/3 Asus Chromebook C523N Keyboard Replacement: 12 단계, 이미지 2/3 Asus Chromebook C523N Keyboard Replacement: 12 단계, 이미지 3/3
    • Gently pull the trackpad cable from the connector, located next to the wireless card.

  13. Asus Chromebook C523N Keyboard Replacement: 13 단계, 이미지 1/3 Asus Chromebook C523N Keyboard Replacement: 13 단계, 이미지 2/3 Asus Chromebook C523N Keyboard Replacement: 13 단계, 이미지 3/3
    • Using a spudger, disconnect the two side-by-side ribbon cables from their connectors, pushing in the direction of the ribbons (toward the left side of the Chromebook).

  14. Asus Chromebook C523N Keyboard Replacement: 14 단계, 이미지 1/2 Asus Chromebook C523N Keyboard Replacement: 14 단계, 이미지 2/2
    • Disconnect the thick blue ribbon cable from the connector by pulling it away from the motherboard.

  15. Asus Chromebook C523N Keyboard Replacement: 15 단계, 이미지 1/3 Asus Chromebook C523N Keyboard Replacement: 15 단계, 이미지 2/3 Asus Chromebook C523N Keyboard Replacement: 15 단계, 이미지 3/3
    • Remove the 0.4mm JIS #0 screws from the heat sink in the center of the motherboard.

    • Lift and remove the heat sink.

  16. Asus Chromebook C523N Keyboard Replacement: 16 단계, 이미지 1/3 Asus Chromebook C523N Keyboard Replacement: 16 단계, 이미지 2/3 Asus Chromebook C523N Keyboard Replacement: 16 단계, 이미지 3/3
    • Gripping the thin white ribbon cable, gently pull it away from the motherboard to disconnect.

  17. Asus Chromebook C523N Keyboard Replacement: 17 단계, 이미지 1/2 Asus Chromebook C523N Keyboard Replacement: 17 단계, 이미지 2/2
    • Disconnect the thick black connector by gently pulling it up, away from the motherboard.

  18. Asus Chromebook C523N Keyboard Replacement: 18 단계, 이미지 1/2 Asus Chromebook C523N Keyboard Replacement: 18 단계, 이미지 2/2
    • Remove the two 0.4mm JIS #00 screws at the bottom of the hinge (closest to the motherboard).

    • Using an opening tool, pry the hinge upward.

  19. Asus Chromebook C523N Keyboard Replacement: 19 단계, 이미지 1/2 Asus Chromebook C523N Keyboard Replacement: 19 단계, 이미지 2/2
    • Remove the two 0.4 mm JIS #00 screws from the motherboard.

    • Gently lift and remove the motherboard.

  20. Asus Chromebook C523N Keyboard Replacement, Touchpad: 20 단계, 이미지 1/1
    • Pull gently on the touchpad cable connector to disconnect.

  21. Asus Chromebook C523N Keyboard Replacement: 21 단계, 이미지 1/1
    • Carefully, remove the tape from the touch pad only.

  22. Asus Chromebook C523N Keyboard Replacement: 22 단계, 이미지 1/1
    • Remove the three 1.4 mm JIS #00 screws.

  23. Asus Chromebook C523N Keyboard Replacement: 23 단계, 이미지 1/2 Asus Chromebook C523N Keyboard Replacement: 23 단계, 이미지 2/2
    • Lift at the far edge of the touchpad to remove it.

  24. Asus Chromebook C523N Keyboard Replacement, Keyboard: 24 단계, 이미지 1/2 Asus Chromebook C523N Keyboard Replacement, Keyboard: 24 단계, 이미지 2/2
    • Disconnect the two ribbon cables from the daughterboard.

  25. Asus Chromebook C523N Keyboard Replacement: 25 단계, 이미지 1/1
    • Remove the four 0.4mm JIS #00 screws from the daughterboard.

    • Remove the daughterboard.

  26. Asus Chromebook C523N Keyboard Replacement: 26 단계, 이미지 1/1
    • Remove the two 0.4mm JIS #00 screws on the left hinge.

  27. Asus Chromebook C523N Keyboard Replacement: 27 단계, 이미지 1/1
    • Lift the keyboard of the Chromebook off of the screen.

결론

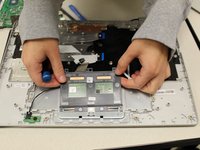
To reassemble your device, follow these instructions in reverse order.

다른 2명이 해당 안내서를 완성하였습니다.

Aaron Hogan

회원 가입일: 10/15/19

675 평판

안내서 4개 작성하였습니다

댓글 3개

Great walk through. I used this to replace a keyboard on a C423N ASUS. Everything but the track pad connector on the mother board and three screws instead of 2 on the screen hinges is the same.

Charles Stanley - 답글

Hi there

How would I replace the screen for this model??

Saif - 답글

how to replace ssd in motherbord

Suresh dhakar - 답글

댓글 쓰기

조회 통계:

24 시간 전: 0

7일 전: 3

30일 전: 17

전체 시간: 2,146