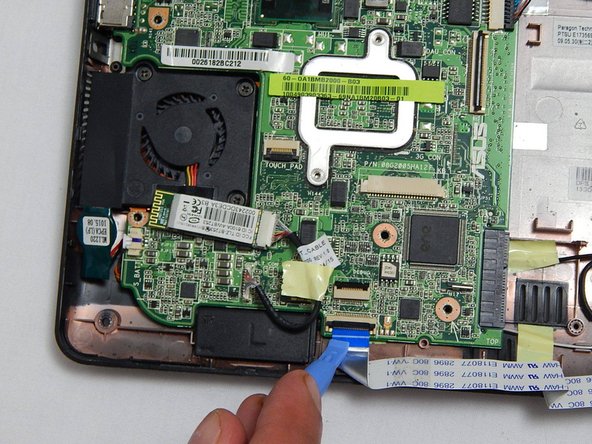
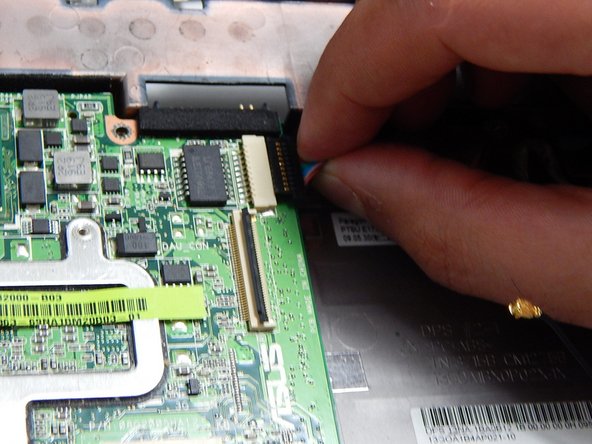
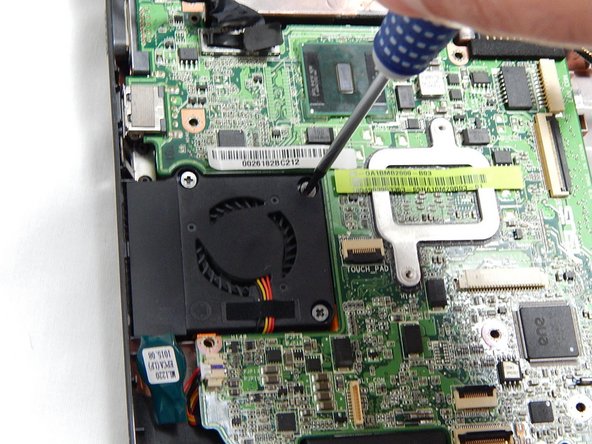
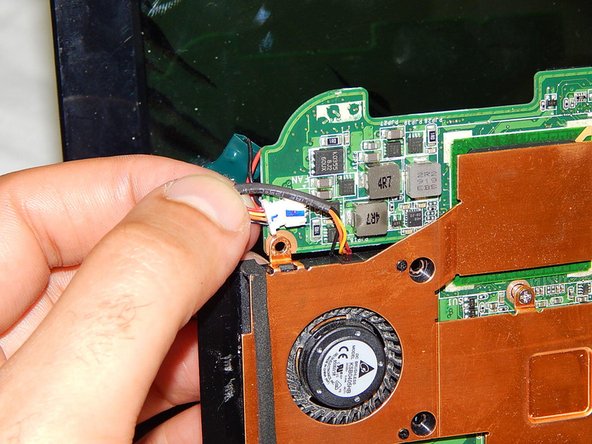
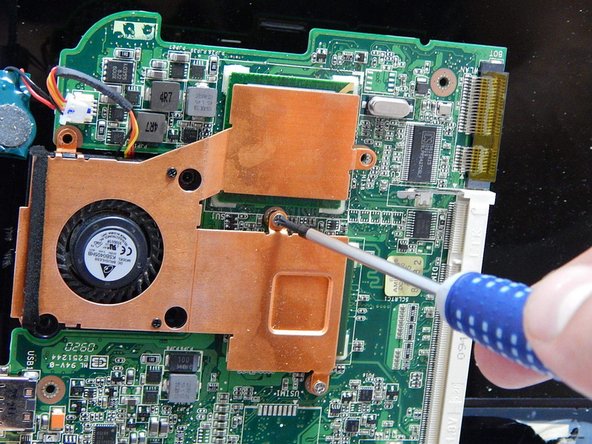
주요 콘텐츠로 건너뛰기

Asus Eee PC 1005HA Fan Replacement

필요한 것

  1. Asus Eee PC 1005HA Fan Replacement, Battery: 1 단계, 이미지 1/1
    • Lay the laptop upside down.

    • Locate the two battery lock tabs.

  2. Asus Eee PC 1005HA Fan Replacement: 2 단계, 이미지 1/3 Asus Eee PC 1005HA Fan Replacement: 2 단계, 이미지 2/3 Asus Eee PC 1005HA Fan Replacement: 2 단계, 이미지 3/3
    • Slide the tabs outward to unlock the battery.

    • The left tab will remain unlocked, while the right tab must be held.

    • Holding the right tab open, slide the battery out of the laptop.

  3. Asus Eee PC 1005HA Fan Replacement, Keyboard: 3 단계, 이미지 1/2 Asus Eee PC 1005HA Fan Replacement, Keyboard: 3 단계, 이미지 2/2
    • Use a plastic opening tool to pull up the four metal latches in the battery cavity that is located on the bottom of the laptop.

    • Do not apply too much pressure. The latches can not be removed and will bend if forced.

  4. Asus Eee PC 1005HA Fan Replacement: 4 단계, 이미지 1/3 Asus Eee PC 1005HA Fan Replacement: 4 단계, 이미지 2/3 Asus Eee PC 1005HA Fan Replacement: 4 단계, 이미지 3/3
    • Flip the laptop over, and open the display.

    • Use a plastic opening tool to lift the edge of the keyboard that is nearest to the screen.

    • Gently lift the keyboard and slide it toward the screen.

    • Do not remove the keyboard completely. This can damage the ribbon cable connecting the underside of the keyboard to the laptop.

  5. Asus Eee PC 1005HA Fan Replacement: 5 단계, 이미지 1/1
    • Use a spudger tool to release the tabs on the ribbon cable ZIF connector that is attached to the underside of the keyboard.

    • Depending on the model, the tabs on this ZIF connector will either flip up toward the display or push out toward the display.

    • Once the ZIF connector tabs have been released, remove the keyboard.

  6. Asus Eee PC 1005HA Fan Replacement, Fan: 6 단계, 이미지 1/2 Asus Eee PC 1005HA Fan Replacement, Fan: 6 단계, 이미지 2/2
    • Detach the ribbon cable that connects the SD card module and the motherboard by lifting the black clips using the plastic opening tool.

  7. Asus Eee PC 1005HA Fan Replacement: 7 단계, 이미지 1/2 Asus Eee PC 1005HA Fan Replacement: 7 단계, 이미지 2/2
    • Detach the Bluetooth wire located below the fan by gently pulling it upward.

  8. Asus Eee PC 1005HA Fan Replacement: 8 단계, 이미지 1/2 Asus Eee PC 1005HA Fan Replacement: 8 단계, 이미지 2/2
    • Detach the black structure connected to the input cables in the top right center of the motherboard by pulling them to the right, away from the fan.

  9. Asus Eee PC 1005HA Fan Replacement: 9 단계, 이미지 1/2 Asus Eee PC 1005HA Fan Replacement: 9 단계, 이미지 2/2
    • Remove the three 5.5 mm screws holding the motherboard to the motherboard plastic frame.

    • Remove the four 5.5 mm screws surrounding the fan.

  10. Asus Eee PC 1005HA Fan Replacement: 10 단계, 이미지 1/1
    • Gently lift the motherboard and hold it so that the bottom of the board is exposed.

  11. Asus Eee PC 1005HA Fan Replacement: 11 단계, 이미지 1/2 Asus Eee PC 1005HA Fan Replacement: 11 단계, 이미지 2/2
    • Disconnect the cable attaching the motherboard to the fan.

  12. Asus Eee PC 1005HA Fan Replacement: 12 단계, 이미지 1/3 Asus Eee PC 1005HA Fan Replacement: 12 단계, 이미지 2/3 Asus Eee PC 1005HA Fan Replacement: 12 단계, 이미지 3/3
    • Remove two 5.5 mm screws holding the fan and the brass frame to the motherboard.

결론

To reassemble your device, follow these instructions in reverse order.

다른 4명이 해당 안내서를 완성하였습니다.

Maged Hanna

회원 가입일: 03/13/14

666 평판

안내서 4개 작성하였습니다

University of Maryland, Team 3-4, Calaway Spring 2014 University of Maryland, Team 3-4, Calaway Spring 2014 회원

UMD-CALAWAY-S14S3G4

1 회원

안내서 8개 작성하였습니다

댓글 0개

댓글 쓰기

조회 통계:

24 시간 전: 3

7일 전: 5

30일 전: 24

전체 시간: 11,587