주요 콘텐츠로 건너뛰기

Asus Eee PC 1005HA Wifi Card Replacement

필요한 것

  1. Asus Eee PC 1005HA Wifi Card Replacement, Keyboard: 1 단계, 이미지 1/2 Asus Eee PC 1005HA Wifi Card Replacement, Keyboard: 1 단계, 이미지 2/2
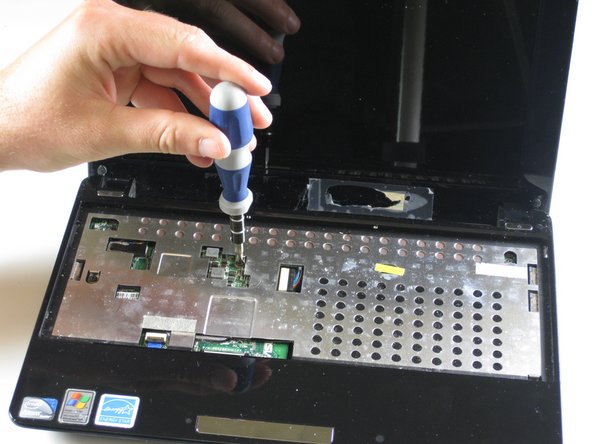
    • Use a plastic opening tool to pull up the four metal latches in the battery cavity that is located on the bottom of the laptop.

    • Do not apply too much pressure. The latches can not be removed and will bend if forced.

  2. Asus Eee PC 1005HA Wifi Card Replacement: 2 단계, 이미지 1/3 Asus Eee PC 1005HA Wifi Card Replacement: 2 단계, 이미지 2/3 Asus Eee PC 1005HA Wifi Card Replacement: 2 단계, 이미지 3/3
    • Flip the laptop over, and open the display.

    • Use a plastic opening tool to lift the edge of the keyboard that is nearest to the screen.

    • Gently lift the keyboard and slide it toward the screen.

    • Do not remove the keyboard completely. This can damage the ribbon cable connecting the underside of the keyboard to the laptop.

  3. Asus Eee PC 1005HA Wifi Card Replacement: 3 단계, 이미지 1/1
    • Use a spudger tool to release the tabs on the ribbon cable ZIF connector that is attached to the underside of the keyboard.

    • Depending on the model, the tabs on this ZIF connector will either flip up toward the display or push out toward the display.

    • Once the ZIF connector tabs have been released, remove the keyboard.

  4. Asus Eee PC 1005HA Wifi Card Replacement, Wifi Antenna: 4 단계, 이미지 1/2 Asus Eee PC 1005HA Wifi Card Replacement, Wifi Antenna: 4 단계, 이미지 2/2
    • Remove the (6.65 mm) screw next to the RAM.

    • Remove the RAM door cover.

  5. Asus Eee PC 1005HA Wifi Card Replacement: 5 단계, 이미지 1/1
    • Remove (6.65 mm) screw next to RAM.

    • Identify and disconnect touch pad ribbon cable which can be seen through a window at the bottom edge of the metal part of the top casing (in these photos the connector shows blue).

  6. Asus Eee PC 1005HA Wifi Card Replacement: 6 단계, 이미지 1/2 Asus Eee PC 1005HA Wifi Card Replacement: 6 단계, 이미지 2/2
    • Turn computer right side up, and open it.

    • Remove 6 (5.5 mm) screws from inside covering.

    • Disconnect the touch pad ribbon cable.

  7. Asus Eee PC 1005HA Wifi Card Replacement: 7 단계, 이미지 1/2 Asus Eee PC 1005HA Wifi Card Replacement: 7 단계, 이미지 2/2
    • The palmrest plastic is fragile. Handle it carefully.

    • Two miniature LEDs will be exposed in the top edge of the bottom casing. Handle with caution to avoid damage.

    • Detach each of the 5 plastic clips. Run a plastic opening tool along the underside of the top half. You will hear the 'clicks' of the clips coming undone.

    • After the clips are loose, disconnect the palmrest flatflex and remove it.

  8. Asus Eee PC 1005HA Wifi Card Replacement: 8 단계, 이미지 1/1
    • Raise black pad to detach trackpad ribbon if not done in step 4.

    • (Completing this step according to the directions in step 4 reduces the potential for damage.)

  9. Asus Eee PC 1005HA Wifi Card Replacement: 9 단계, 이미지 1/3 Asus Eee PC 1005HA Wifi Card Replacement: 9 단계, 이미지 2/3 Asus Eee PC 1005HA Wifi Card Replacement: 9 단계, 이미지 3/3
    • Remove the hard drive ribbon by lifting the black clips upward.

    • Remove (4.6 mm) screws that hold the hard drive in place.

    • There may be only one of these screws, the one at bottom right. The upper position screw may already have been removed (The 4th red circle from the left in step 4).

  10. Asus Eee PC 1005HA Wifi Card Replacement: 10 단계, 이미지 1/2 Asus Eee PC 1005HA Wifi Card Replacement: 10 단계, 이미지 2/2
    • Gently pull the hard drive to the left by the black plastic ribbon. Slowly lift the hard drive up on the left and then out.

    • When re-inserting, use caution to ensure that the WiFi antenna cable (visible as a black loop below the disk in the 2nd photo) is not trapped under the leg of the drive encasing.

  11. Asus Eee PC 1005HA Wifi Card Replacement: 11 단계, 이미지 1/2 Asus Eee PC 1005HA Wifi Card Replacement: 11 단계, 이미지 2/2
    • Lift the black clips using the plastic opening tool to detach the ribbon that connects the SD card module.

  12. Asus Eee PC 1005HA Wifi Card Replacement: 12 단계, 이미지 1/1
    • Remove the wifi antenna connection using the plastic opening tool.

  13. Asus Eee PC 1005HA Wifi Card Replacement: 13 단계, 이미지 1/2 Asus Eee PC 1005HA Wifi Card Replacement: 13 단계, 이미지 2/2
    • Remove this screw, which holds the wifi component in place, using the Phillips head screwdriver.

  14. Asus Eee PC 1005HA Wifi Card Replacement: 14 단계, 이미지 1/1
    • Pull the Wi-Fi component to the right, and then slightly upward and finally out to remove the Wi-Fi antenna.

    • Move antenna cautiously to avoid damage.

결론

To reassemble your device, follow these instructions in reverse order.

다른 한 분이 해당 안내서를 완성하였습니다.

Maged Hanna

회원 가입일: 03/13/14

666 평판

안내서 4개 작성하였습니다

University of Maryland, Team 3-4, Calaway Spring 2014 University of Maryland, Team 3-4, Calaway Spring 2014 회원

UMD-CALAWAY-S14S3G4

1 회원

안내서 8개 작성하였습니다

댓글 한 개

een heel duidelijke uitleg. ik zal het zelf niet proberen. ben bang dat ik met ijn trillende vingers de boel kapot ga maken.

ik had wifi verbinding maar ineens is het niet meer mogelijk om on-line te komen.

de ==internet adopter == werkt niet.

vraag mijn zwager om te helpen, anders moet ik afscheid nemen van mijn kleine computertje.

jammer.

beukeneut@gmail.com

duurt - 답글

댓글 쓰기

조회 통계:

24 시간 전: 0

7일 전: 6

30일 전: 23

전체 시간: 6,687