주요 콘텐츠로 건너뛰기

Asus EeeBook X205TA Screen Assembly Replacement

필요한 것

  1. Asus EeeBook X205TA Screen Assembly Replacement, Screen Assembly: 1 단계, 이미지 1/2 Asus EeeBook X205TA Screen Assembly Replacement, Screen Assembly: 1 단계, 이미지 2/2
    • Unscrew all 10 screws located on the bottom of the laptop using 2mm Phillips Screwdriver.

    • Keep in mind that some of the screws vary in length, so keep track of which screws were placed in each hole.

  2. Asus EeeBook X205TA Screen Assembly Replacement: 2 단계, 이미지 1/1
    • Insert the plastic opening tool in the crevice between the back of the laptop and the rest of the case.

    • Carefully pry open the case from several points.

    • Slowly remove the back of the laptop, revealing the parts inside.

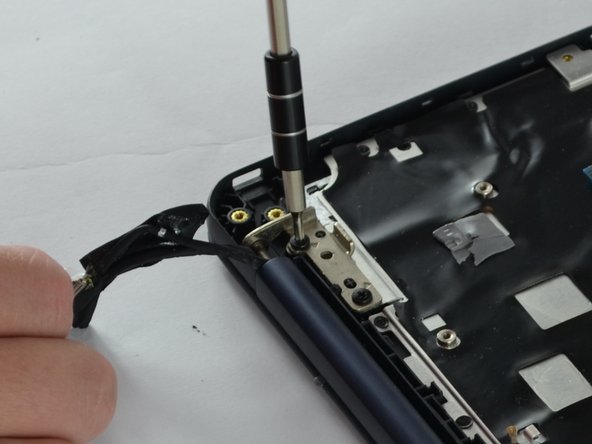
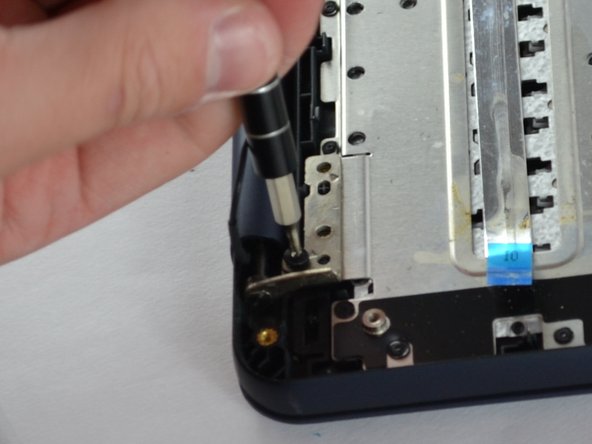
  3. Asus EeeBook X205TA Screen Assembly Replacement: 3 단계, 이미지 1/3 Asus EeeBook X205TA Screen Assembly Replacement: 3 단계, 이미지 2/3 Asus EeeBook X205TA Screen Assembly Replacement: 3 단계, 이미지 3/3
    • Unscrew the four screws using Philips #2 screwdriver that connect the screen to the inside of the case for the laptop.

  4. Asus EeeBook X205TA Screen Assembly Replacement: 4 단계, 이미지 1/1
    • Unplug the No-Fuss Ribbon connector of the screen from the motherboard.

    • Carefully lift the screen away from the case.

결론

To reassemble your device, follow these instructions in reverse order.

다른 3명이 해당 안내서를 완성하였습니다.

Lorena Santiago

회원 가입일: 10/06/16

712 평판

안내서 4개 작성하였습니다

USF Tampa, Team 2-2, Sullivan Fall 2016 USF Tampa, Team 2-2, Sullivan Fall 2016 회원

USFT-SULLIVAN-F16S2G2

3 회원들

안내서 10개 작성하였습니다

댓글 한 개

What's that small black screen hanging out from the laptop

Tayler Grant - 답글

댓글 쓰기

조회 통계:

24 시간 전: 0

7일 전: 4

30일 전: 19

전체 시간: 2,376