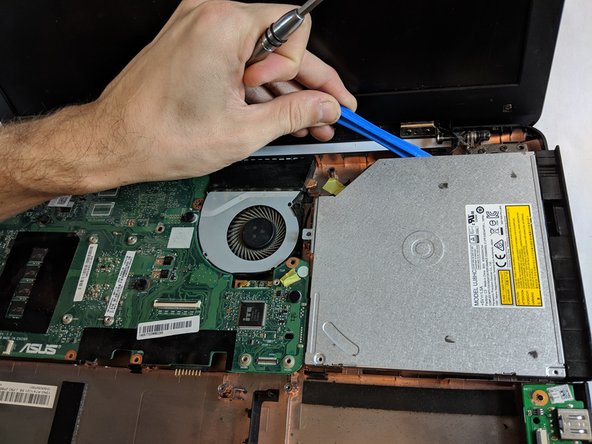
주요 콘텐츠로 건너뛰기

Asus F554LA-WS52 Disc Drive

필요한 것

  1. Asus F554LA-WS52 Disc Drive, Disc Drive: 1 단계, 이미지 1/2 Asus F554LA-WS52 Disc Drive, Disc Drive: 1 단계, 이미지 2/2
    • Make sure the notebook is off and has been unplugged from any power source.

    • Flip the notebook over and remove the 10 screws from the back plate with a #0 Phillips head screwdriver.

    • Six (6) will be 9.6mm and four (4) will be 12.7mm.

  2. Asus F554LA-WS52 Disc Drive: 2 단계, 이미지 1/3 Asus F554LA-WS52 Disc Drive: 2 단계, 이미지 2/3 Asus F554LA-WS52 Disc Drive: 2 단계, 이미지 3/3
    • With a plastic opening tool, gently lift and remove the back cover to expose the internal components.

    • (Not pictured) Remove the three cables attached to the keyboard and one touch-pad.

  3. Asus F554LA-WS52 Disc Drive: 3 단계, 이미지 1/2 Asus F554LA-WS52 Disc Drive: 3 단계, 이미지 2/2
    • Unscrew the three 5.7 mm hard drive-motherboard connection screws with a #0 Phillips head screwdriver.

    • Remove the small rectangular hard drive-motherboard connection board.

    • (Not pictured) Remove the hard drive.

  4. Asus F554LA-WS52 Disc Drive: 4 단계, 이미지 1/2 Asus F554LA-WS52 Disc Drive: 4 단계, 이미지 2/2
    • Unscrew the four 5.7 mm battery screws with a #0 Phillips head screwdriver.

    • Remove the battery.

  5. Asus F554LA-WS52 Disc Drive: 5 단계, 이미지 1/3 Asus F554LA-WS52 Disc Drive: 5 단계, 이미지 2/3 Asus F554LA-WS52 Disc Drive: 5 단계, 이미지 3/3
    • Unscrew the two 2.7 mm and one 5.7 mm CD drive screws with the Phillips #00 screwdriver.

    • With the plastic opening tool, gently pry the drive out from the metal brackets that hold it in place.

결론

To reassemble your device, follow these instructions in reverse order.

다른 2명이 해당 안내서를 완성하였습니다.

Aaron Ratliff

회원 가입일: 10/09/18

527 평판

안내서 4개 작성하였습니다

USF Tampa, Team S1-G2, Leahy Fall 2018 USF Tampa, Team S1-G2, Leahy Fall 2018 회원

USFT-LEAHY-F18S1G2

4 회원들

안내서 6개 작성하였습니다

댓글 0개

댓글 쓰기

조회 통계:

24 시간 전: 0

7일 전: 0

30일 전: 0

전체 시간: 549