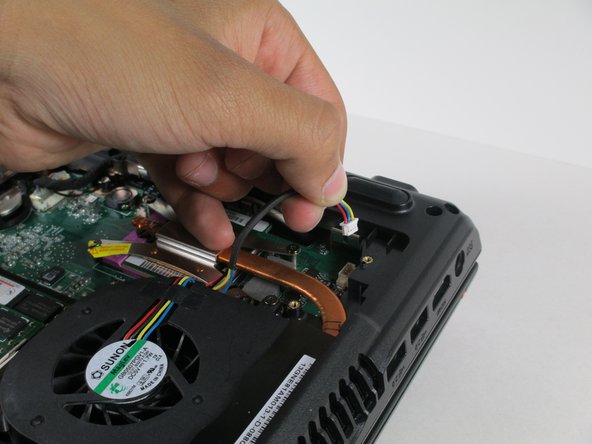
주요 콘텐츠로 건너뛰기

Asus F6A-X2 Fan Replacement

필요한 것

  1. Asus F6A-X2 Fan Replacement, Battery: 1 단계, 이미지 1/1
    • Remove any power cords and turn the laptop off. Attempting to replace part of the laptop while power is running through it may cause electrocution or damage to the device.

    • Flip laptop face down and rotate so the battery is facing toward you.

    • The battery is not shown in this picture.

    • To remove the battery, place one finger on each of the two black slide tabs. Push each tab toward the center of the laptop to release the lock.

    • Slide the battery toward you and lift it out of the laptop.

  2. Asus F6A-X2 Fan Replacement, Back Access Panel: 2 단계, 이미지 1/2 Asus F6A-X2 Fan Replacement, Back Access Panel: 2 단계, 이미지 2/2
    • With the laptop facing down, rotate it so the battery pack is facing away from you.

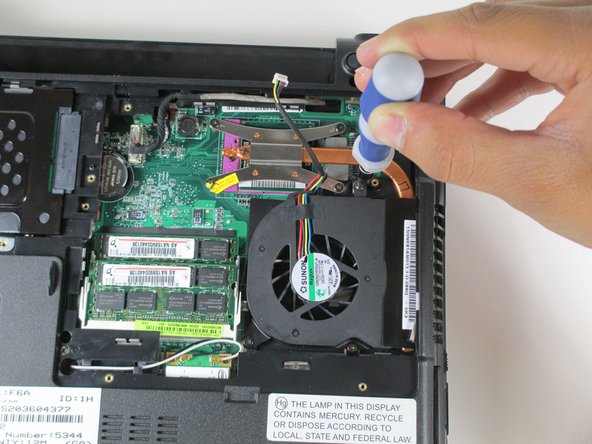
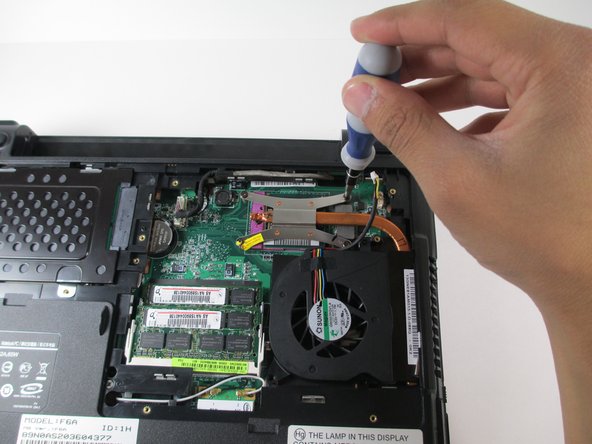
    • Remove the six 1.5 mm Phillips #1 screws on the back panel of the laptop.

  3. Asus F6A-X2 Fan Replacement: 3 단계, 이미지 1/3 Asus F6A-X2 Fan Replacement: 3 단계, 이미지 2/3 Asus F6A-X2 Fan Replacement: 3 단계, 이미지 3/3
    • Insert a finger into one of the slots on the bottom panel.

    • Gently lift the upwards, and the back panel of the laptop will come off easily.

  4. Asus F6A-X2 Fan Replacement, Fan: 4 단계, 이미지 1/2 Asus F6A-X2 Fan Replacement, Fan: 4 단계, 이미지 2/2
    • Remove the three 2.0mm Phillips #1 screws that secure the metal guard.

    • With the screws removed, simply lift the metal guard out of the laptop to remove it.

  5. Asus F6A-X2 Fan Replacement: 5 단계, 이미지 1/2 Asus F6A-X2 Fan Replacement: 5 단계, 이미지 2/2
    • Disconnect the fan from the motherboard by pulling the black cord straight up.

  6. Asus F6A-X2 Fan Replacement: 6 단계, 이미지 1/2 Asus F6A-X2 Fan Replacement: 6 단계, 이미지 2/2
    • Remove the 1.5mm Phillips #1 screws attaching the fan to the motherboard.

  7. Asus F6A-X2 Fan Replacement: 7 단계, 이미지 1/1
    • Using the flat end of a spudger, gently pry upwards on the adhesive attaching the fan to the side of the laptop.

    • When removing the adhesive, be sure not to remove it completely. You will need to keep the end of it on so you can attach it to your replacement fan.

  8. Asus F6A-X2 Fan Replacement: 8 단계, 이미지 1/2 Asus F6A-X2 Fan Replacement: 8 단계, 이미지 2/2
    • Remove the four 1.25 mm Phillips #1 screw that secure the heat sink in place.

  9. Asus F6A-X2 Fan Replacement: 9 단계, 이미지 1/1
    • With one hand holding the heat sink, and the other hand holding the fan, pull upwards with moderate force to remove the compents from the laptop.

    • The heat sink can offer a lot of resistance to movement. If it proves too difficult to pull off with your fingers, use the flat end of a spudger to pry it off the CPU.

  10. Asus F6A-X2 Fan Replacement: 10 단계, 이미지 1/2 Asus F6A-X2 Fan Replacement: 10 단계, 이미지 2/2
    • Flip the fan and heat sink over so the metal end of the fan is facing upwards, and lay it flat.

    • Using the flat end of a spudger, gently pry off the adhesive attaching the fan to the plastic.

    • With the adhesive off, simply pull the fan away from the plastic to remove it.

결론

To reassemble your device, follow these instructions in reverse order.

Jonathan

회원 가입일: 04/24/14

1,174 평판

안내서 11개 작성하였습니다

Cal Poly, Team 10-56, Amido Spring 2014 Cal Poly, Team 10-56, Amido Spring 2014 회원

CPSU-AMIDO-S14S10G56

4 회원들

안내서 12개 작성하였습니다

댓글 0개

댓글 쓰기

조회 통계:

24 시간 전: 0

7일 전: 1

30일 전: 1

전체 시간: 755