소개
Replacing the hard drive on this device is quite easy as all of the components are accessible by removing a single cover.
필요한 것
-
-
First, turn off your laptop, then disconnect the power supply. Unplug any peripheral devices connected to your laptop.
-
Next, remove the battery from the laptop.
-
-
-
Next, remove the 4 Phillips screws from the service door cover (circled in red).
-
-
-
-
Remove the 4 screws circled in red in the photo.
-
Once the screws are removed, slide the hard drive to the right, with the help of the tab.
-
-
-
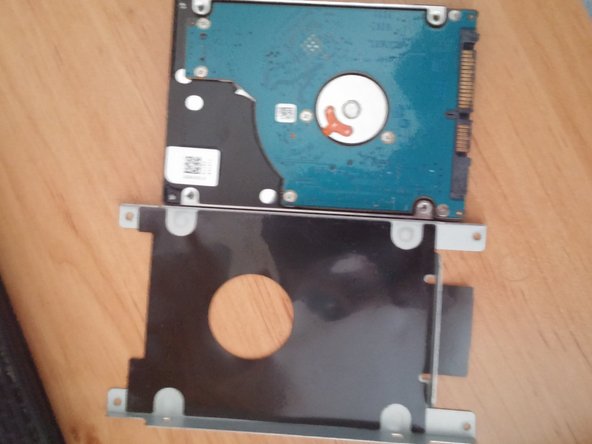
Remove the 4 screws located on the side of the support.
-
Then, remove the hard drive form its metallic support.
-
Finally, replace de hard drive with a new one or an SSD.
-


To reassemble your device, follow these steps in reverse order.
To reassemble your device, follow these steps in reverse order.
다른 2명이 해당 안내서를 완성하였습니다.
다음 번역가들에게 특별히 감사 드립니다:
100%


이 번역자 분들은 저희가 세상을 수리하는데 동참해 주시는 분입니다! 기여하시겠습니까?
번역 시작하기 ›

댓글 3개
why do you do this?
You can do this to replace a faulty hard-drive or replace it by a SSD to get better performance. So I did this to replace mine by a new one and I wrote this guide for other people who search how to do it. As you can see, very easy to do.
Brendan -
Amazing tutorial, thanks :)