필요한 것
-
-
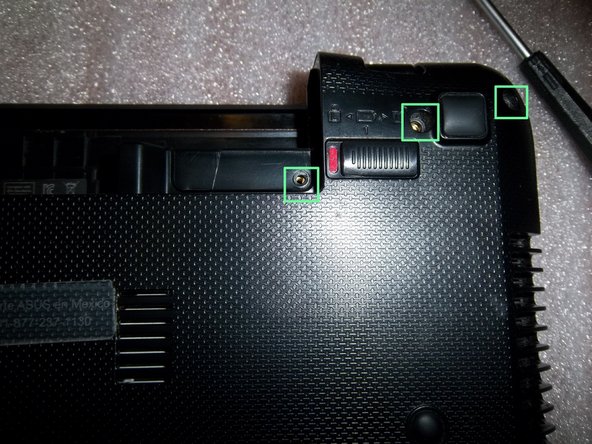
Start by removing the battery and 2 Ph0 screws indicated here, then slide the cover to access hard drive, RAM modules and Wi-Fi card.
-
-
-
-
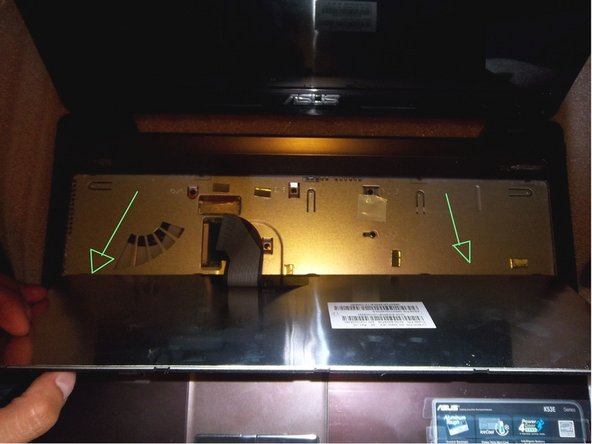
Take a small flat screwdriver and displace the 5 tabs holding the keyboard one by one. Start on the right end and push the tabs in towards the screen as you lift the keyboard up.
-
Lift the keyboard being careful with the flex cable.
-
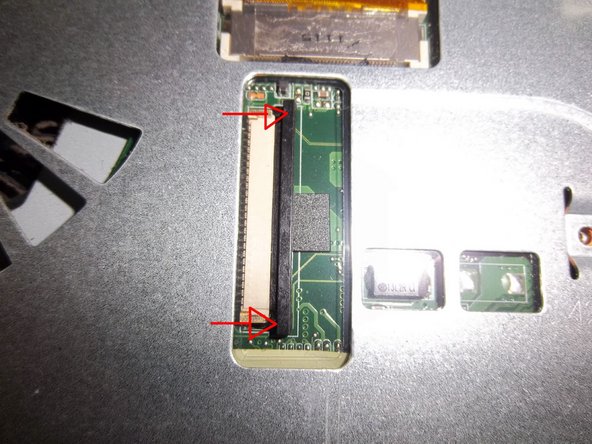
Release the keyboard ribbon from the motherboard by carefully sliding the black plastic part of the connector to the right.
-
-
-
Remove every screw from this metal surface behind the keyboard.
-
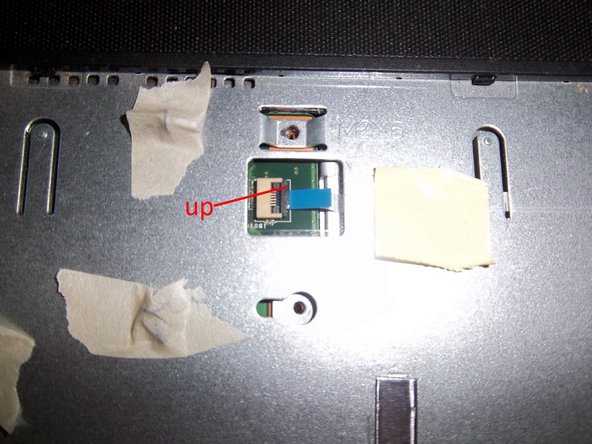
You'll find the mousepad connector hidden by an isolating tape. Lift up the black part of the connector to remove the ribbon.
-
You'll also find the power button flex cable hidden by a tape. Lifting the black part of the connector will also allow you to remove this cable.
-
-
-
Remove the microphone and earphone flex ribbon by lifting the black piece of the connector upwards.
-
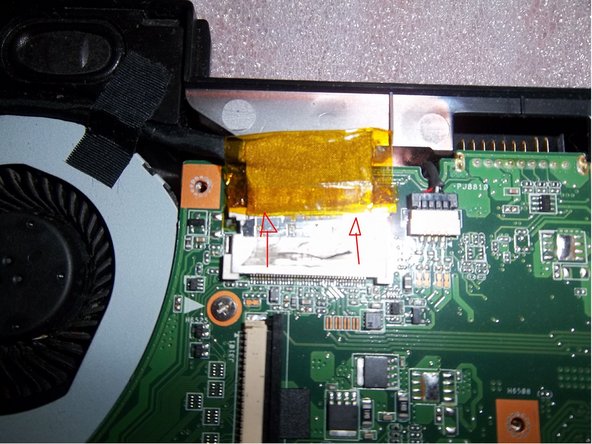
To remove the display flex cable, there's a clear tape you'll have to clear away first (but do not disturb the yellow tape) then carefully displace the connector by pushing back against the two white lips of the cable to remove.
-
Disconnect the speaker connector in the same way.
-


To reassemble your device, follow these instructions in reverse order.
To reassemble your device, follow these instructions in reverse order.
다른 26명이 해당 안내서를 완성하였습니다.
댓글 7개
Awesome guide! my Asus K53E's power jack was damages and this guide made getting to the mother board to replace the part fairly east. In step 9 don't forget to check the entire back cover for screws before taking off the top cover, they arent all shown in the guide and there are a lot of them, if the case isnt coming away fairly easily you probably missed a screw so double check!
Ok. I'm glad it worked for you. In my case, I fixed a noise in the headphone's output, caused by the flex cable connecting to the motherboard.
The power jack replacement I tried was useless because the solder was to difficult to remove and was nothing easy at all like tutorial videos on YouTube show! and I ended up breaking the Power jack area on the motherboard.
Shawn LH; I got the exact same problem! The power jack is soldered with alot of silver I guess, cause it needed a very high temp. 450C was just enough, and the extreme small space did not help much.. I replaced the jack but the DC jack area on the motherboard had suffered alot of heat, so it did not connect anymore. Now ASUS can't support me and they refuse to send me a new motherboard.. have anyone tried bying boards on ebay?
Great guide BTW! Very detailed information ^^
Thomas -