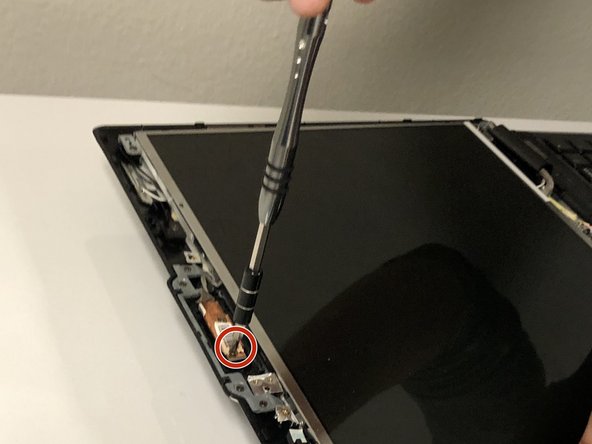
주요 콘텐츠로 건너뛰기

Asus M51E-B2 Swivel Camera Replacement

필요한 것

  1. Asus M51E-B2  Swivel Camera Replacement, Swivel Camera: 1 단계, 이미지 1/1
    • Open the laptop.

    • Press and hold the power button until the laptop powers off.

  2. Asus M51E-B2  Swivel Camera Replacement: 2 단계, 이미지 1/2 Asus M51E-B2  Swivel Camera Replacement: 2 단계, 이미지 2/2
    • Use a metal spudger prying tool to remove the outer screen cover of the laptop.

    • Gently work your way clockwise around the outer part of the screen.

  3. Asus M51E-B2  Swivel Camera Replacement: 3 단계, 이미지 1/2 Asus M51E-B2  Swivel Camera Replacement: 3 단계, 이미지 2/2
    • Use the Phillips PH0 head screwdriver to remove the two 2.5 mm screws located on the left side of the camera.

    • Use the Phillips PH0 head screwdriver to remove the one 2.5 millimeter screw that goes through the left side of the camera.

  4. Asus M51E-B2  Swivel Camera Replacement: 4 단계, 이미지 1/1
    • Find the wiring harness on the right side of the camera.

    • Using your fingers, gently remove the wiring harness connected to the right side of the camera.

결론

To reassemble your device, follow these instructions in reverse order.

Juston Brown

회원 가입일: 09/21/18

383 평판

안내서 3개 작성하였습니다

댓글 0개

댓글 쓰기

조회 통계:

24 시간 전: 1

7일 전: 2

30일 전: 17

전체 시간: 285