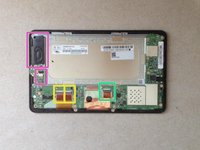
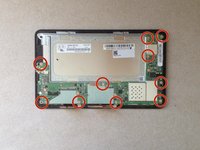
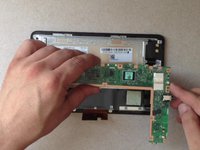
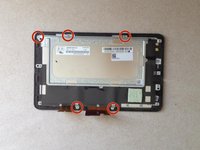
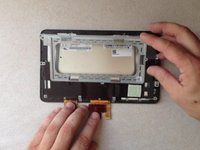
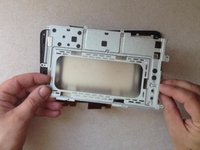
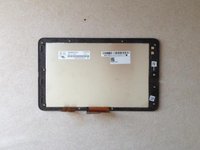
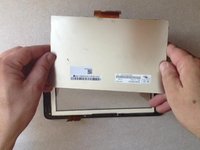
주요 콘텐츠로 건너뛰기

Asus Memo Pad ME172V - LCD Display Replacement

필요한 것

동영상 개요

  1. Asus Memo Pad ME172V - LCD Display Replacement, LCD Display: 1 단계, 이미지 1/3 Asus Memo Pad ME172V - LCD Display Replacement, LCD Display: 1 단계, 이미지 2/3 Asus Memo Pad ME172V - LCD Display Replacement, LCD Display: 1 단계, 이미지 3/3
    • Open the back/battery cover.

  2. Asus Memo Pad ME172V - LCD Display Replacement: 2 단계, 이미지 1/3 Asus Memo Pad ME172V - LCD Display Replacement: 2 단계, 이미지 2/3 Asus Memo Pad ME172V - LCD Display Replacement: 2 단계, 이미지 3/3
    • Disconnect and remove the battery.

  3. Asus Memo Pad ME172V - LCD Display Replacement: 3 단계, 이미지 1/3 Asus Memo Pad ME172V - LCD Display Replacement: 3 단계, 이미지 2/3 Asus Memo Pad ME172V - LCD Display Replacement: 3 단계, 이미지 3/3
    • Disconnect the LCD display flex cable.

    • Disconnect the touch screen flex cable.

    • Disconnect and remove the loudspeaker.

    • Unscrew 10x screws and remove the mother board.

  4. Asus Memo Pad ME172V - LCD Display Replacement: 4 단계, 이미지 1/3 Asus Memo Pad ME172V - LCD Display Replacement: 4 단계, 이미지 2/3 Asus Memo Pad ME172V - LCD Display Replacement: 4 단계, 이미지 3/3
    • Remove the LCD display metal shield.

  5. Asus Memo Pad ME172V - LCD Display Replacement: 5 단계, 이미지 1/3 Asus Memo Pad ME172V - LCD Display Replacement: 5 단계, 이미지 2/3 Asus Memo Pad ME172V - LCD Display Replacement: 5 단계, 이미지 3/3
    • The LCD display is held from a metal frame, glued to the touch screen. By using cutter, start carefully open the frame to remove the LCD display.

    • .

    • Did you do it successfully?

    • .

    • Please SUBSCRIBE to my channel ツ

결론

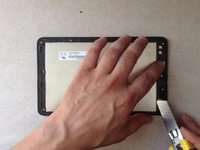
To reassemble your device, follow these instructions in reverse order.

다른 5명이 해당 안내서를 완성하였습니다.

ZFix

회원 가입일: 12/09/13

191,278 평판

안내서 330개 작성하였습니다

Master Techs Master Techs 회원

Community

322 회원들

안내서 2,526개 작성하였습니다

댓글 0개

댓글 쓰기

조회 통계:

24 시간 전: 0

7일 전: 0

30일 전: 15

전체 시간: 5,166