소개
This guide will show you how to remove the back camera of your Asus PadFone S. There are 3 moderate steps to this guide that require some precision and patience. This guide will make it easy to replace a broken or damaged back camera to get your phone working again. Some common tools are required for this replacement so make sure you have them before you start.
필요한 것
-
-
Place your thumb in the charging port and pry the back cover off of the phone.
-
Separate cover all the way around the sides of the phone.
-
-
-
-
Remove all the screws on the back panel using a T5 Torx screwdriver.
-
Lift the back panel off to reveal the logic board and battery.
-
-
-
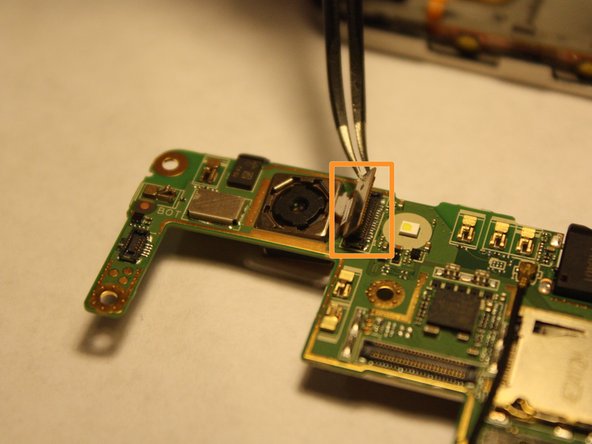
The back camera is located at the top left on the logic board.
-
Use tweezers to lift back camera strip from logic board.
-
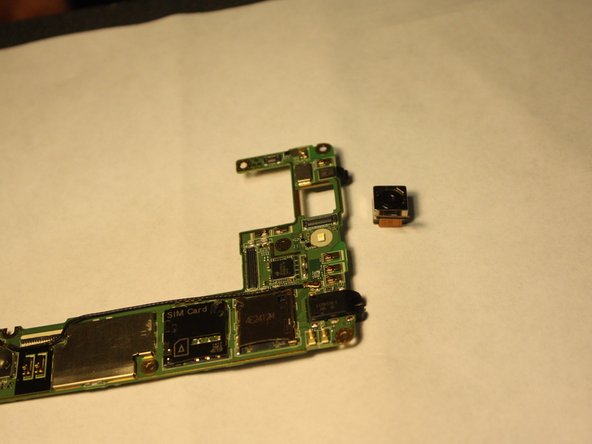
Lift back camera out of logic board.
-


To reassemble your device, follow these instructions in reverse order.
To reassemble your device, follow these instructions in reverse order.
다른 한 분이 해당 안내서를 완성하였습니다.
팀

UMass Dartmouth, Team 6-1, Vijaybhaskar Fall 2014 UMass Dartmouth, Team 6-1, Vijaybhaskar Fall 2014 회원
UMASSD-VIJAYBHASKAR-F14S6G1
3 회원들
안내서 10개 작성하였습니다