주요 콘텐츠로 건너뛰기

Asus Padfone X Mini Screen Replacement

필요한 것

  1. Asus Padfone X Mini Screen Replacement, Speaker: 1 단계, 이미지 1/1
    • With the phone facing down, look at the bottom right side corner and there should be a groove. Use a plastic opening tool and lift up to remove outside cover.

    • This is not the cover with the speaker attached.

  2. Asus Padfone X Mini Screen Replacement: 2 단계, 이미지 1/1
    • Lift the battery out from the top of the device.

  3. Asus Padfone X Mini Screen Replacement: 3 단계, 이미지 1/1
    • Around the perimeter, there should be 10 2 mm T5 Torx screws. Take them out.

    • Remove the cover.

  4. Asus Padfone X Mini Screen Replacement: 4 단계, 이미지 1/1
    • Turn the cover over.

    • The speaker is attached to the inside of the cover and to the right of the camera hole.

  5. Asus Padfone X Mini Screen Replacement: 5 단계, 이미지 1/1
    • Remove speaker with standard tweezers to minimize damage, and replace.

  6. Asus Padfone X Mini Screen Replacement, Screen: 6 단계, 이미지 1/1
    • Detach the black connector on the left hand side of the motherboard.

    • Don't completely remove the black connector.

  7. Asus Padfone X Mini Screen Replacement: 7 단계, 이미지 1/1
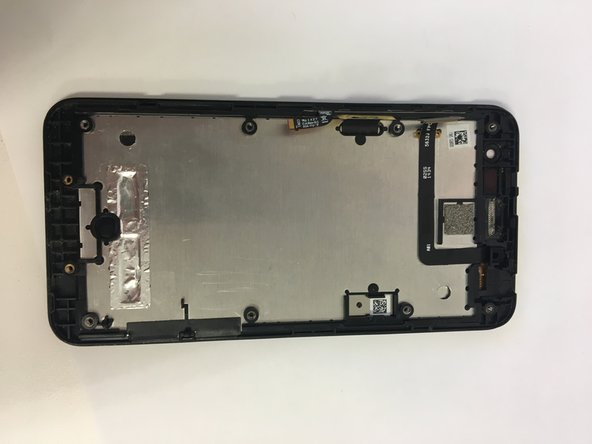
    • Disconnect silver connector from the motherboard. It is located on the left hand side above the black connector.

  8. Asus Padfone X Mini Screen Replacement: 8 단계, 이미지 1/2 Asus Padfone X Mini Screen Replacement: 8 단계, 이미지 2/2
    • Remove motherboard and replace screen.

결론

To reassemble your device, follow these instructions in reverse order.

Benjamin Trigg

회원 가입일: 09/18/18

97 평판

안내서 1개 작성함

University of North Texas, Team S4-G2, Raign Fall 2018 University of North Texas, Team S4-G2, Raign Fall 2018 회원

UNT-RAIGN-F18S4G2

4 회원들

안내서 8개 작성하였습니다

댓글 0개

댓글 쓰기

조회 통계:

24 시간 전: 0

7일 전: 1

30일 전: 3

전체 시간: 251