주요 콘텐츠로 건너뛰기

Asus Q551L Repair Motherboard Replacement

필요한 것

  1. Asus Q551L Repair Motherboard Replacement, Back Panel: 1 단계, 이미지 1/2 Asus Q551L Repair Motherboard Replacement, Back Panel: 1 단계, 이미지 2/2
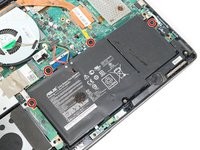
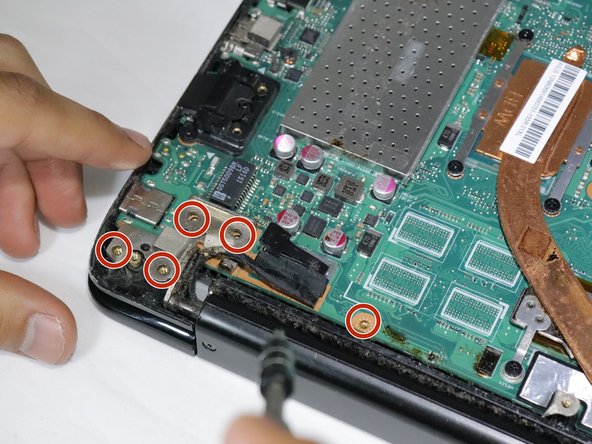
    • Unscrew the 10 screws around the edge of the back panel. Eight of the screws are 0.0793mm T5 , two of them are 0.0793 JIS #0.

  2. Asus Q551L Repair Motherboard Replacement: 2 단계, 이미지 1/1
    • Use the plastic opening tool to pry the back panel off the base of the laptop.

  3. Asus Q551L Repair Motherboard Replacement, Battery: 3 단계, 이미지 1/2 Asus Q551L Repair Motherboard Replacement, Battery: 3 단계, 이미지 2/2
    • Unscrew the four screws to remove the battery.

  4. Asus Q551L Repair Motherboard Replacement: 4 단계, 이미지 1/2 Asus Q551L Repair Motherboard Replacement: 4 단계, 이미지 2/2
    • Un-clip both wire clips on the upper and right side of the battery.

    • Lift the battery out of the device.

  5. Asus Q551L Repair Motherboard Replacement, Optical Drive: 5 단계, 이미지 1/3 Asus Q551L Repair Motherboard Replacement, Optical Drive: 5 단계, 이미지 2/3 Asus Q551L Repair Motherboard Replacement, Optical Drive: 5 단계, 이미지 3/3
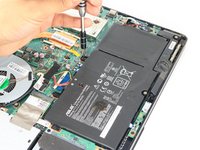
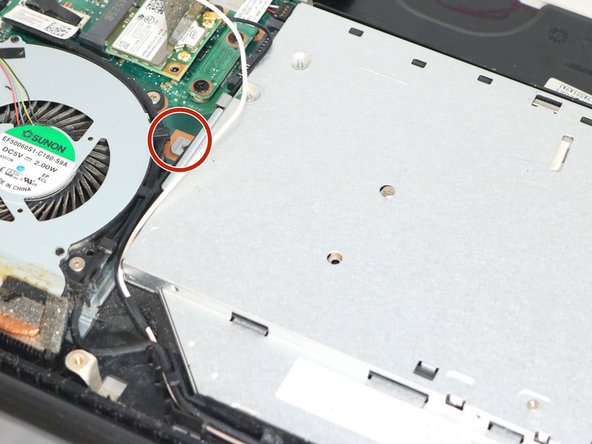
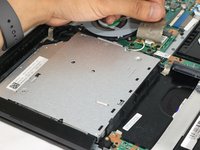
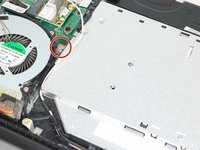
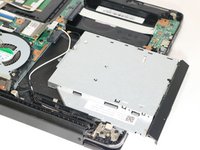
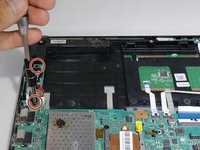
    • Lift up the sticker that sticks between the motherboard and the optical drive. Then, unscrew the one screw where it is marked and slide it out gently.

    • Watch out for the wires around the optical drive.

  6. Asus Q551L Repair Motherboard Replacement, Motherboard: 6 단계, 이미지 1/3 Asus Q551L Repair Motherboard Replacement, Motherboard: 6 단계, 이미지 2/3 Asus Q551L Repair Motherboard Replacement, Motherboard: 6 단계, 이미지 3/3
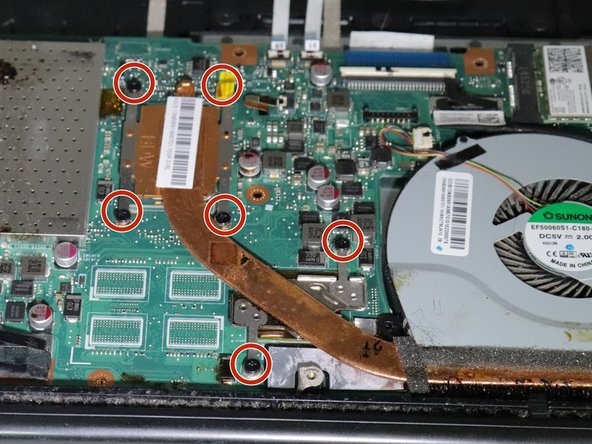
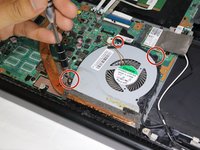
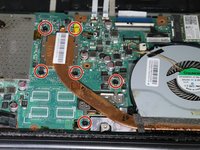
    • Remove the fan by unscrewing the nine screws shown in the images.

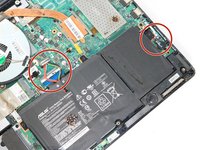
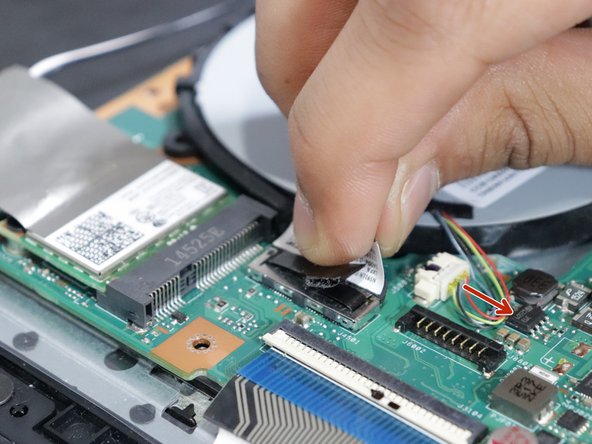
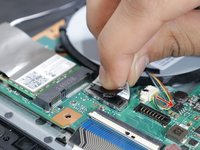
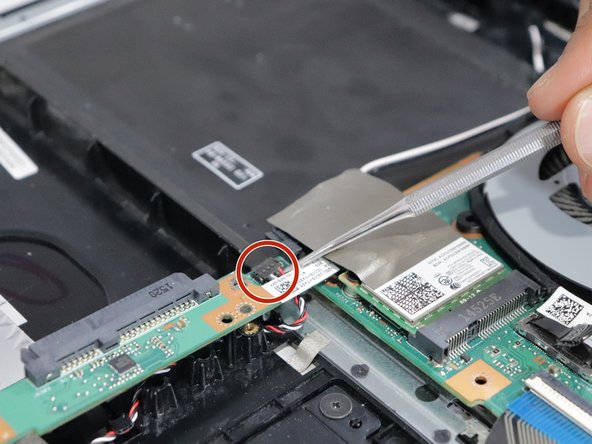
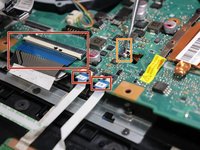
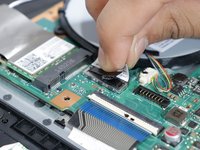
    • The four colored wire and the black cable need to be pulled out gently.

    • There will be wires around the fan. Make sure they are not stuck to it.

    • You want to keep the fan if it still in good conditions.

  7. Asus Q551L Repair Motherboard Replacement: 7 단계, 이미지 1/2 Asus Q551L Repair Motherboard Replacement: 7 단계, 이미지 2/2
    • Unscrew the seven screws Phillips Head 0.0793 MM on the edges of the motherboard.

  8. Asus Q551L Repair Motherboard Replacement: 8 단계, 이미지 1/3 Asus Q551L Repair Motherboard Replacement: 8 단계, 이미지 2/3 Asus Q551L Repair Motherboard Replacement: 8 단계, 이미지 3/3
    • Disconnect any cables that hold the motherboard.

    • Open up the white adjustable latch first to pull out the tapes.

결론

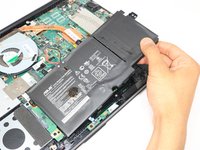
To reassemble your device, follow these instructions in reverse order.

다른 2명이 해당 안내서를 완성하였습니다.

Baker

회원 가입일: 01/17/18

300 평판

안내서 1개 작성함

댓글 한 개

Thanks for posting this guide. Helped me to fix this model computer for a friend. Very well done!

Robert Valentino - 답글

댓글 쓰기

조회 통계:

24 시간 전: 0

7일 전: 0

30일 전: 3

전체 시간: 2,356