주요 콘텐츠로 건너뛰기

Asus ROG G55VW-DH71 Sound Bar Replacement

필요한 것

  1. Asus ROG G55VW-DH71 Sound Bar  Replacement, Sound Bar: 1 단계, 이미지 1/2 Asus ROG G55VW-DH71 Sound Bar  Replacement, Sound Bar: 1 단계, 이미지 2/2
    • Side the switch and lift the battery from the back of the device.

  2. Asus ROG G55VW-DH71 Sound Bar  Replacement: 2 단계, 이미지 1/2 Asus ROG G55VW-DH71 Sound Bar  Replacement: 2 단계, 이미지 2/2
    • Using the PH0 screw driver remove both 4.4 mm screws.

    • Using the PH0 screw driver remove the 6.4 mm screw.

  3. Asus ROG G55VW-DH71 Sound Bar  Replacement: 3 단계, 이미지 1/2 Asus ROG G55VW-DH71 Sound Bar  Replacement: 3 단계, 이미지 2/2
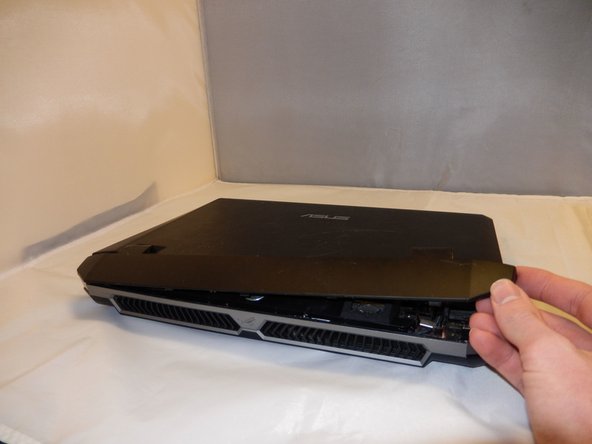
    • Using the iFixit opening tool, gently pry open the plate covering the spine of the device.

  4. Asus ROG G55VW-DH71 Sound Bar  Replacement: 4 단계, 이미지 1/1
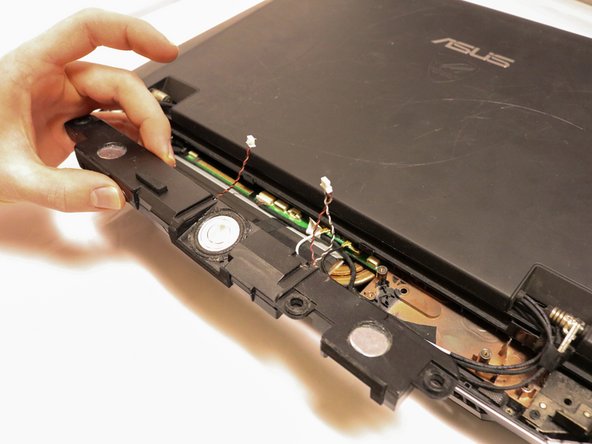
    • Using the PH 00 screwdriver, remove the three 10.6 mm screws holding the sound bar down.

  5. Asus ROG G55VW-DH71 Sound Bar  Replacement: 5 단계, 이미지 1/2 Asus ROG G55VW-DH71 Sound Bar  Replacement: 5 단계, 이미지 2/2
    • Using the bent black tweezers, remove both wires connecting the sound bar to the motherboard.

결론

To reassemble your device, follow these instructions in reverse order.

Savanna Stockman

회원 가입일: 01/16/19

641 평판

안내서 5개 작성하였습니다

댓글 한 개

Excellent tutorial. Thank you for your help.Excellent tutorial. Thank you for your help. I lost the back cover of my g55. I couldn't find a spare part here in Brazil.

Welington Faria - 답글

댓글 쓰기

조회 통계:

24 시간 전: 0

7일 전: 3

30일 전: 6

전체 시간: 291