주요 콘텐츠로 건너뛰기

Asus ROG G750JH-DB71 Hard Drive Replacement

필요한 것

  1. Asus ROG G750JH-DB71 Hard Drive Replacement, Battery: 1 단계, 이미지 1/2 Asus ROG G750JH-DB71 Hard Drive Replacement, Battery: 1 단계, 이미지 2/2
    • Ensure the laptop is powered off and unplugged before beginning.

    • Flip the laptop over so the bottom case is facing up.

  2. Asus ROG G750JH-DB71 Hard Drive Replacement: 2 단계, 이미지 1/3 Asus ROG G750JH-DB71 Hard Drive Replacement: 2 단계, 이미지 2/3 Asus ROG G750JH-DB71 Hard Drive Replacement: 2 단계, 이미지 3/3
    • Push the switch near the front of the laptop to release the battery from the computer.

    • Pull the battery out and away from the center of the computer.

  3. Asus ROG G750JH-DB71 Hard Drive Replacement, Hard Drive: 3 단계, 이미지 1/3 Asus ROG G750JH-DB71 Hard Drive Replacement, Hard Drive: 3 단계, 이미지 2/3 Asus ROG G750JH-DB71 Hard Drive Replacement, Hard Drive: 3 단계, 이미지 3/3
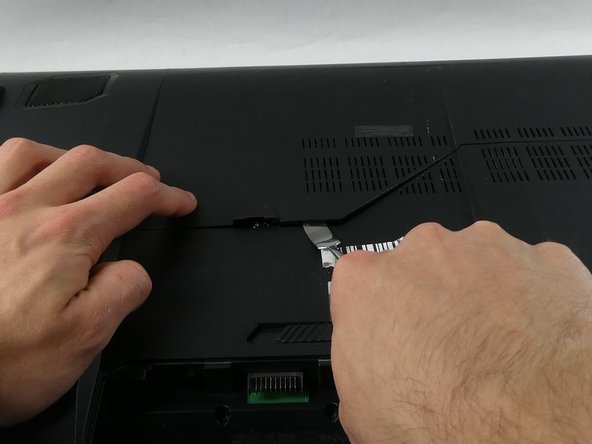
    • Use a pick or your finger to lift up the plastic cover on back of the laptop.

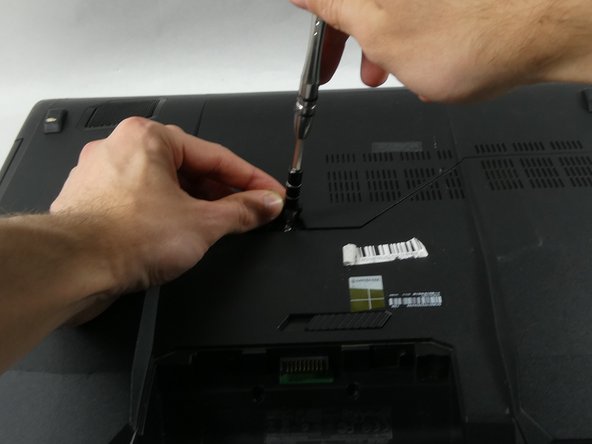
    • Under the plastic cover is a screw, unscrew it using a Phillips #00 screwdriver.

    • The screw has a c lock so it can not be unscrewed completely. Once Its loose pry on the seam using a screwdriver or the iFixit pry tool.

  4. Asus ROG G750JH-DB71 Hard Drive Replacement: 4 단계, 이미지 1/3 Asus ROG G750JH-DB71 Hard Drive Replacement: 4 단계, 이미지 2/3 Asus ROG G750JH-DB71 Hard Drive Replacement: 4 단계, 이미지 3/3
    • Remove the cover.

    • Remove the four 4.0 mm Phillips #00 screws holding in the hard drive caddy.

    • Push the caddy towards the open space in its compartment to remove it.

결론

To reassemble your device, follow these instructions in reverse order.

Devin Medeiros

회원 가입일: 10/25/22

219 평판

안내서 2개 작성하였습니다

UMass Dartmouth, Team 5-5, Sinclaire Fall 2022 UMass Dartmouth, Team 5-5, Sinclaire Fall 2022 회원

UMASSD-SINCLAIRE-F22S5G5

4 회원들

안내서 6개 작성하였습니다

댓글 0개

댓글 쓰기

조회 통계:

24 시간 전: 0

7일 전: 2

30일 전: 18

전체 시간: 148