주요 콘텐츠로 건너뛰기

Asus ROG G751JL-DS71 Hard Drive Replacement

필요한 것

  1. Asus ROG G751JL-DS71 Hard Drive Replacement, Hard Drive: 1 단계, 이미지 1/2 Asus ROG G751JL-DS71 Hard Drive Replacement, Hard Drive: 1 단계, 이미지 2/2
    • Lift the rubber cover found on the bottom of the laptop.

    • Remove the 5.2 mm screw with a Phillips 1 Screwdriver.

  2. Asus ROG G751JL-DS71 Hard Drive Replacement: 2 단계, 이미지 1/3 Asus ROG G751JL-DS71 Hard Drive Replacement: 2 단계, 이미지 2/3 Asus ROG G751JL-DS71 Hard Drive Replacement: 2 단계, 이미지 3/3
    • Use the black nylon spudger to pry the back panel off the laptop.

  3. Asus ROG G751JL-DS71 Hard Drive Replacement: 3 단계, 이미지 1/3 Asus ROG G751JL-DS71 Hard Drive Replacement: 3 단계, 이미지 2/3 Asus ROG G751JL-DS71 Hard Drive Replacement: 3 단계, 이미지 3/3
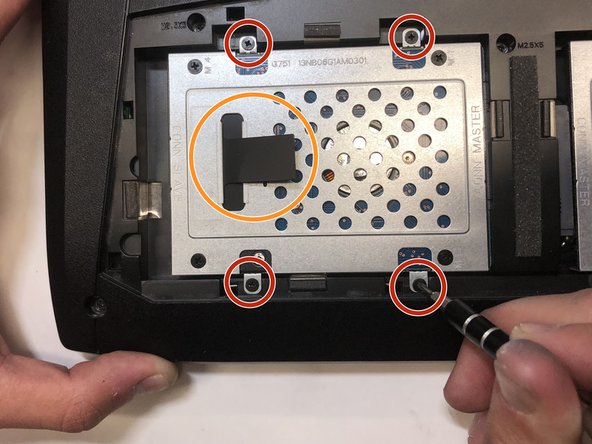
    • Use a Phillips 1 Screwdriver to remove the four 2.4 mm screws securing the hard drive.

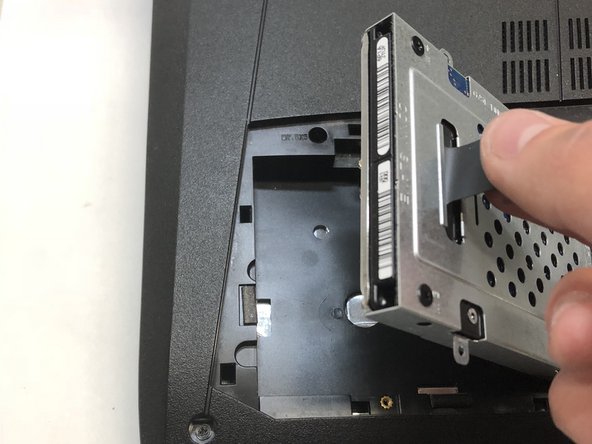
    • Use the black pull-tab located on the shell covering the hard drive, to lift the hard drive housing and pull the hard drive away from the connector.

    • To access the hard drive on the right side of the laptop, perform the same steps, but on hard drive casing to the right of the previous hard drive.

결론

To reassemble your device, follow these instructions in reverse order.

다른 2명이 해당 안내서를 완성하였습니다.

Vincent Guarino

회원 가입일: 01/22/18

190 평판

안내서 1개 작성함

Cal Poly, Team S16-G1, Banghart Winter 2018 Cal Poly, Team S16-G1, Banghart Winter 2018 회원

CPSU-BANGHART-W18S16G1

4 회원들

안내서 22개 작성하였습니다

댓글 0개

댓글 쓰기

조회 통계:

24 시간 전: 1

7일 전: 7

30일 전: 14

전체 시간: 516