이 버전에는 잘못된 편집 사항이 있을 수 있습니다. 최신 확인된 스냅샷으로 전환하십시오.
필요한 것
-
이 단계는 번역되지 않았습니다. 번역을 도와주십시오
-
Flip the laptop over to the back panel, with the serial numbers facing up.
-
Using a Phillips #1 screwdriver, remove the ten 12 mm screws from the back panel.
-
-
이 단계는 번역되지 않았습니다. 번역을 도와주십시오
-
Wedge the sharp edge of the plastic opening tool into the seam between the back panel and the rest of the laptop, then gently pry the panel up.
-
Continue breaking the seals by sliding the plastic opening tool around the entire laptop under the seam until the back panel is free.
-
Once you have broken all the seals, carefully lift the panel off.
-
-
-
이 단계는 번역되지 않았습니다. 번역을 도와주십시오
-
Unscrew the 3.8 mm Phillips #1 screw on the top right hand corner of the battery.
-
Lift battery from laptop frame.
-
-
이 단계는 번역되지 않았습니다. 번역을 도와주십시오
-
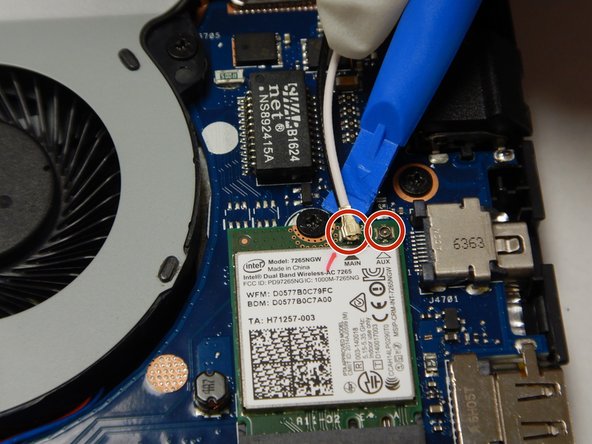
Using the iFixit Opening Tool, disconnect the black and white coaxial cables from the wifi card.
-
Using a Phillips #1 screwdriver, remove the 4mm retaining screw.
-
Gently slide the wifi card out from the connection slot.
-


