주요 콘텐츠로 건너뛰기

Asus Rog GL55VW-DH71 Screen Replacement

필요한 것

  1. Asus Rog GL55VW-DH71 Screen Replacement, Battery: 1 단계, 이미지 1/3 Asus Rog GL55VW-DH71 Screen Replacement, Battery: 1 단계, 이미지 2/3 Asus Rog GL55VW-DH71 Screen Replacement, Battery: 1 단계, 이미지 3/3
    • Flip the laptop over so the backside is facing upwards.

    • Using both hands, slide the lock mechanisms outwards and pull up to remove the battery.

  2. Asus Rog GL55VW-DH71 Screen Replacement, Keyboard: 2 단계, 이미지 1/3 Asus Rog GL55VW-DH71 Screen Replacement, Keyboard: 2 단계, 이미지 2/3 Asus Rog GL55VW-DH71 Screen Replacement, Keyboard: 2 단계, 이미지 3/3
    • Remove the nine 15.4mm Phillips #00 screws.

    • Remove the four 8.7mm Phillips #00 screws from the hard drive mounting bracket.

    • Remove the hard drive bracket.

  3. Asus Rog GL55VW-DH71 Screen Replacement: 3 단계, 이미지 1/2 Asus Rog GL55VW-DH71 Screen Replacement: 3 단계, 이미지 2/2
    • Flip laptop over and open the screen.

    • Wedge some plastic opening tools between the keyboard and case.

    • Work your way around with the plastic opening tools until the keyboard is separate from the case.

    • Do not try to lift the keyboard straight off at this time. There are some ribbon cables that attach the motherboard to the keyboard that need to be removed first.

  4. Asus Rog GL55VW-DH71 Screen Replacement: 4 단계, 이미지 1/3 Asus Rog GL55VW-DH71 Screen Replacement: 4 단계, 이미지 2/3 Asus Rog GL55VW-DH71 Screen Replacement: 4 단계, 이미지 3/3
    • Remove the ZIF connected ribbon cables for the touchpad and keyboard by gently lifting the latch on the connector point, then slide the ribbon cable out. Repeat for each cable.

    • Verify all ribbon cables are disconnected and out of the way, and lift the keyboard out of the assembly.

  5. Asus Rog GL55VW-DH71 Screen Replacement, Asus Rog GL55VW-DH71 Disassembly: 5 단계, 이미지 1/1
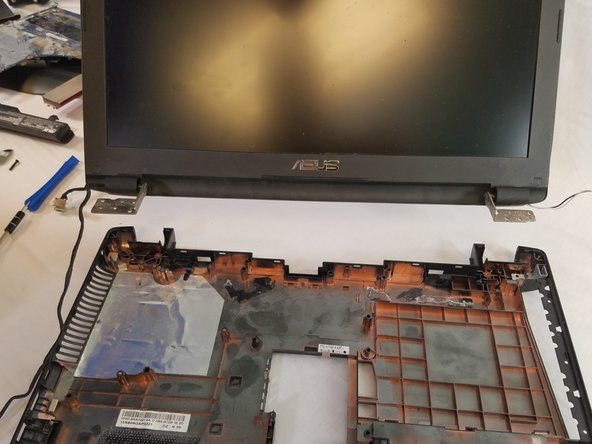
    • Remove the CD/DVD drive by sliding it out of the side of the laptop.

  6. Asus Rog GL55VW-DH71 Screen Replacement: 6 단계, 이미지 1/3 Asus Rog GL55VW-DH71 Screen Replacement: 6 단계, 이미지 2/3 Asus Rog GL55VW-DH71 Screen Replacement: 6 단계, 이미지 3/3
    • Remove the three 6.5mm Phillips #00 screws from the fan.

    • Disconnect the fan power cable from the motherboard.

    • Remove the fan.

  7. Asus Rog GL55VW-DH71 Screen Replacement: 7 단계, 이미지 1/3 Asus Rog GL55VW-DH71 Screen Replacement: 7 단계, 이미지 2/3 Asus Rog GL55VW-DH71 Screen Replacement: 7 단계, 이미지 3/3
    • Gently remove the ribbon cables and wireless chip. A plastic prying tool will help in this removal.

    • Remove the power cable for the motherboard.

    • Remove the power cable for the speaker.

  8. Asus Rog GL55VW-DH71 Screen Replacement: 8 단계, 이미지 1/1
    • Ensuring no missed connections or screws, remove the motherboard from the assembly.

  9. Asus Rog GL55VW-DH71 Screen Replacement, Screen: 9 단계, 이미지 1/2 Asus Rog GL55VW-DH71 Screen Replacement, Screen: 9 단계, 이미지 2/2
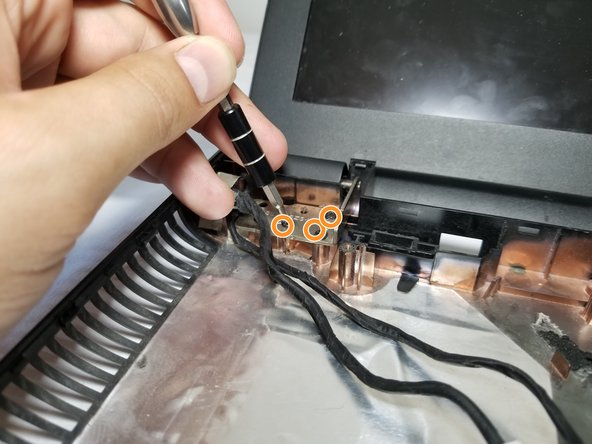
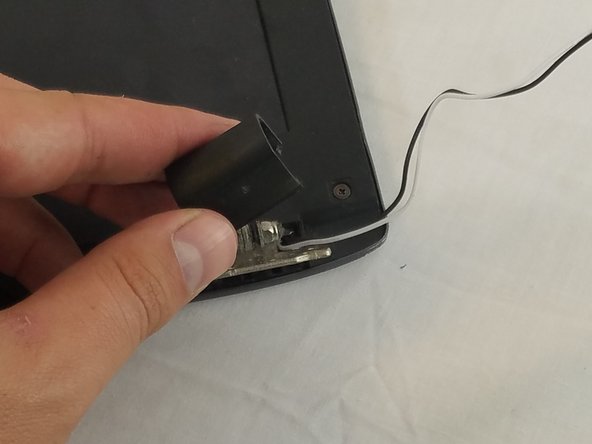
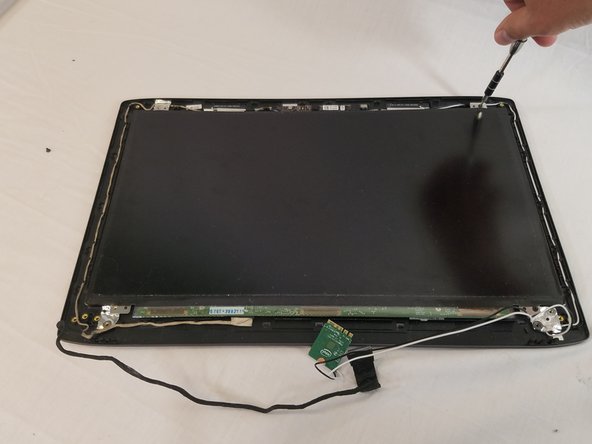
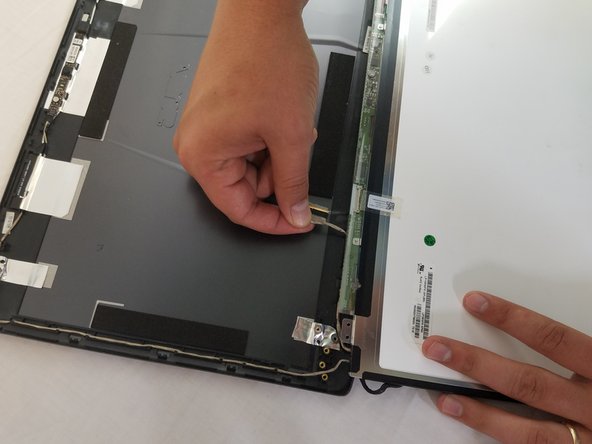
    • Using the Phillips Screwdriver #00, remove the 3 8.5mm screws to disconnect the right side hinge from the assembly.

    • Remove the 3 8.5mm screws to disconnect the left side hinge from the assembly.

  10. Asus Rog GL55VW-DH71 Screen Replacement: 10 단계, 이미지 1/2 Asus Rog GL55VW-DH71 Screen Replacement: 10 단계, 이미지 2/2
    • Remove the tape holding the power cable down and trace and remove the cables for the LCD from the assembly.

    • Set the assembly aside and all that should be left is the screen.

  11. Asus Rog GL55VW-DH71 Screen Replacement: 11 단계, 이미지 1/2 Asus Rog GL55VW-DH71 Screen Replacement: 11 단계, 이미지 2/2
    • Remove the black hinge covers on each side. They just pop on and off with some force.

  12. Asus Rog GL55VW-DH71 Screen Replacement: 12 단계, 이미지 1/2 Asus Rog GL55VW-DH71 Screen Replacement: 12 단계, 이미지 2/2
    • Using 2 plastic opening tools, remove the faceplate. Slide the tools under the side with the screen and the outside in the crevice.

    • You will feel the faceplate start to lift off with audible clicks.

    • Place the faceplate to the side.

  13. Asus Rog GL55VW-DH71 Screen Replacement: 13 단계, 이미지 1/3 Asus Rog GL55VW-DH71 Screen Replacement: 13 단계, 이미지 2/3 Asus Rog GL55VW-DH71 Screen Replacement: 13 단계, 이미지 3/3
    • Using the Phillips Screwdriver #00, remove the 4 3.4mm screws that hold the screen to the top plate.

    • Trace the wires through the holders and remove the LCD.

    • Replace with new screen.

결론

To reassemble your device, follow these instructions in reverse order.

다른 2명이 해당 안내서를 완성하였습니다.

Addison Thomas

회원 가입일: 02/14/18

1,232 평판

안내서 8개 작성하였습니다

USF Tampa, Team S1-G2, Nance Spring 2018 USF Tampa, Team S1-G2, Nance Spring 2018 회원

USFT-NANCE-S18S1G2

4 회원들

안내서 8개 작성하였습니다

댓글 0개

댓글 쓰기

조회 통계:

24 시간 전: 0

7일 전: 2

30일 전: 11

전체 시간: 3,478