소개
Is your Asus TF300T Android Tablet not charging or powering up? If this this the case your battery may need to be replaced. This replacement guide is intended for those who are experiencing battery related problems with their Asus TF300T Android Tablet. After trouble shooting the various problems this guide is a last resort to correct the issue.
필요한 것
-
-
Begin the process by making sure that the dock is disconnected and the power is turned off.
-
Start by using the plastic opening tool on the side opposite the dock/ charging port. Begin to open the device along the short sides of the tablet.
-
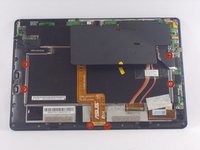
Once the opening tools have completely made their way around the device use the spudger to separate the back panel from the screen and expose the inside.
-
-
-
-
The Asus Transformer series tablets have a hard power switch. This should be turned off before working on the tablet.
-
Locate the power switch near the power button on the top left. Use a tool to slide it to the position marked 'off'
-
-
-
Using the Phillips #00 screwdriver remove all of the screws connecting the battery to the mother board.
-
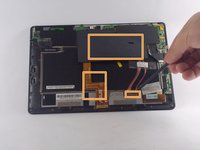
Once the initial screws have been removed as indicated by the photo, use the spudger to remove the cover concealing the the clips for the dock sensor and a few more screws.
-
Again remove the screws with the same screwdriver and use the spudger to disconnect the spudger sesors from their respective clips.
-
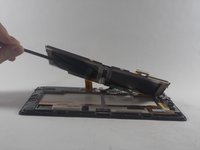
Once the battery is freed use the spudger to remove the battery from its spot
-


To reassemble your device, follow these instructions in reverse order.
다른 3명이 해당 안내서를 완성하였습니다.
팀

UMass Dartmouth, Team 2-6, Duarte Fall 2014 UMass Dartmouth, Team 2-6, Duarte Fall 2014 회원
UMASSD-DUARTE-F14S2G6
4 회원들
안내서 10개를 작성함
1가이드 댓글
Great instructions. The link to buy the battery is broken. I believe the part number is C21-TF201X. I found it on Amazon and Ebay.