주요 콘텐츠로 건너뛰기

Asus Transformer Flip Book TP200S IO Board Replacement

필요한 것

  1. Asus Transformer Flip Book TP200S IO Board Replacement, Battery: 1 단계, 이미지 1/2 Asus Transformer Flip Book TP200S IO Board Replacement, Battery: 1 단계, 이미지 2/2
    • Remove the back 6mm and 8mm screws with a J000 screwdriver.

  2. Asus Transformer Flip Book TP200S IO Board Replacement: 2 단계, 이미지 1/1
    • Remove the back cover of the flip book by gently using a metal spudger.

  3. Asus Transformer Flip Book TP200S IO Board Replacement: 3 단계, 이미지 1/1
    • Unscrew the battery from the motherboard using a J000 screwdriver on the 3mm screws.

  4. Asus Transformer Flip Book TP200S IO Board Replacement: 4 단계, 이미지 1/2 Asus Transformer Flip Book TP200S IO Board Replacement: 4 단계, 이미지 2/2
    • The battery comes attached to the motherboard and needs to be disconnected before you can remove it.

    • Disconnect the battery from the motherboard by gently pulling out the connection with tweezers.

    • Gently remove the Wifi cables hooked to the rim of the battery

    • Remove the battery

  5. Asus Transformer Flip Book TP200S IO Board Replacement, IO Board: 5 단계, 이미지 1/2 Asus Transformer Flip Book TP200S IO Board Replacement, IO Board: 5 단계, 이미지 2/2
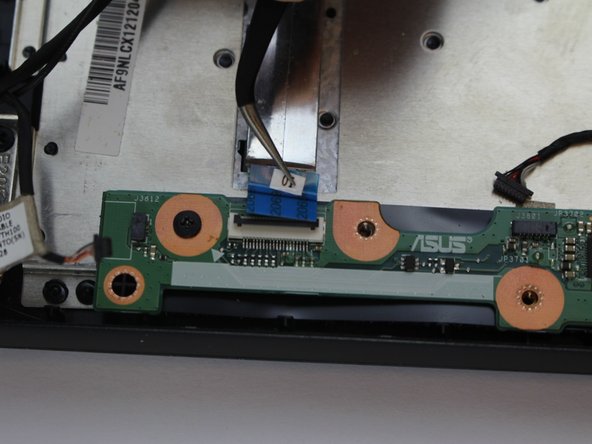
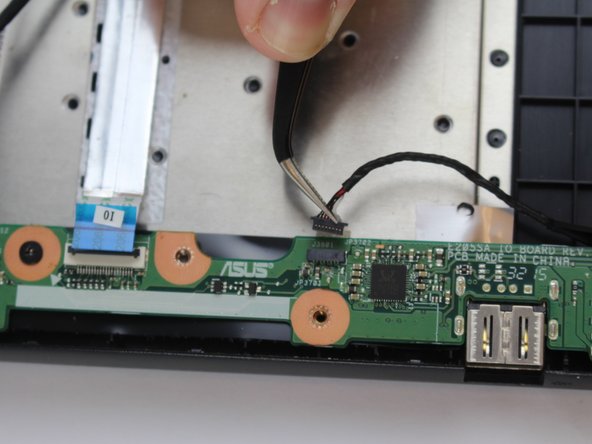
    • The IO Board will be the section of circuitry to the left. It's held down by a couple of 3mm and 6mm screws and some device connections.

    • Unscrew the 3mm and 6mm screws on the IO Board with a phillips head J000 screwdriver.

  6. Asus Transformer Flip Book TP200S IO Board Replacement: 6 단계, 이미지 1/3 Asus Transformer Flip Book TP200S IO Board Replacement: 6 단계, 이미지 2/3 Asus Transformer Flip Book TP200S IO Board Replacement: 6 단계, 이미지 3/3
    • After unscrewing, gently unplug all the connections to the IO Board with tweezers. We have highlighted where these connections are located in our images.

  7. Asus Transformer Flip Book TP200S IO Board Replacement: 7 단계, 이미지 1/2 Asus Transformer Flip Book TP200S IO Board Replacement: 7 단계, 이미지 2/2
    • Remove the final connections from the IO board with tweezers.

결론

To reassemble your device, follow these instructions in reverse order.

Alejandro Lopez

회원 가입일: 02/15/18

662 평판

안내서 5개 작성하였습니다

USF Tampa, Team S17-G2, Boczar Spring 2018 USF Tampa, Team S17-G2, Boczar Spring 2018 회원

USFT-BOCZAR-S18S17G2

3 회원들

안내서 6개 작성하였습니다

댓글 0개

댓글 쓰기

조회 통계:

24 시간 전: 2

7일 전: 3

30일 전: 8

전체 시간: 637