주요 콘텐츠로 건너뛰기

Asus Transformer Flip Book TP200S LCD Screen Replacement

필요한 것

  1. Asus Transformer Flip Book TP200S LCD Screen Replacement, Battery: 1 단계, 이미지 2개 중 1개 Asus Transformer Flip Book TP200S LCD Screen Replacement, Battery: 1 단계, 이미지 2개 중 2개
    • Remove the back 6mm and 8mm screws with a J000 screwdriver.

  2. Asus Transformer Flip Book TP200S LCD Screen Replacement: 2 단계, 이미지 1개 중 1개
    • Remove the back cover of the flip book by gently using a metal spudger.

  3. Asus Transformer Flip Book TP200S LCD Screen Replacement: 3 단계, 이미지 1개 중 1개
    • Unscrew the battery from the motherboard using a J000 screwdriver on the 3mm screws.

  4. Asus Transformer Flip Book TP200S LCD Screen Replacement: 4 단계, 이미지 2개 중 1개 Asus Transformer Flip Book TP200S LCD Screen Replacement: 4 단계, 이미지 2개 중 2개
    이 단계에 사용된 도구:
    Tweezers
    $4.99
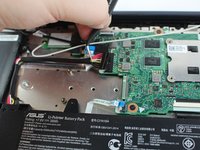
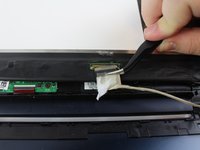
    • The battery comes attached to the motherboard and needs to be disconnected before you can remove it.

    • Disconnect the battery from the motherboard by gently pulling out the connection with tweezers.

    • Gently remove the Wifi cables hooked to the rim of the battery
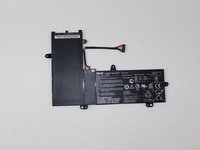
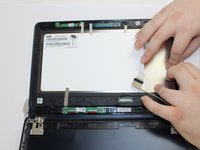
    • Remove the battery

  5. Asus Transformer Flip Book TP200S LCD Screen Replacement, LCD Screen: 5 단계, 이미지 2개 중 1개 Asus Transformer Flip Book TP200S LCD Screen Replacement, LCD Screen: 5 단계, 이미지 2개 중 2개
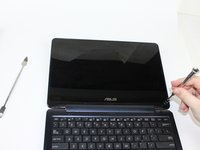
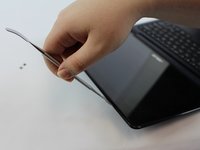
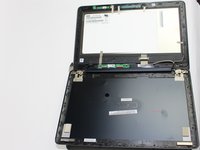
    • Open your flip book so that the screen faces towards you. You will notice 2 rubber pads at the base of the screen.

    • Using a metal spudger, lift the rubber pads off to find 2 screen 3mm screws. Unscrew these 3mm screw with a phillips head J000 screwdriver.

  6. Asus Transformer Flip Book TP200S LCD Screen Replacement: 6 단계, 이미지 2개 중 1개 Asus Transformer Flip Book TP200S LCD Screen Replacement: 6 단계, 이미지 2개 중 2개
    • After removing the screws, use the metal spudger to gentle pry open the screen casing from the flip book casing.

  7. Asus Transformer Flip Book TP200S LCD Screen Replacement: 7 단계, 이미지 2개 중 1개 Asus Transformer Flip Book TP200S LCD Screen Replacement: 7 단계, 이미지 2개 중 2개
    이 단계에 사용된 도구:
    Tweezers
    $4.99
    • Gently remove all the connections and tape you see attached to the screen with tweezers.

  8. Asus Transformer Flip Book TP200S LCD Screen Replacement: 8 단계, 이미지 1개 중 1개
    • After all connections have been removed, use the metal spudger and pry the screen itself from the screen casing.

    • Caution: The screen is glued to the screen casing with adhesive so you will need to exert some force to get the screen off. This will likely damage your old screen permanently. Be certain you have a replacement readily available before you engage in this step.

    • You will not need to reapply the adhesive.

결론

To reassemble your device, follow these instructions in reverse order.

다른 한 분이 해당 안내서를 완성하였습니다.

작성자

4다른 기여자 명과 함께

Alejandro Lopez

회원 가입일: 02/15/18

662 평판

안내서 5개를 작성함

USF Tampa, Team S17-G2, Boczar Spring 2018 USF Tampa, Team S17-G2, Boczar Spring 2018 회원

USFT-BOCZAR-S18S17G2

3 회원들

안내서 6개를 작성함

0가이드 댓글

댓글 쓰기

조회 통계:

지난 24시간: 0

지난 7일: 4

지난 30일: 18

전체 시간: 1,922