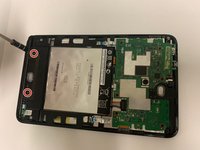
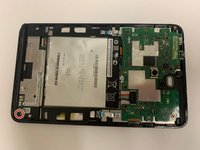
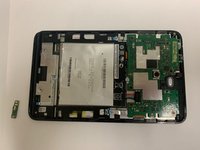
주요 콘텐츠로 건너뛰기

Asus VivoTab Note 8 IO Board Replacement

필요한 것

  1. Asus VivoTab Note 8 IO Board Replacement, Back Panel: 1 단계, 이미지 1개 중 1개
    • Remove the pen and memory card if you have them; they may get in the way when you are opening the device.

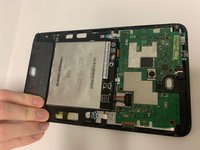
    • Pry open the edges of the cover using the plastic opening tool. The memory card slot is very useful for getting started.

  2. Asus VivoTab Note 8 IO Board Replacement: 2 단계, 이미지 2개 중 1개 Asus VivoTab Note 8 IO Board Replacement: 2 단계, 이미지 2개 중 2개
    • Move the opening tool along the edges of the tablet and push up wherever you can. You may need to open up all of the sides to take the panel off.

    • Pull apart the sides of the casing by hand.

  3. Asus VivoTab Note 8 IO Board Replacement: 3 단계, 이미지 1개 중 1개
    • After pulling the panel off, put it to the side.

  4. Asus VivoTab Note 8 IO Board Replacement, IO Board: 4 단계, 이미지 1개 중 1개
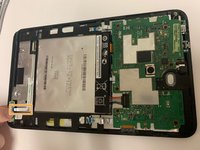
    • After removing the back panel, you will see the IO Board under another removable plastic piece.

  5. Asus VivoTab Note 8 IO Board Replacement: 5 단계, 이미지 2개 중 1개 Asus VivoTab Note 8 IO Board Replacement: 5 단계, 이미지 2개 중 2개
    • Unscrew the two screws of the plastic piece, and lift it off.

  6. Asus VivoTab Note 8 IO Board Replacement: 6 단계, 이미지 3개 중 1개 Asus VivoTab Note 8 IO Board Replacement: 6 단계, 이미지 3개 중 2개 Asus VivoTab Note 8 IO Board Replacement: 6 단계, 이미지 3개 중 3개
    • Unscrew the screw holding down the IO Board.

    • Pull out the ribbon (hold the ribbon with one hand and the board with the other, then pull) and remove the IO Board.

결론

To reassemble your device, follow these instructions in reverse order.

작성자

1다른 기여자 명과 함께

Ryan Spencer

회원 가입일: 09/21/18

756 평판

안내서 6개를 작성함

0가이드 댓글

댓글 쓰기

조회 통계:

지난 24시간: 1

지난 7일: 3

지난 30일: 10

전체 시간: 622