소개
This guide will show you how to take apart your device and replace its Digitizer Touch Screen.
Be cautious not to smudge or scratch the screen during replacement.
필요한 것
-
-
Place the device face down on a flat surface.
-
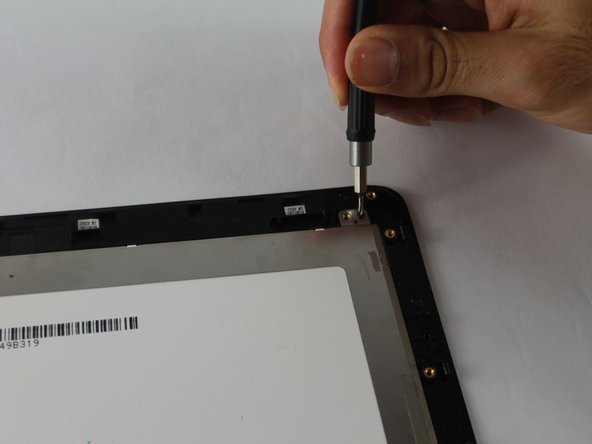
Remove the back panel with the plastic opening tool by sliding the tool around the edge of the panel.
-
-


To reassemble your device, follow these instructions in reverse order.
To reassemble your device, follow these instructions in reverse order.
다른 3명이 해당 안내서를 완성하였습니다.

팀

USF Tampa, Team 2-4, Sullivan Fall 2016 USF Tampa, Team 2-4, Sullivan Fall 2016 회원
USFT-SULLIVAN-F16S2G4
4 회원들
안내서 5개 작성하였습니다
댓글 2개
Attention: this procedure has a big trap, in which I fell by following it: I have broken the glued connection between USB/power plug-in unit (on the right-side bottom) and its strip cable (visible on the right side and going into a whole on the right side bottom). Result: when I finished the assembly and tried to start the tablet, I only get the 3 blinking of the power LED, saying the the power connection is not OK.
The instructions should mention, that we have to disconnect also the power/USB strip-cable and take it out the whole, without braking the glued connection !!! - So, the photo in Etape 5 should show also the strip-cable still connected to the USB/power plug-in unit (green element on right-side bottom) !! - This in not the case on your Etape 5 photo and I am wondering how you could re-establish this connection when re-assembling the board.
Consequence: I have to find and buy a new power/USB connector (called DC board) which has the strip-cable included, i.e. attached.
Really annoying !
I don’t like this tutorial.
First: as Richard mentioned be very careful to get the flex out of the USB/power plug-in-unit. I broke it as well. It’s a newby thing. Doesn’t matter, it is easy to buy a new one but it takes time off course.
Second: This tutorial has the title of replacing the ** digitizer** but suggests to buy an LCD . Likely many people don’t need to buy a new LCD but a only a reliable digitizer (that’s the frame basically).
Third: Be very cautious about buying a new digitizer. Maybe for a reason it is not part of this tutorial. So you want to replace the digitizer, but there is not a digitizer sold as a part in this tuturial?! Weird. Anyway: I read there were THREE variations of this digitizer, and you really have to buy the one that fits your tablet. Others won’t work. So I suggest to read the flex. I have done this step, and now bought a new, original, digitizer for this tablet. But according a pro it still isn’t a safe buy. I don’t know if he is right, he might be though.