주요 콘텐츠로 건너뛰기

Asus Vivobook Flip 14 TP410U LCD Assembly Replacement

필요한 것

  1. Asus Vivobook Flip 14 TP410U LCD Assembly Replacement, LCD Assembly: 1 단계, 이미지 1/1
    • Turn off the power and disconnected the AC cable from the laptop.

  2. Asus Vivobook Flip 14 TP410U LCD Assembly Replacement: 2 단계, 이미지 1/2 Asus Vivobook Flip 14 TP410U LCD Assembly Replacement: 2 단계, 이미지 2/2
    • Remove the rubber covers for the two screws located at the bottom of the screen.

    • Use a Phillips #00 screwdriver to remove the two 6.4 mm screws outlined in the image.

  3. Asus Vivobook Flip 14 TP410U LCD Assembly Replacement: 3 단계, 이미지 1/2 Asus Vivobook Flip 14 TP410U LCD Assembly Replacement: 3 단계, 이미지 2/2
    • Excessive force may cause damage to connections.

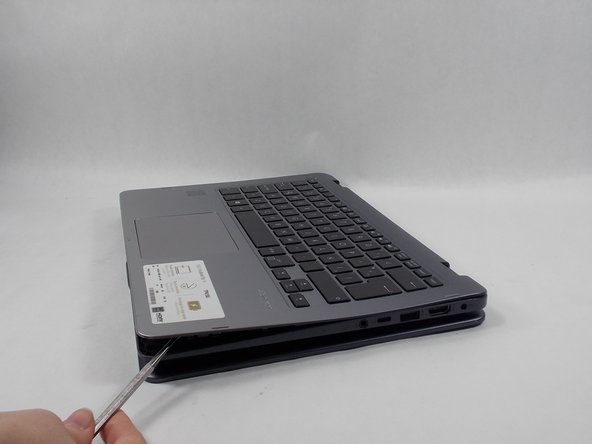
    • Rotate the screen 360 degrees for ease of access.

    • Place the opening tool at the corner of where the screen meets the base of the laptop.

    • Pry open the screen along the edge until it is completely off the front cover.

    • Disconnect each appropriate connector while opening up the laptop.

  4. Asus Vivobook Flip 14 TP410U LCD Assembly Replacement: 4 단계, 이미지 1/2 Asus Vivobook Flip 14 TP410U LCD Assembly Replacement: 4 단계, 이미지 2/2
    • Excessive force should avoided since damage may accrue.

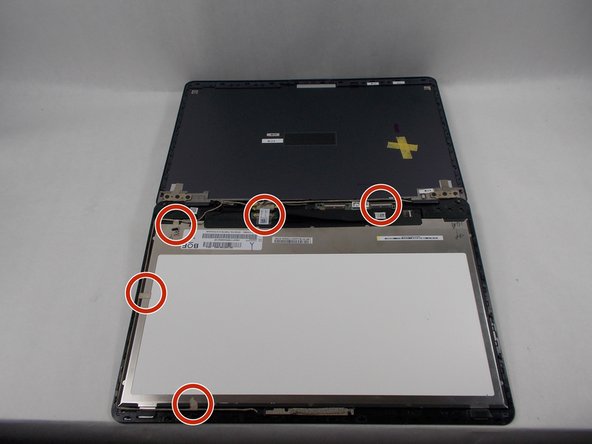
    • Remove the cable that connects to the touch display, front camera, and motherboard.

    • Remove each piece of tape that holds down each cable.

  5. Asus Vivobook Flip 14 TP410U LCD Assembly Replacement: 5 단계, 이미지 1/1
    • Have the new LCD display fully unboxed and ready to be used.

    • Remove the old LCD display.

    • The touch screen sensor is extremely fragile, make sure to not put excessive force on the cable while assembling.

결론

To reassemble your device, follow these instructions in reverse order.

다른 한 분이 해당 안내서를 완성하였습니다.

Dominic Bento

회원 가입일: 03/22/22

305 평판

안내서 2개 작성하였습니다

댓글 0개

댓글 쓰기

조회 통계:

24 시간 전: 1

7일 전: 7

30일 전: 51

전체 시간: 819