소개
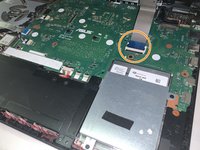
For the vast majority of laptop users, a Wi-Fi connection is critical for accessing the internet and if the Wi-Fi card were ever to go bad in a laptop, many would simply see their laptop as unusable. This guide will walk owners of the Asus Vivobook K570UD-DS74 through the process of replacing their broken Wi-Fi card in order to give their device new life.
필요한 것
-
-
Remove the 11 Philips #00 screws from the underside of the device.
-
Four 12mm screws.
-
Three 10mm screws.
-
Four 7mm screws.
-
-


To reassemble your device, follow these instructions in reverse order.
To reassemble your device, follow these instructions in reverse order.
다른 한 분이 해당 안내서를 완성하였습니다.

팀

Embry-Riddle Aeronautical University, Team S3-G7, Cromer Twal Fall 2020 Embry-Riddle Aeronautical University, Team S3-G7, Cromer Twal Fall 2020 회원
ERAU-CROMER TWAL-F20S3G7
1 회원
안내서 1개 작성