주요 콘텐츠로 건너뛰기

Asus Vivobook S500CA Fan Replacement

필요한 것

  1. Asus Vivobook S500CA Fan Replacement, Cooling Fan: 1 단계, 이미지 1/1
    • Turn the device over so the back plate is facing up.

  2. Asus Vivobook S500CA Fan Replacement: 2 단계, 이미지 1/1
    • Use a Phillips Head PH1 screwdriver to remove 10 screws around the perimeter of the back plate.

    • It may be helpful to lay out the screws in the orientation in which they are taken out, in order to help remember where they go.

  3. Asus Vivobook S500CA Fan Replacement: 3 단계, 이미지 1/1
    • Remove the back plate by lifting it straight up.

  4. Asus Vivobook S500CA Fan Replacement: 4 단계, 이미지 1/2 Asus Vivobook S500CA Fan Replacement: 4 단계, 이미지 2/2
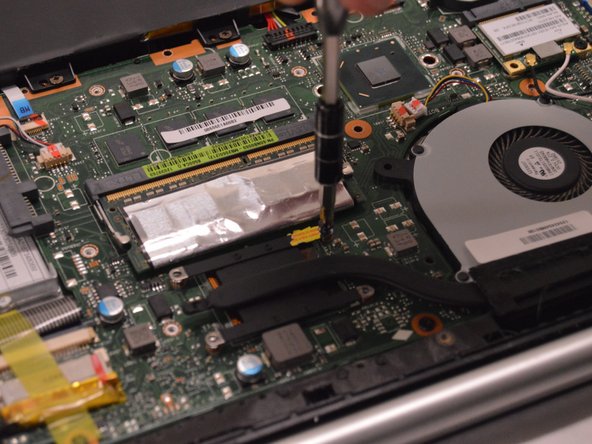
    • Remove 2 (.5 cm) Phillips Head screws found around the fan and 4 (.3 cm) Phillips Head screws found around the heat sink connector.

  5. Asus Vivobook S500CA Fan Replacement: 5 단계, 이미지 1/1
    • Unhook the electronic connection located above the fan by pulling the white connector straight out of the brown socket.

    • This photo is for demonstration purposes only. Do not remove by pulling the wires. Instead, remove by pulling on the edges of the white socket.

  6. Asus Vivobook S500CA Fan Replacement: 6 단계, 이미지 1/1
    • Remove the fan and connected heat sink by lifting straight out of the assembly.

  7. Asus Vivobook S500CA Fan Replacement: 7 단계, 이미지 1/1
    • Replace fan and follow steps 1-5 in reverse order to complete repair.

결론

To reassemble your device, follow these instructions in reverse order.

다른 한 분이 해당 안내서를 완성하였습니다.

Brad Shipman

회원 가입일: 01/17/17

137 평판

안내서 1개 작성함

댓글 0개

댓글 쓰기

조회 통계:

24 시간 전: 1

7일 전: 5

30일 전: 8

전체 시간: 1,792