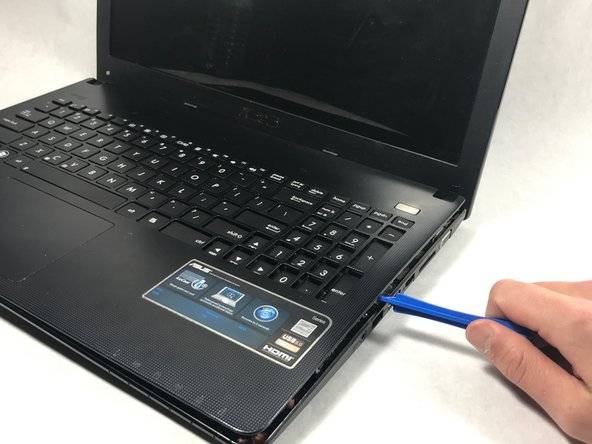
주요 콘텐츠로 건너뛰기

Asus X501A-RH31 Keyboard Replacement

필요한 것

  1. Asus X501A-RH31 Keyboard  Replacement, Battery: 1 단계, 이미지 1/1
    • Turn the laptop over so that the back is facing upwards.

  2. Asus X501A-RH31 Keyboard  Replacement: 2 단계, 이미지 1/1
    • To unlock the left tab, make sure the tab on the left has red showing.

  3. Asus X501A-RH31 Keyboard  Replacement: 3 단계, 이미지 1/2 Asus X501A-RH31 Keyboard  Replacement: 3 단계, 이미지 2/2
    • To unlock the right tab, push the right slider to the left with one hand.

    • Push the battery out with the other hand.

  4. Asus X501A-RH31 Keyboard  Replacement, Keyboard: 4 단계, 이미지 1/2 Asus X501A-RH31 Keyboard  Replacement, Keyboard: 4 단계, 이미지 2/2
    • Using the Phillips #00 screwdriver unscrew all nine screws from the bottom of the laptop, as well as the additional two screws inside the battery compartment.

    • Nine of the screws are 5 mm long, 4.5 mm in diameter, while two screws closest to the hinges are 7 mm long.

  5. Asus X501A-RH31 Keyboard  Replacement: 5 단계, 이미지 1/1
    • Turn the laptop over and open the top so the keyboard is facing you.

  6. Asus X501A-RH31 Keyboard  Replacement: 6 단계, 이미지 1/2 Asus X501A-RH31 Keyboard  Replacement: 6 단계, 이미지 2/2
    • Pry off the keyboard cover on the edge using the plastic opening tool.

    • Start from one side. Once it is lose, carry out the same procedure on the front and other side.

    • Only do little sections at a time as the keyboard may break if you attempt to take the whole thing off from a single point.

  7. Asus X501A-RH31 Keyboard  Replacement: 7 단계, 이미지 1/1
    • Slowly lift the keyboard upward, but do not remove completely.

    • Remove the two data cables that attach the keyboard to the motherboard.

  8. Asus X501A-RH31 Keyboard  Replacement: 8 단계, 이미지 1/1
    이 단계에 사용된 도구:
    Tweezers
    $4.99
    구매
    • Use tweezers to pull the white plastic piece up that is attached to the data cable.

    • Repeat this process for the big black cable as well.

    • Use caution when unlatching the data cables from the motherboard. The cables are extremely delicate and can break.

결론

To reassemble your device, follow these instructions in reverse order.

다른 한 분이 해당 안내서를 완성하였습니다.

Romana Hruby

회원 가입일: 10/20/17

587 평판

안내서 5개 작성하였습니다

UMass Dartmouth, Team S3-G3, Bailey Fall 2017 UMass Dartmouth, Team S3-G3, Bailey Fall 2017 회원

UMASSD-BAILEY-F17S3G3

3 회원들

안내서 8개 작성하였습니다

댓글 0개

댓글 쓰기

조회 통계:

24 시간 전: 1

7일 전: 5

30일 전: 11

전체 시간: 1,141