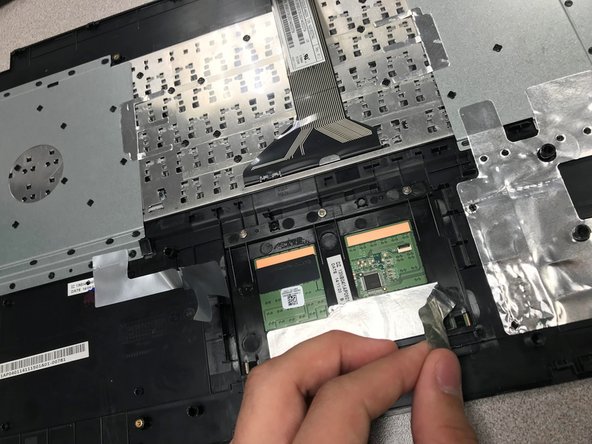
주요 콘텐츠로 건너뛰기

Asus X751MA-DH01TQ Touchpad Replacement

필요한 것

  1. Asus X751MA-DH01TQ Touchpad Replacement, Touchpad: 1 단계, 이미지 1/2 Asus X751MA-DH01TQ Touchpad Replacement, Touchpad: 1 단계, 이미지 2/2
    • Turn the laptop upside down

    • Unscrew the ten screws on the bottom with the PH00 screwdriver bit.

  2. Asus X751MA-DH01TQ Touchpad Replacement: 2 단계, 이미지 1/3 Asus X751MA-DH01TQ Touchpad Replacement: 2 단계, 이미지 2/3 Asus X751MA-DH01TQ Touchpad Replacement: 2 단계, 이미지 3/3
    • Open up the laptop.

    • Using the plastic opening tool, open up and disconnect the keyboard from the base.

    • Take the keyboard off and put it upside down.

  3. Asus X751MA-DH01TQ Touchpad Replacement: 3 단계, 이미지 1/3 Asus X751MA-DH01TQ Touchpad Replacement: 3 단계, 이미지 2/3 Asus X751MA-DH01TQ Touchpad Replacement: 3 단계, 이미지 3/3
    • Peel off the silver stickers that are attaching the touch pad to the back part of the keyboard.

  4. Asus X751MA-DH01TQ Touchpad Replacement: 4 단계, 이미지 1/2 Asus X751MA-DH01TQ Touchpad Replacement: 4 단계, 이미지 2/2
    • Unscrew the three 4mm screws on the touch pad with a PH00 screwdriver.

  5. Asus X751MA-DH01TQ Touchpad Replacement: 5 단계, 이미지 1/1
    • Grab the touch pad and slide it out to replace it.

결론

To reassemble your device, follow these instructions in reverse order.

Joshua Kramer

회원 가입일: 09/18/18

147 평판

안내서 1개 작성함

University of North Texas, Team S4-G5, Raign Fall 2018 University of North Texas, Team S4-G5, Raign Fall 2018 회원

UNT-RAIGN-F18S4G5

3 회원들

안내서 3개 작성하였습니다

댓글 0개

댓글 쓰기

조회 통계:

24 시간 전: 0

7일 전: 8

30일 전: 11

전체 시간: 393