주요 콘텐츠로 건너뛰기

Asus Zenbook UX31A Motherboard Replacement

필요한 것

  1. Asus Zenbook UX31A Motherboard Replacement, Battery: 1 단계, 이미지 1/2 Asus Zenbook UX31A Motherboard Replacement, Battery: 1 단계, 이미지 2/2
    • Use a T6 screwdriver to remove the ten 6 mm case screws.

    • The two screws adjacent to the device serial number stamps are longer than the others. These two screws run about 11 mm long.

    • Remove the back cover from the laptop.

    • DO NOT BEND OR PUNCTURE THE BATTERY: Puncturing the battery can result in injury since the battery can catch fire or explode when exposed directly to oxygen

  2. Asus Zenbook UX31A Motherboard Replacement: 2 단계, 이미지 1/1
    • Use a Phillips #00 screwdriver to remove the three 7 mm screws that secure the battery.

  3. Asus Zenbook UX31A Motherboard Replacement: 3 단계, 이미지 1/1
    • Unplug the bundled battery connector from the motherboard by gently pulling the cable up.

    • Make sure you pull the connector directly upwards or you could damage the connector

  4. Asus Zenbook UX31A Motherboard Replacement: 4 단계, 이미지 1/1
    • Remove the battery from the laptop by lifting it up and out.

  5. Asus Zenbook UX31A Motherboard Replacement, Wi-Fi Card: 5 단계, 이미지 1/2 Asus Zenbook UX31A Motherboard Replacement, Wi-Fi Card: 5 단계, 이미지 2/2
    • Use a T6 screwdriver to remove the ten 6 mm case screws.

    • The two screws adjacent to the device serial number stamps are longer than the others. These two screws run about 11 mm long.

  6. Asus Zenbook UX31A Motherboard Replacement: 6 단계, 이미지 1/2 Asus Zenbook UX31A Motherboard Replacement: 6 단계, 이미지 2/2
    • Use a Phillips #00 screwdriver to remove the two 6 mm screws that secure the Wi-Fi card.

    • Wires are loose and easy to disconnect.

  7. Asus Zenbook UX31A Motherboard Replacement: 7 단계, 이미지 1/1
    • Gently pull the the Wi-Fi card from the motherboard.

    • Disconnect the white and black wire by gently pulling each one up.

    • They can be a little tricky to put back on so take your time and be gentle.

  8. Asus Zenbook UX31A Motherboard Replacement, Fan: 8 단계, 이미지 1/2 Asus Zenbook UX31A Motherboard Replacement, Fan: 8 단계, 이미지 2/2
    • Unclip both ZIF connector tabs by lifting the black tab up and away from the connector.

    • Remove the bridge connector.

  9. Asus Zenbook UX31A Motherboard Replacement: 9 단계, 이미지 1/3 Asus Zenbook UX31A Motherboard Replacement: 9 단계, 이미지 2/3 Asus Zenbook UX31A Motherboard Replacement: 9 단계, 이미지 3/3
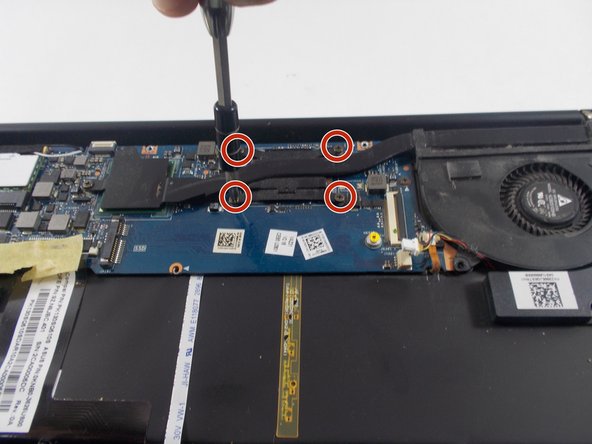
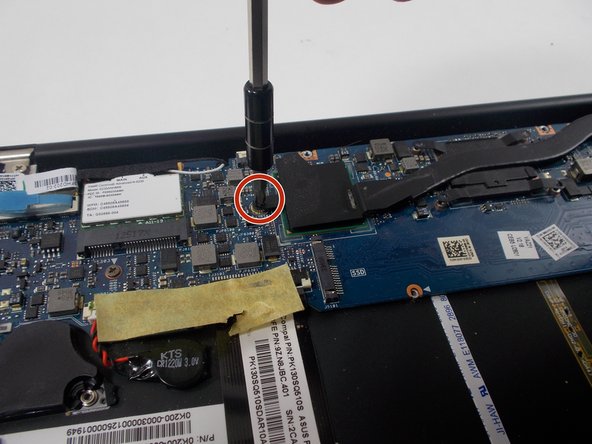
    • Use a Phillips #00 screwdriver to remove all seven 6 mm screws that secure the fan and heatsink.

  10. Asus Zenbook UX31A Motherboard Replacement: 10 단계, 이미지 1/2 Asus Zenbook UX31A Motherboard Replacement: 10 단계, 이미지 2/2
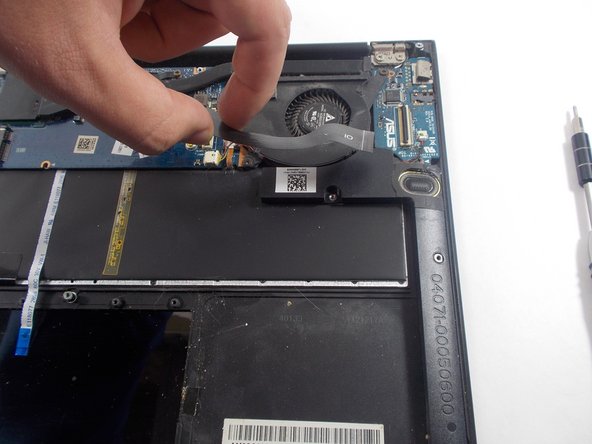
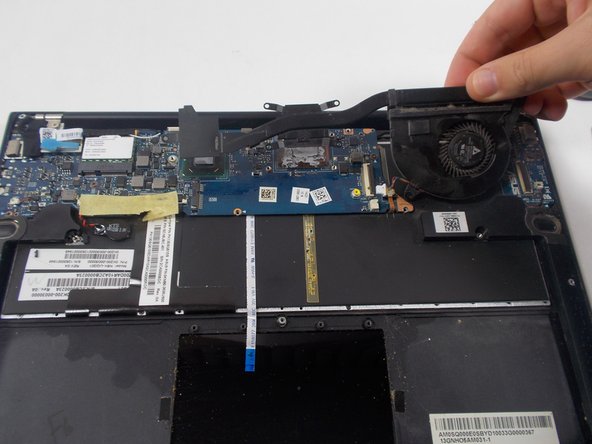
    • Disconnect the fan connector by puling on it horizontally until it disconnects.

    • Remove the fan.

  11. Asus Zenbook UX31A Motherboard Replacement, Motherboard: 11 단계, 이미지 1/3 Asus Zenbook UX31A Motherboard Replacement, Motherboard: 11 단계, 이미지 2/3 Asus Zenbook UX31A Motherboard Replacement, Motherboard: 11 단계, 이미지 3/3
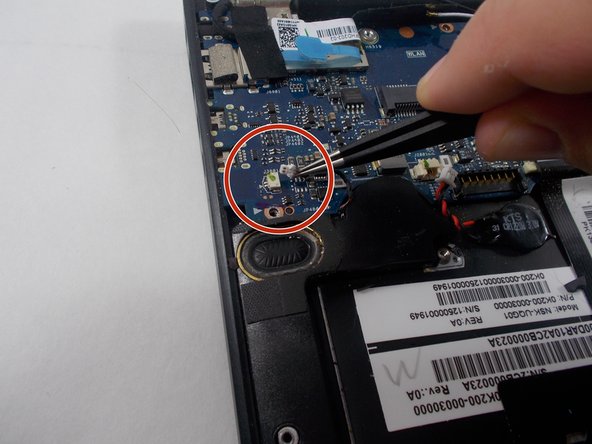
    • Disconnect the bundled connectors by pulling the cable away from the connector in the same direction that the individual wires are running.

    • Disconnect the ZIF connector by using the tip of the spudger tool or your fingernail to lift the locking tab. Then, gently pull the cable out.

  12. Asus Zenbook UX31A Motherboard Replacement: 12 단계, 이미지 1/1
    • To disconnect the display connector, use the iFixit opening tool and pry the connector up and away from the board.

  13. Asus Zenbook UX31A Motherboard Replacement: 13 단계, 이미지 1/3 Asus Zenbook UX31A Motherboard Replacement: 13 단계, 이미지 2/3 Asus Zenbook UX31A Motherboard Replacement: 13 단계, 이미지 3/3
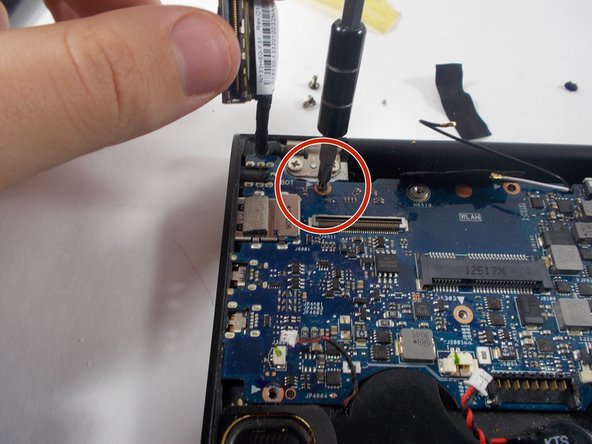
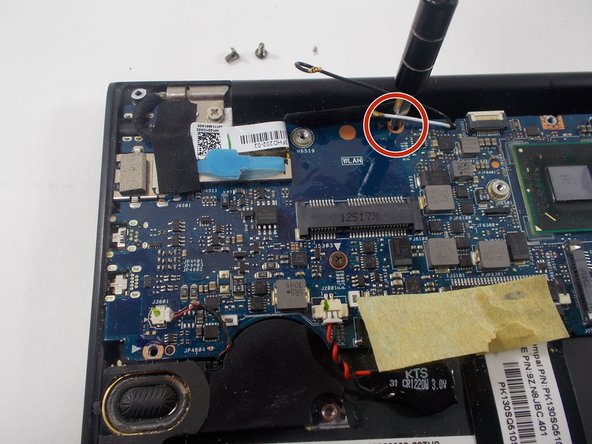
    • Use a Phillips #00 screwdriver to remove the four 6 mm screws that hold the motherboard in place.

    • Use a Phillips #000 screwdriver to remove the single 4 mm screw.

  14. Asus Zenbook UX31A Motherboard Replacement: 14 단계, 이미지 1/1
    • Remove the motherboard.

결론

To reassemble your device, follow these instructions in reverse order.

다른 한 분이 해당 안내서를 완성하였습니다.

Brendan Walsh

회원 가입일: 03/22/22

227 평판

안내서 2개 작성하였습니다

UMass Dartmouth, Team 7-1, Sinclaire Spring 2022 UMass Dartmouth, Team 7-1, Sinclaire Spring 2022 회원

UMASSD-SINCLAIRE-S22S7G1

5 회원들

안내서 8개 작성하였습니다

댓글 0개

댓글 쓰기

조회 통계:

24 시간 전: 0

7일 전: 8

30일 전: 27

전체 시간: 812