주요 콘텐츠로 건너뛰기

Asus Zenfone 4 Max Camera Replacement

필요한 것

  1. Asus Zenfone 4 Max Camera Replacement, Camera: 1 단계, 이미지 1/1
    • Using a removable head screwdriver and a T4 bit, remove the screws on the base of the phone on either side of the charging port.

  2. Asus Zenfone 4 Max Camera Replacement: 2 단계, 이미지 1/1
    • Starting near either of the 4 corners of the device notice the seam of the case around the front of the device.

    • Begin using the opening tool with a moderate amount of force to wedge between the back case and the phone.

    • Gently move the tool around the edges towards each corner until the back is removed.

    • You will be able to hear the back casing pulling apart from the phone. Do not be alarmed, but work gently with the device.

  3. Asus Zenfone 4 Max Camera Replacement: 3 단계, 이미지 1/2 Asus Zenfone 4 Max Camera Replacement: 3 단계, 이미지 2/2
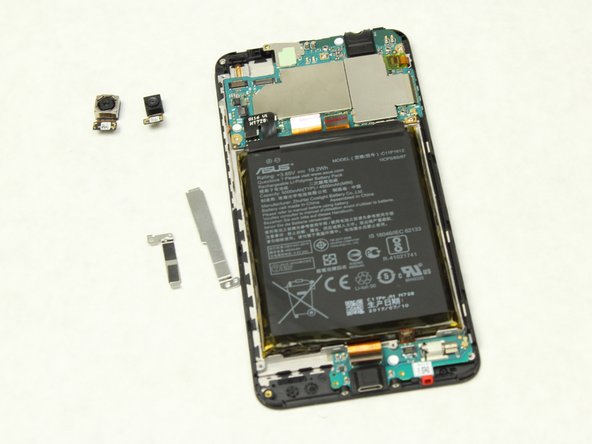
    • Using a removable head screwdriver and a PH0 bit, begin removing the panel beneath the two cameras by unscrewing the screw.

  4. Asus Zenfone 4 Max Camera Replacement: 4 단계, 이미지 1/3 Asus Zenfone 4 Max Camera Replacement: 4 단계, 이미지 2/3 Asus Zenfone 4 Max Camera Replacement: 4 단계, 이미지 3/3
    • Use the tweezers to gently pull up on the flaps beneath the two cameras.

    • Completely remove the cameras and replace with the new cameras.

결론

To reassemble your device, follow these instructions in reverse order.

Maegan West

회원 가입일: 10/02/18

839 평판

안내서 4개 작성하였습니다

Sam Houston State, Team S11-G6, Blackburne Fall 2018 Sam Houston State, Team S11-G6, Blackburne Fall 2018 회원

SHSU-BLACKBURNE-F18S11G6

4 회원들

안내서 10개 작성하였습니다

댓글 2개

You can read T3 in the summary and T4 in the instructions: which one do I need?

patriziomaugeri - 답글

Does this fix the Zenfone 4 max camera black screen?

Roger Dufault - 답글

댓글 쓰기

조회 통계:

24 시간 전: 0

7일 전: 1

30일 전: 9

전체 시간: 1,930