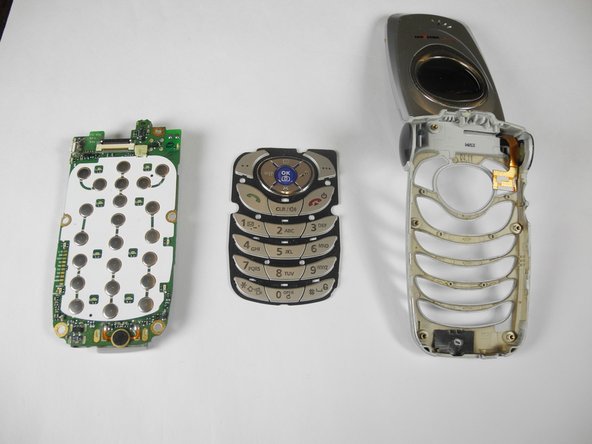
주요 콘텐츠로 건너뛰기

Audiovox CDM-8900 Keypad Replacement

필요한 것

  1. Audiovox CDM-8900 Keypad Replacement, Battery: 1 단계, 이미지 1/2 Audiovox CDM-8900 Keypad Replacement, Battery: 1 단계, 이미지 2/2
    • Hold the phone in one hand, slide the latch up, and pull the battery up to remove it.

  2. Audiovox CDM-8900 Keypad Replacement, Antenna: 2 단계, 이미지 1/3 Audiovox CDM-8900 Keypad Replacement, Antenna: 2 단계, 이미지 2/3 Audiovox CDM-8900 Keypad Replacement, Antenna: 2 단계, 이미지 3/3
    • Grasp the antenna at its base and twist to unscrew.

    • Remove the antenna along with its plastic casing from inside the battery housing. Keep the antenna in the plastic casing for reassembly.

  3. Audiovox CDM-8900 Keypad Replacement, Motherboard: 3 단계, 이미지 1/3 Audiovox CDM-8900 Keypad Replacement, Motherboard: 3 단계, 이미지 2/3 Audiovox CDM-8900 Keypad Replacement, Motherboard: 3 단계, 이미지 3/3
    • Remove the small rubber insert from the top of the phone to access the top screw.

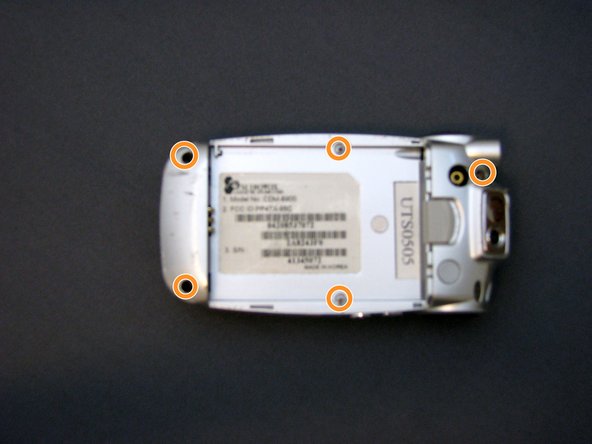
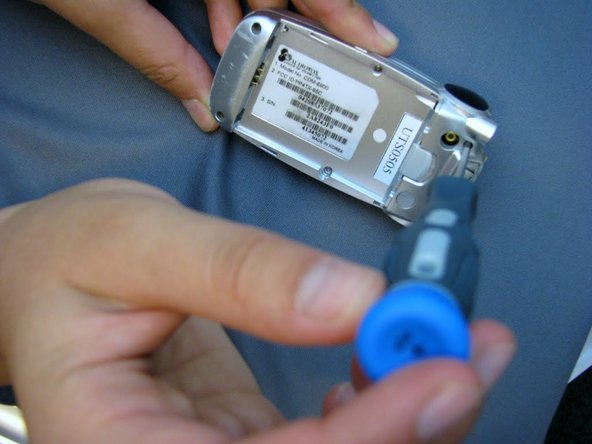
    • Unscrew all five screws on the back of the cell phone with a Phillips #00 screwdriver.

    • If screws do not slide out after unscrewing, gently flip and tap the phone in your hand until the screws come loose.

  4. Audiovox CDM-8900 Keypad Replacement: 4 단계, 이미지 1/3 Audiovox CDM-8900 Keypad Replacement: 4 단계, 이미지 2/3 Audiovox CDM-8900 Keypad Replacement: 4 단계, 이미지 3/3
    • Wedge the phone plate toward you, using the leverage from an opening tool.

    • The volume control button on the left side of the phone will loosen. Make sure to carefully reinsert it during reassembly.

    • Detach the motherboard from the LCD screen connector by gently detaching the small copper plate on the top right of the motherboard.

  5. Audiovox CDM-8900 Keypad Replacement: 5 단계, 이미지 1/3 Audiovox CDM-8900 Keypad Replacement: 5 단계, 이미지 2/3 Audiovox CDM-8900 Keypad Replacement: 5 단계, 이미지 3/3
    • To release the motherboard, push the large "OK" button located on the other side of the phone.

    • Before reassembly, make sure the keypad is lined up with the motherboard. Be sure the camera lens is properly aligned at the top of the motherboard and the volume controls are in place.

  6. Audiovox CDM-8900 Keypad Replacement, Keypad: 6 단계, 이미지 1/1
    • Peel away keypad from faceplate.

결승점

다른 한 분이 해당 안내서를 완성하였습니다.

Aaron Shaw

회원 가입일: 04/15/10

159 평판

안내서 6개 작성하였습니다

Cal Poly, Team 28-31, Regan Spring 2010 Cal Poly, Team 28-31, Regan Spring 2010 회원

CPSU-REGAN-S10S28G31

4 회원들

안내서 12개 작성하였습니다

댓글 0개

댓글 쓰기

조회 통계:

24 시간 전: 0

7일 전: 0

30일 전: 0

전체 시간: 1,865