주요 콘텐츠로 건너뛰기

Audiovox CR8030iE5 Speakers Replacement

필요한 것

  1. Audiovox CR8030iE5 Speakers Replacement, Top-Casing: 1 단계, 이미지 1/1
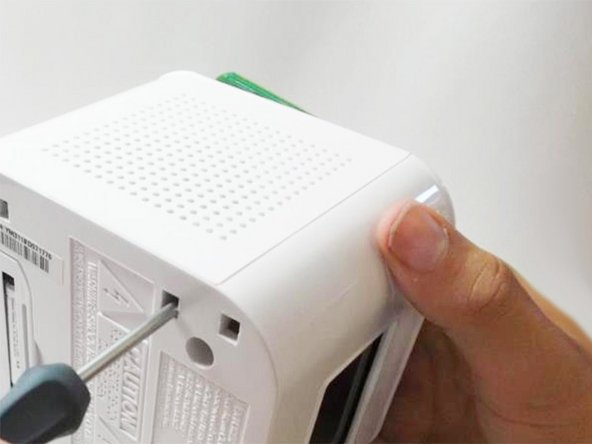
    • Turn the device upside down.

    • Apply constant pressure to the base of your Audiovox, while holding the plastic casing until the casing is completely removed.

  2. Audiovox CR8030iE5 Speakers Replacement: 2 단계, 이미지 1/1
    • Remove the four screws from the base using a Phillips #1 screwdriver.

  3. Audiovox CR8030iE5 Speakers Replacement: 3 단계, 이미지 1/1
    • Turn the device right-side up.

    • Gently pull the top panel off of the device.

  4. Audiovox CR8030iE5 Speakers Replacement: 4 단계, 이미지 1/1
    • Using a Phillips #1 screwdriver, remove the screw found in the middle of the board.

  5. Audiovox CR8030iE5 Speakers Replacement: 5 단계, 이미지 1/1
    • Pull back the board gently to avoid disconnecting the attached wires.

    • This allows you to view the soldered connections on the other side, and the internal components.

  6. Audiovox CR8030iE5 Speakers Replacement, Speakers: 6 단계, 이미지 1/1
    • Notice that there are two speakers located on opposite sides of the inside of your Audiovox.

    • Slide a plastic opening tool along the rim of the faulty speaker where it meets the plastic casing.

    • This action removes any glue or adhesive that holds the speaker to the wall of your Audiovox.

  7. Audiovox CR8030iE5 Speakers Replacement: 7 단계, 이미지 1/2 Audiovox CR8030iE5 Speakers Replacement: 7 단계, 이미지 2/2
    • Using your thumb, applying constant pressure, pull back the plastic tab towards the speaker and away from the metal bracket.

    • Simultaneously insert a Phillips #00 screwdriver into the square hole on the underside of clock and push through to lift the metal bracket off of the plastic tab.

  8. Audiovox CR8030iE5 Speakers Replacement: 8 단계, 이미지 1/1
    • Repeat the second part of "Step 7" for the other hole.

  9. Audiovox CR8030iE5 Speakers Replacement: 9 단계, 이미지 1/1
    • Pull up on the metal brackets, found on either side, until the speaker is completely removed. Removing the speaker is rather challenging. Don't get discouraged if it takes multiple attempts!

    • Each speaker contains a powerful magnet. Try to keep them away from nearby metal objects.

결론

To reassemble your device, follow these instructions in reverse order.

다른 3명이 해당 안내서를 완성하였습니다.

Nab Sengupta

회원 가입일: 04/18/13

55 평판

안내서 4개 작성하였습니다

Cal Poly, Team 10-39, Amido Spring 2013 Cal Poly, Team 10-39, Amido Spring 2013 회원

CPSU-AMIDO-S13S10G39

4 회원들

안내서 6개 작성하였습니다

댓글 0개

댓글 쓰기

조회 통계:

24 시간 전: 4

7일 전: 24

30일 전: 31

전체 시간: 1,036