주요 콘텐츠로 건너뛰기

BLU Dash 3.5 Camera Replacement

필요한 것

  1. BLU Dash 3.5 Camera Replacement, Battery: 1 단계, 이미지 1/3 BLU Dash 3.5 Camera Replacement, Battery: 1 단계, 이미지 2/3 BLU Dash 3.5 Camera Replacement, Battery: 1 단계, 이미지 3/3
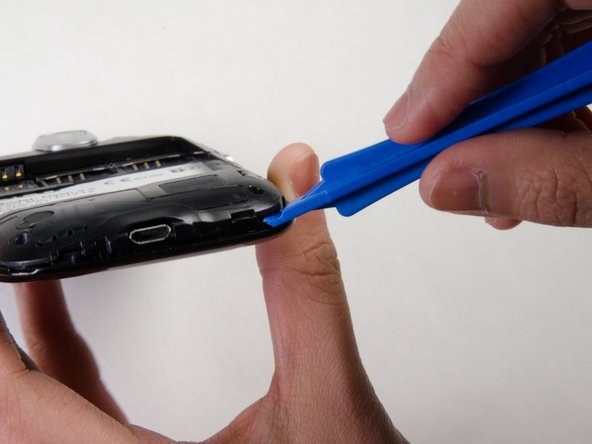
    • Start by locating the slot on the lower right corner of the device.

    • Insert the opening tool into the slot.

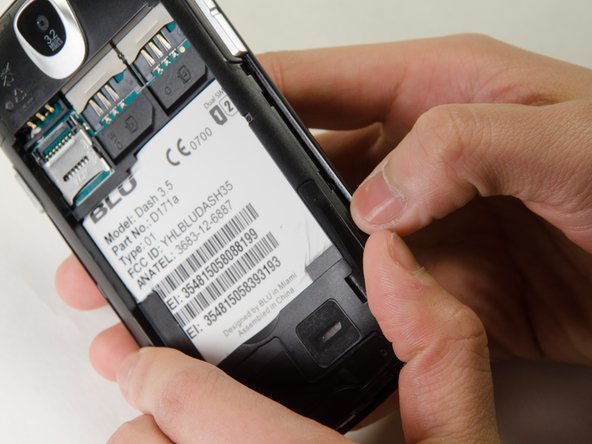
    • Pry the back cover off. Once the corner is off, continue around the perimeter of the phone pulling the back off with your fingers.

    • A fingernail can work to open the back in place of an opening tool.

  2. BLU Dash 3.5 Camera Replacement: 2 단계, 이미지 1/2 BLU Dash 3.5 Camera Replacement: 2 단계, 이미지 2/2
    • Locate the indentation at the bottom of the battery.

    • Insert your thumb and pull the battery out.

  3. BLU Dash 3.5 Camera Replacement, Camera: 3 단계, 이미지 1/3 BLU Dash 3.5 Camera Replacement, Camera: 3 단계, 이미지 2/3 BLU Dash 3.5 Camera Replacement, Camera: 3 단계, 이미지 3/3
    • Use the J000 Phillips screwdriver to remove the four 4.5 mm screws from the corners of the interior back panel.

    • Use the opening tool to pry open the plastic back panel to expose the motherboard.

  4. BLU Dash 3.5 Camera Replacement: 4 단계, 이미지 1/2 BLU Dash 3.5 Camera Replacement: 4 단계, 이미지 2/2
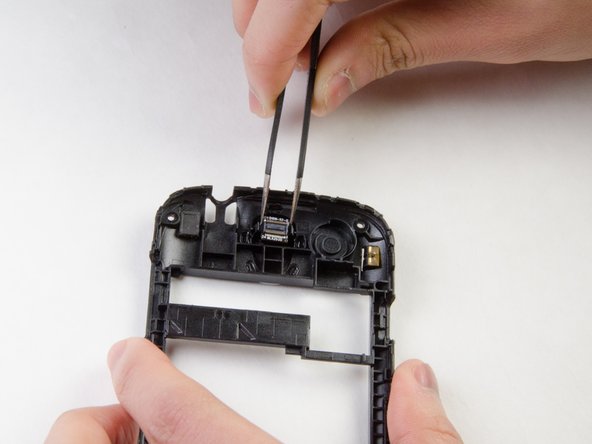
    • Locate camera module on inside of the black plastic back panel

    • Note the orientation of the camera.

    • Use tweezers to carefully remove the camera.

결론

To reassemble your device, follow these instructions in reverse order.

victoria dorony

회원 가입일: 09/28/15

22 평판

안내서 1개 작성함

Ohio State, Team 1-2, Garvin Fall 2015 Ohio State, Team 1-2, Garvin Fall 2015 회원

OSU-GARVIN-F15S1G2

4 회원들

안내서 2개 작성하였습니다

댓글 0개

댓글 쓰기

조회 통계:

24 시간 전: 0

7일 전: 0

30일 전: 1

전체 시간: 325