주요 콘텐츠로 건너뛰기

BLU Studio 5.0 S II Motherboard Replacement

필요한 것

  1. BLU Studio 5.0 S II Motherboard Replacement, Remove back cover: 1 단계, 이미지 1/1
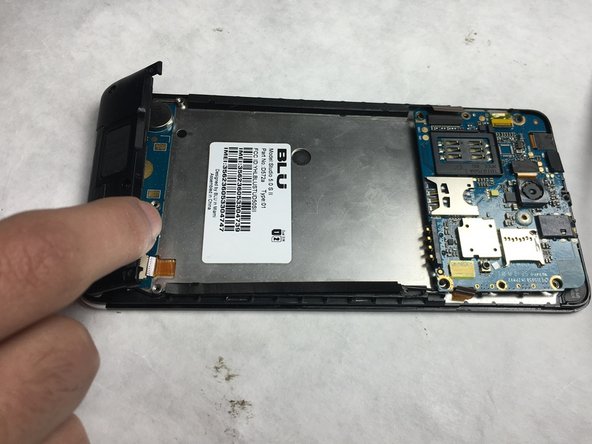
    • Remove the back cover of the phone with the plastic opening tool, or your fingers.

  2. BLU Studio 5.0 S II Motherboard Replacement, Remove battery: 2 단계, 이미지 1/1
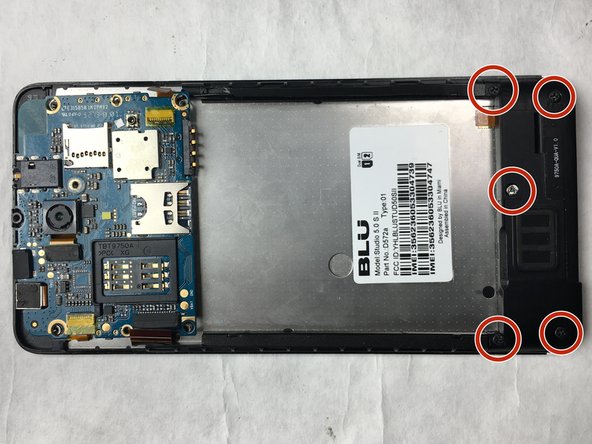
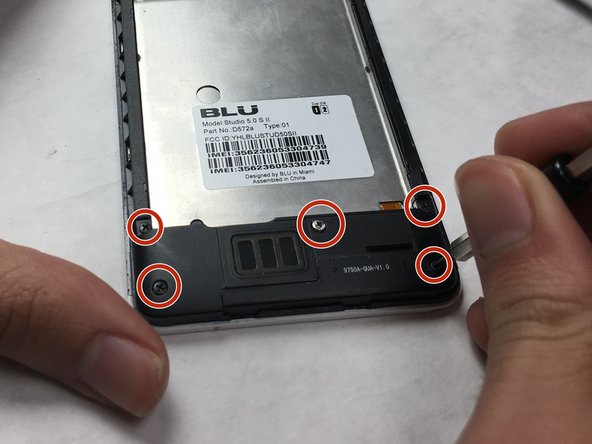
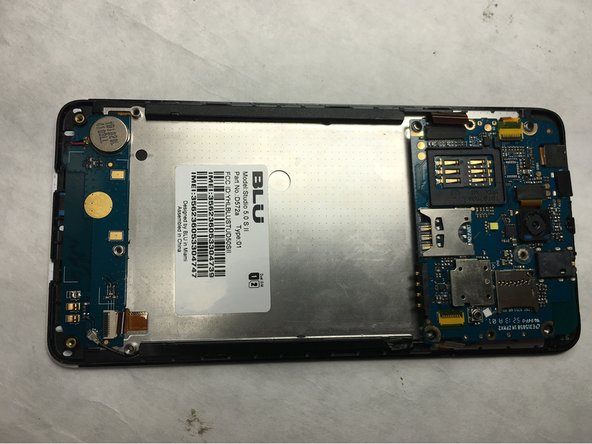
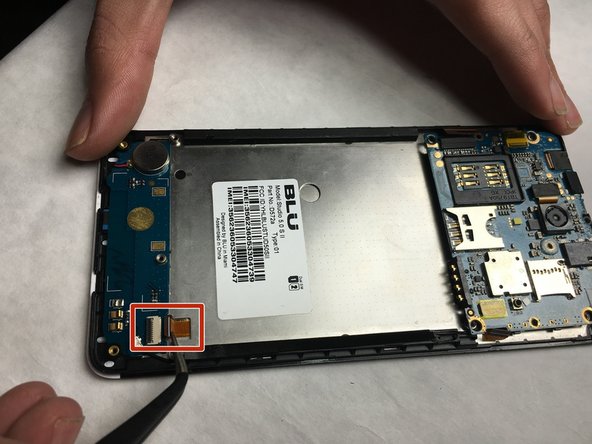
    • Remove the battery from the phone with the plastic opening tool, or your fingers.

  3. BLU Studio 5.0 S II Motherboard Replacement, Motherboard: 3 단계, 이미지 1/2 BLU Studio 5.0 S II Motherboard Replacement, Motherboard: 3 단계, 이미지 2/2
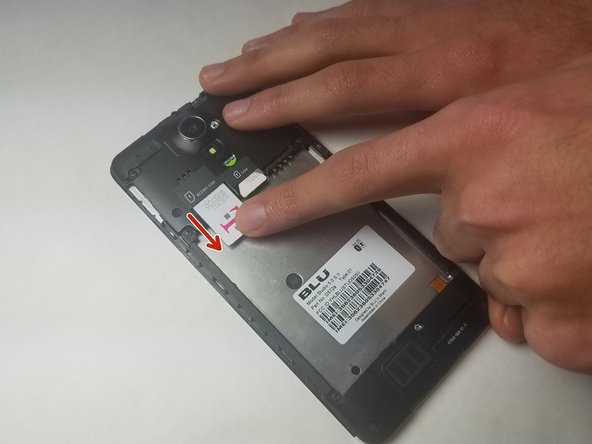
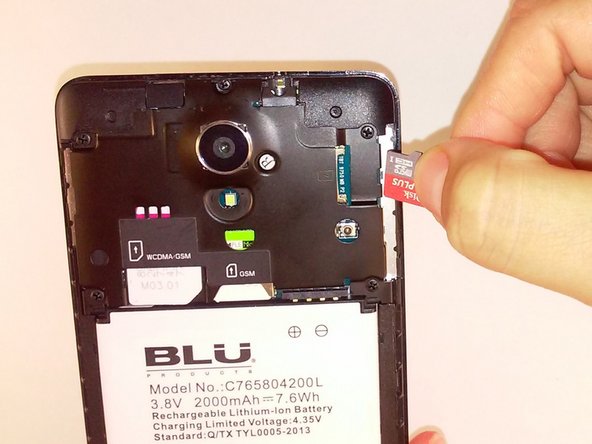
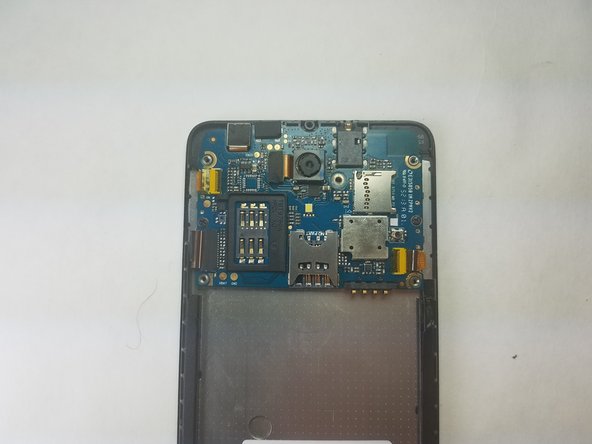
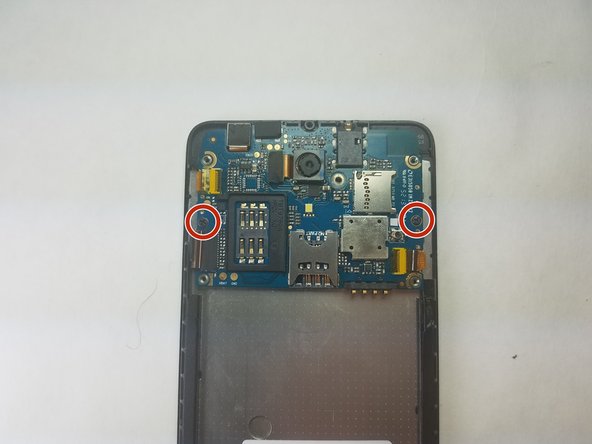
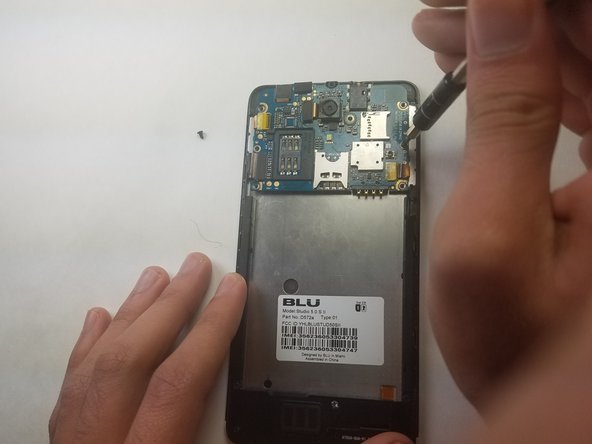
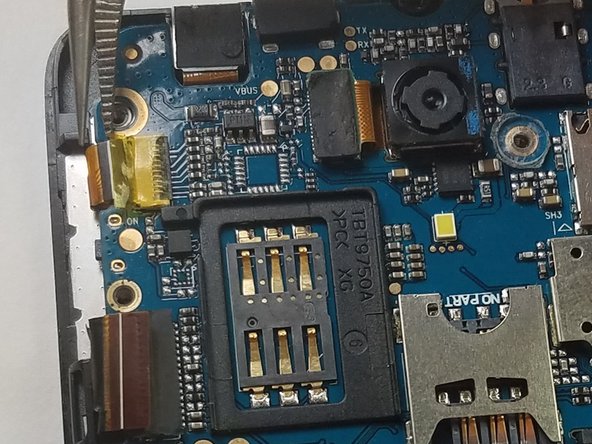
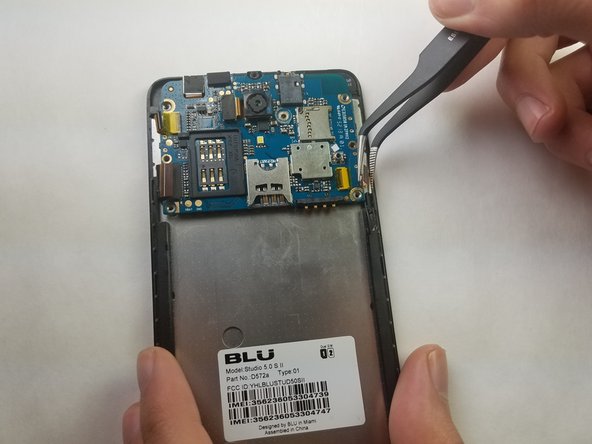
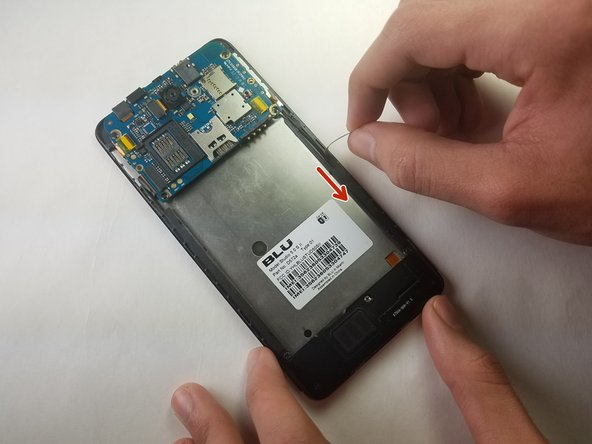
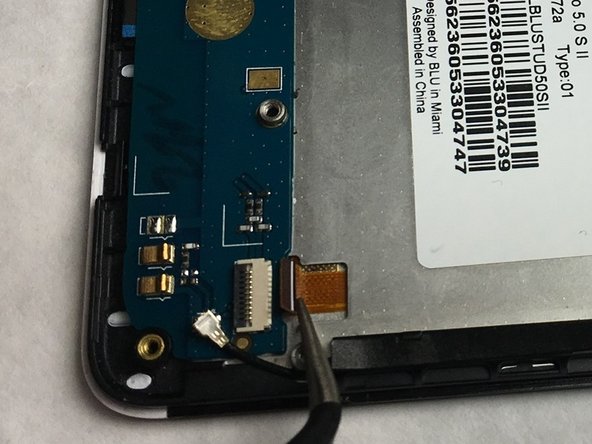
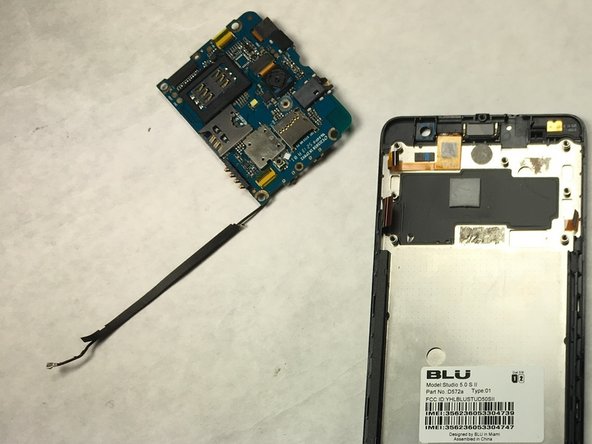
    • Remove the microSD and SIM card. Gently tug on the microSD and SIM card to slide them out of their insert.

  4. BLU Studio 5.0 S II Motherboard Replacement: 4 단계, 이미지 1/2 BLU Studio 5.0 S II Motherboard Replacement: 4 단계, 이미지 2/2
    • Locate the 5 black 3.5mm screws and the 1 3.5mm silver screw on the top back plate.

    • Remove the 6 3.5mm screws by using a Phillips #00 screwdriver.

  5. BLU Studio 5.0 S II Motherboard Replacement: 5 단계, 이미지 1/2 BLU Studio 5.0 S II Motherboard Replacement: 5 단계, 이미지 2/2
    • Remove the inner top back black plate.

  6. BLU Studio 5.0 S II Motherboard Replacement: 6 단계, 이미지 1/2 BLU Studio 5.0 S II Motherboard Replacement: 6 단계, 이미지 2/2
    • Locate the 2 black 3.5mm screws on the motherboard.

    • Remove the black 3.5 mm screws using a Phillips #00 screwdriver.

  7. BLU Studio 5.0 S II Motherboard Replacement: 7 단계, 이미지 1/3 BLU Studio 5.0 S II Motherboard Replacement: 7 단계, 이미지 2/3 BLU Studio 5.0 S II Motherboard Replacement: 7 단계, 이미지 3/3
    이 단계에 사용된 도구:
    Tweezers
    $4.99
    구매
    • Locate the 2 orange ribbons on opposite sides.

    • Carefully remove the two ribbon cables using tweezers.

    • Gently rock the cable back and forth equally from both sides to not damage the pins.

  8. BLU Studio 5.0 S II Motherboard Replacement: 8 단계, 이미지 1/2 BLU Studio 5.0 S II Motherboard Replacement: 8 단계, 이미지 2/2
    • Gently rock the plastic opening tool back and forth until the motherboard releases from the phone.

    • Adhesion, identified with red circles, bonds the motherboard to the chassis. This may require extra effort to lift off from back of phone.

  9. BLU Studio 5.0 S II Motherboard Replacement: 9 단계, 이미지 1/2 BLU Studio 5.0 S II Motherboard Replacement: 9 단계, 이미지 2/2
    • Follow the wire from the motherboard.

    • Remove the black lining covering the wire.

  10. BLU Studio 5.0 S II Motherboard Replacement: 10 단계, 이미지 1/2 BLU Studio 5.0 S II Motherboard Replacement: 10 단계, 이미지 2/2
    • Locate the 5 black screws on inner black lower plate.

    • Remove the black 3.5 mm screws using a Phillips #00 screwdriver.

  11. BLU Studio 5.0 S II Motherboard Replacement: 11 단계, 이미지 1/2 BLU Studio 5.0 S II Motherboard Replacement: 11 단계, 이미지 2/2
    • Remove the bottom inner back plate.

  12. BLU Studio 5.0 S II Motherboard Replacement: 12 단계, 이미지 1/2 BLU Studio 5.0 S II Motherboard Replacement: 12 단계, 이미지 2/2
    • Holding the cable with the removal tool, gently pull in the direction of the cable to remove the connector from its socket.

    • Gently rock the cable back and forth equally from both sides to not damage the pins.

  13. BLU Studio 5.0 S II Motherboard Replacement: 13 단계, 이미지 1/1
    • Remove the whole motherboard.

    • The Motherboard contains the headphone jack and the power button.

결론

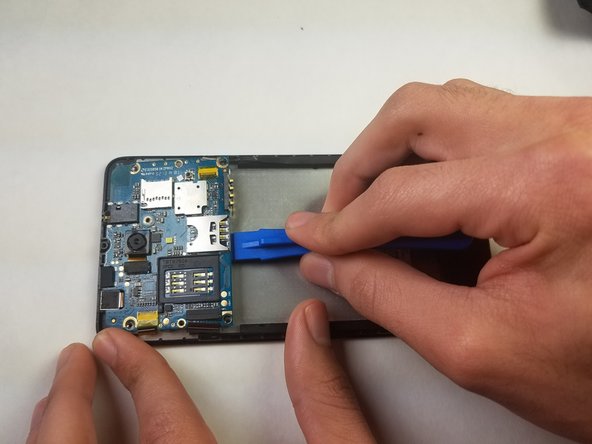
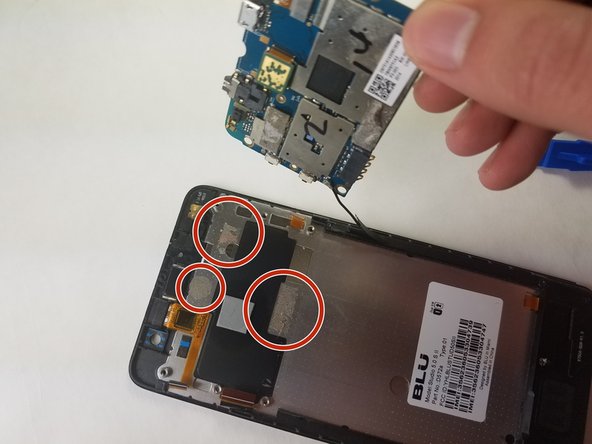
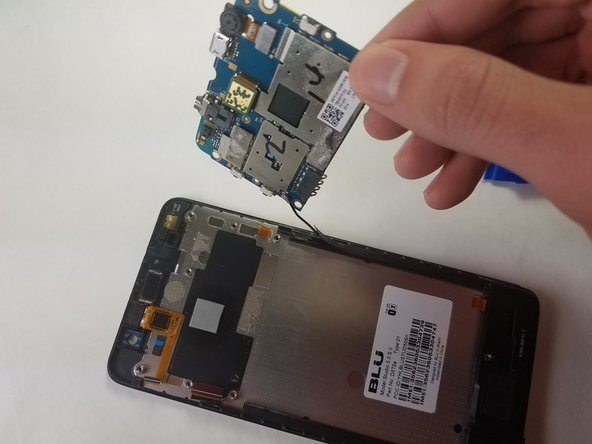
To reassemble your device, follow these instructions in reverse order with the new motherboard.

다른 한 분이 해당 안내서를 완성하였습니다.

Aaron Isaacs

회원 가입일: 03/01/17

107 평판

안내서 1개 작성함

IUPUI, Team S2-G3, Harley Spring 2017 IUPUI, Team S2-G3, Harley Spring 2017 회원

IUPUI-HARLEY-S17S2G3

4 회원들

안내서 3개 작성하였습니다

댓글 0개

댓글 쓰기

조회 통계:

24 시간 전: 0

7일 전: 0

30일 전: 11

전체 시간: 478