주요 콘텐츠로 건너뛰기

Baby Taylor Guitar String Replacement

필요한 것

  1. Baby Taylor Guitar String Replacement, Guitar String Replacement: 1 단계, 이미지 1/3 Baby Taylor Guitar String Replacement, Guitar String Replacement: 1 단계, 이미지 2/3 Baby Taylor Guitar String Replacement, Guitar String Replacement: 1 단계, 이미지 3/3
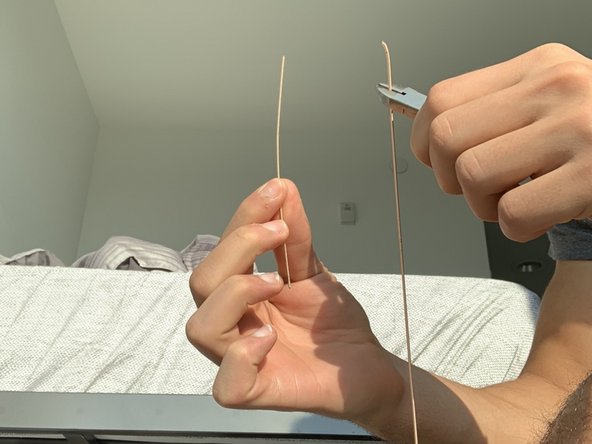
    • Rotate the tuner of the string you want to replace in a clockwise direction until it's loose.

    • You can either do it by hand (First Picture) or you can use the guitar string winder (Second picture).

  2. Baby Taylor Guitar String Replacement: 2 단계, 이미지 1/2 Baby Taylor Guitar String Replacement: 2 단계, 이미지 2/2
    • Grab a plier and pull out the bridge pin of the string you want to replace.

    • Make sure that you've completed step 1 first. The string has to be loose before doing this step.

  3. Baby Taylor Guitar String Replacement: 3 단계, 이미지 1/3 Baby Taylor Guitar String Replacement: 3 단계, 이미지 2/3 Baby Taylor Guitar String Replacement: 3 단계, 이미지 3/3
    • Take out the string from the bridge and the tuning pin.

    • You can now throw away the string. You will not be needing it anymore.

  4. Baby Taylor Guitar String Replacement: 4 단계, 이미지 1/2 Baby Taylor Guitar String Replacement: 4 단계, 이미지 2/2
    • Grab the new string and place the end (ball-end) inside the bridge.

    • The ball-end of a string is the side of the string that has a ball shape. (Shown in picture 2)

  5. Baby Taylor Guitar String Replacement: 5 단계, 이미지 1/2 Baby Taylor Guitar String Replacement: 5 단계, 이미지 2/2
    • Place the bridge pin inside the bridge in order to lock in the new string.

    • Lightly hammer down the bridge pin to keep it from detaching.

  6. Baby Taylor Guitar String Replacement: 6 단계, 이미지 1/2 Baby Taylor Guitar String Replacement: 6 단계, 이미지 2/2
    • Cut the excess string with a plier.

    • Cut the string around 1.5 inches over the desired tuning pin. (Recommended by Taylor Guitars)

  7. Baby Taylor Guitar String Replacement: 7 단계, 이미지 1/1
    • Place the new string inside the tuning pinhole.

    • It is recommended to place a really small portion of the string inside the pinhole to keep it from ripping your guitar bag. (As shown in the picture)

  8. Baby Taylor Guitar String Replacement: 8 단계, 이미지 1/3 Baby Taylor Guitar String Replacement: 8 단계, 이미지 2/3 Baby Taylor Guitar String Replacement: 8 단계, 이미지 3/3
    • Rotate the tuners in a counter-clockwise direction to tighten the new string.

    • You can either tighten it by hand (First Picture) or you can use the guitar string winder (Second Picture).

  9. Baby Taylor Guitar String Replacement: 9 단계, 이미지 1/1
    • Make sure your string is in tune and strum away!

결론

Most guitar strings de-tune after they’ve been recently replaced. Tune your strings every once in a while for a few days and the strings will stay in tune.

Mohamed Saleh

회원 가입일: 09/18/21

230 평판

안내서 1개 작성함

York University, Team F-21, Woodhouse Fall 2021 York University, Team F-21, Woodhouse Fall 2021 회원

YORK-WOODHOUSE-F21SFG21

1 회원

안내서 1개 작성하였습니다

댓글 0개

댓글 쓰기

조회 통계:

24 시간 전: 0

7일 전: 3

30일 전: 15

전체 시간: 612