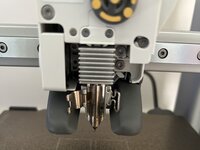
주요 콘텐츠로 건너뛰기

Bambu A1 Mini Hotend Assembly Replacement

필요한 것

  1. Bambu A1 Mini Hotend Assembly Replacement, Remove filment: 1 단계, 이미지 2개 중 1개 Bambu A1 Mini Hotend Assembly Replacement, Remove filment: 1 단계, 이미지 2개 중 2개
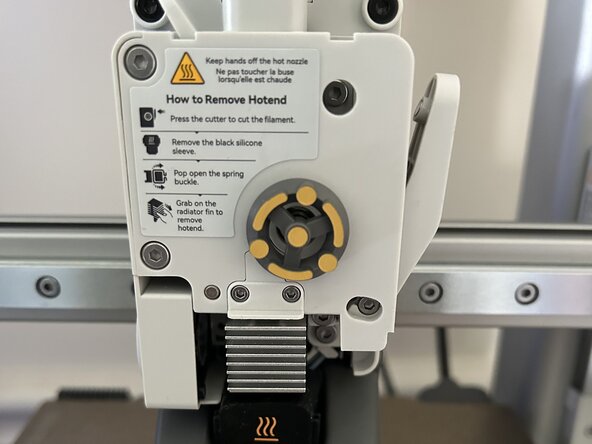
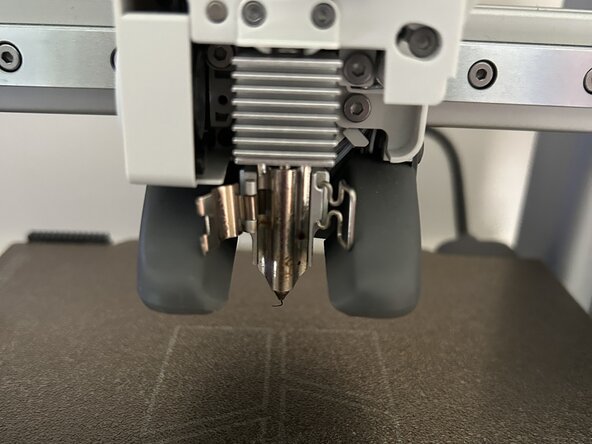
    • Cut the filament by fully pressing the handle on the right side of the toolhead.

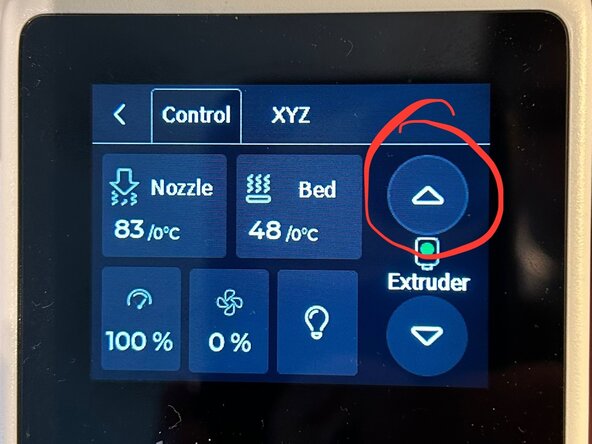
    • In the control window, press the up button for the extruder.

    • You do not want to need to rip the filament out of the nozzle.

  2. Bambu A1 Mini Hotend Assembly Replacement, Take off front pannel: 2 단계, 이미지 2개 중 1개 Bambu A1 Mini Hotend Assembly Replacement, Take off front pannel: 2 단계, 이미지 2개 중 2개
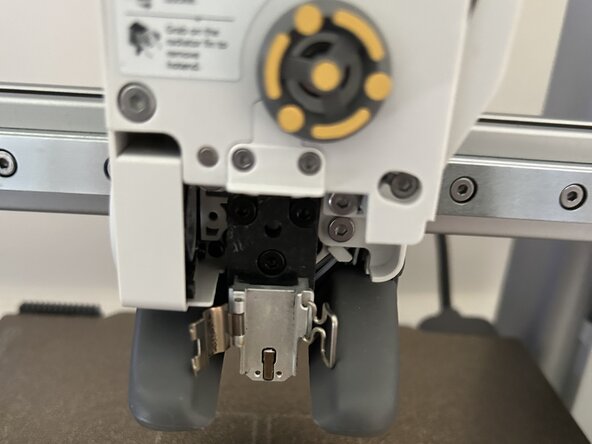
    • Lift the front cover in the circled spot in the photo and pull out the front cover.

  3. Bambu A1 Mini Hotend Assembly Replacement, Take off ruber sock: 3 단계, 이미지 2개 중 1개 Bambu A1 Mini Hotend Assembly Replacement, Take off ruber sock: 3 단계, 이미지 2개 중 2개
    • Remove the silicone sock from the nozzle.

  4. Bambu A1 Mini Hotend Assembly Replacement, Undo latch: 4 단계, 이미지 3개 중 1개 Bambu A1 Mini Hotend Assembly Replacement, Undo latch: 4 단계, 이미지 3개 중 2개 Bambu A1 Mini Hotend Assembly Replacement, Undo latch: 4 단계, 이미지 3개 중 3개
    • Open the front wire frame latch.

    • Then, open the solid latch.

  5. Bambu A1 Mini Hotend Assembly Replacement, Remove Hotend: 5 단계, 이미지 2개 중 1개 Bambu A1 Mini Hotend Assembly Replacement, Remove Hotend: 5 단계, 이미지 2개 중 2개
    • Pull out the old nozzle.

  6. Bambu A1 Mini Hotend Assembly Replacement, Add New hotend: 6 단계, 이미지 2개 중 1개 Bambu A1 Mini Hotend Assembly Replacement, Add New hotend: 6 단계, 이미지 2개 중 2개
    • Place the new nozzle into the hotend.

결론

To reassemble your device, follow these instructions in reverse order.

다른 2명이 해당 안내서를 완성하였습니다.

작성자

2다른 기여자 명과 함께

not-ethan

회원 가입일: 05/25/25

419 평판

안내서 2개를 작성함

1가이드 댓글

Perhaps this may be cross-referenced to various guides from the Bambu Lab wiki, such as the guide to clean the A1 series hotend.

Tai Lam - 답글

댓글 쓰기

조회 통계:

지난 24시간: 4

지난 7일: 24

지난 30일: 132

전체 시간: 659