주요 콘텐츠로 건너뛰기

Barnes And Noble Nook HD Tablet Screen Replacement

필요한 것

  1. Barnes And Noble Nook HD Tablet Screen Replacement, Remove the front screen: 1 단계, 이미지 1/3 Barnes And Noble Nook HD Tablet Screen Replacement, Remove the front screen: 1 단계, 이미지 2/3 Barnes And Noble Nook HD Tablet Screen Replacement, Remove the front screen: 1 단계, 이미지 3/3
    • wedge the plastic opening piece underneath the bottom left hand corner of the front frame. Pry the frame off of the Nook.

  2. Barnes And Noble Nook HD Tablet Screen Replacement, Remove the screws: 2 단계, 이미지 1/2 Barnes And Noble Nook HD Tablet Screen Replacement, Remove the screws: 2 단계, 이미지 2/2
    • Remove every visible screw tying the chassis to the bottom frame using the T-4 attachment for the screwdriver in the iFixit screwdriver kit.

  3. Barnes And Noble Nook HD Tablet Screen Replacement, Remove the chassis: 3 단계, 이미지 1/1
    • Remove every visible screw tying the chassis to the bottom frame using the T-4 attachment for the screwdriver in the iFixit screwdriver kit.

  4. Barnes And Noble Nook HD Tablet Screen Replacement, Detach battery: 4 단계, 이미지 1/1
    • detach the battery ribbon from the motherboard.

  5. Barnes And Noble Nook HD Tablet Screen Replacement, Flip the nook: 5 단계, 이미지 1/1
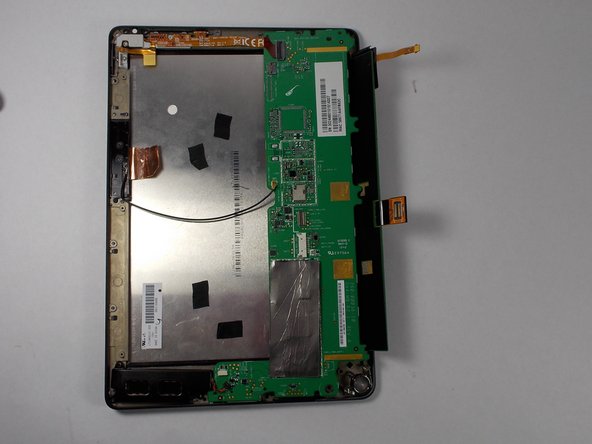
    • flip center chassis so that the back of the screen is facing you, and the hole is positioned in the bottom right corner.

  6. Barnes And Noble Nook HD Tablet Screen Replacement, Detach the screen from chassis part 1: 6 단계, 이미지 1/3 Barnes And Noble Nook HD Tablet Screen Replacement, Detach the screen from chassis part 1: 6 단계, 이미지 2/3 Barnes And Noble Nook HD Tablet Screen Replacement, Detach the screen from chassis part 1: 6 단계, 이미지 3/3
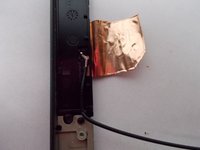
    • Remove copper tape above the antenna, 3 quarters of the way up the left side of the nook.

  7. Barnes And Noble Nook HD Tablet Screen Replacement, Detach the screen from chassis part 2: 7 단계, 이미지 1/2 Barnes And Noble Nook HD Tablet Screen Replacement, Detach the screen from chassis part 2: 7 단계, 이미지 2/2
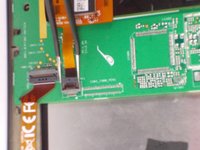
    • Locate thin orange strip on the top side of the motherboard. Apply tweezers to the black casing that locks it into the motherboard (plastic piece will completely come out).

  8. Barnes And Noble Nook HD Tablet Screen Replacement, Detach the screen from chassis part 3: 8 단계, 이미지 1/2 Barnes And Noble Nook HD Tablet Screen Replacement, Detach the screen from chassis part 3: 8 단계, 이미지 2/2
    • Locate the foam covered orange strip on the motherboard. Pull up (away from motherboard) so that it i no longer connected to the motherboard.

  9. Barnes And Noble Nook HD Tablet Screen Replacement, Take motherboard away from the screen: 9 단계, 이미지 1/2 Barnes And Noble Nook HD Tablet Screen Replacement, Take motherboard away from the screen: 9 단계, 이미지 2/2
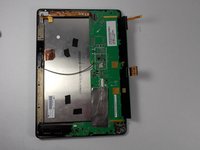
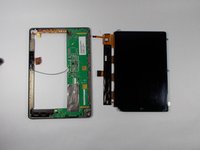
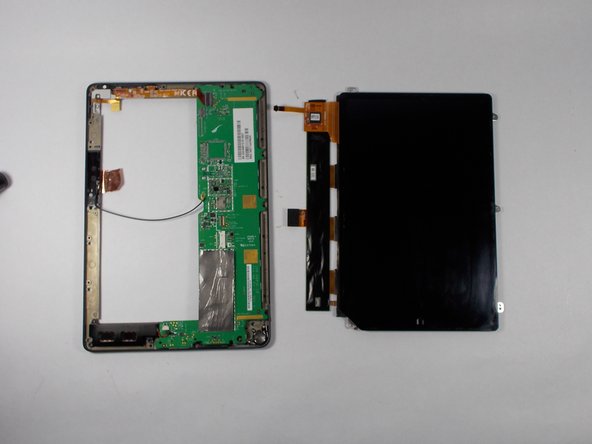
    • Lift motherboard away from the screen. Pull frame off of the screen.

  10. Barnes And Noble Nook HD Tablet Screen Replacement, Place new screen: 10 단계, 이미지 1/2 Barnes And Noble Nook HD Tablet Screen Replacement, Place new screen: 10 단계, 이미지 2/2
    • Put the new screen back into place in the frame (the reverse of step 9). Place motherboard back into place on the back of the screen. And follow steps in reverse order to reassemble.

결론

To reassemble your device, follow these instructions in reverse order.

다른 9명이 해당 안내서를 완성하였습니다.

Elijah Gonsalves

회원 가입일: 10/24/14

1,049 평판

안내서 3개 작성하였습니다

UMass Dartmouth, Team 2-3, Duarte Fall 2014 UMass Dartmouth, Team 2-3, Duarte Fall 2014 회원

UMASSD-DUARTE-F14S2G3

5 회원들

안내서 10개 작성하였습니다

댓글 한 개

como faço para comprar a tela touch do tablet nook ce0984

sou de Fortaleza-Ceara - Brasil

meu e-mail é moreiragenesio@yahoo.com.br

moreiragenesio - 답글

댓글 쓰기

조회 통계:

24 시간 전: 0

7일 전: 8

30일 전: 18

전체 시간: 14,186