이 버전에는 잘못된 편집 사항이 있을 수 있습니다. 최신 확인된 스냅샷으로 전환하십시오.
필요한 것
-
이 단계는 번역되지 않았습니다. 번역을 도와주십시오
-
Remove the following pentalobe screws securing the lower case to the MacBook Pro:
-
Eight 3.0 mm
-
Two 2.3 mm
-
-
이 단계는 번역되지 않았습니다. 번역을 도와주십시오
-
Lifting from the edge nearest the clutch cover, lift the lower case off the MacBook Pro.
-
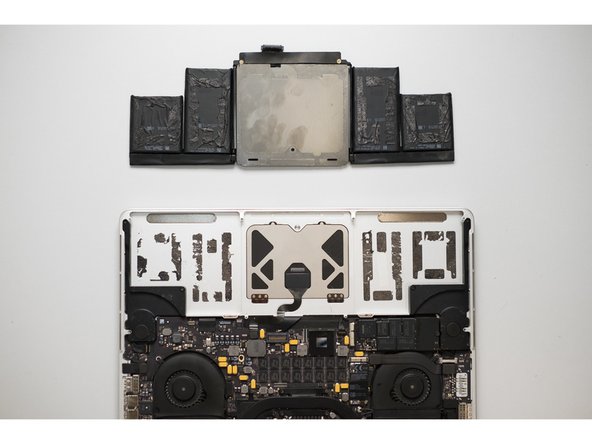
Set the lower case aside.
-
-
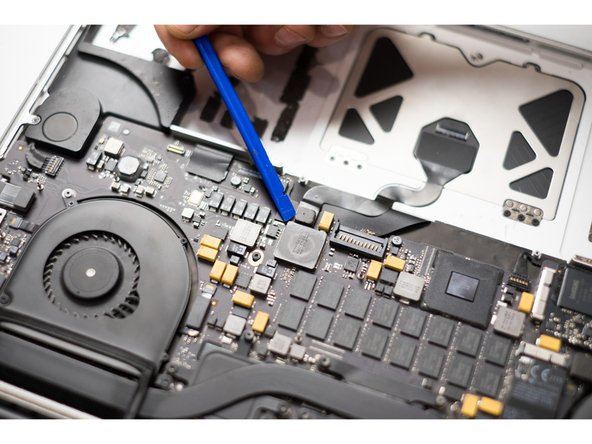
이 단계는 번역되지 않았습니다. 번역을 도와주십시오
-
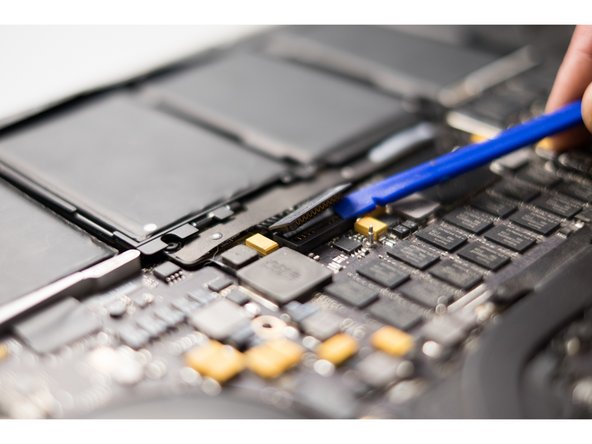
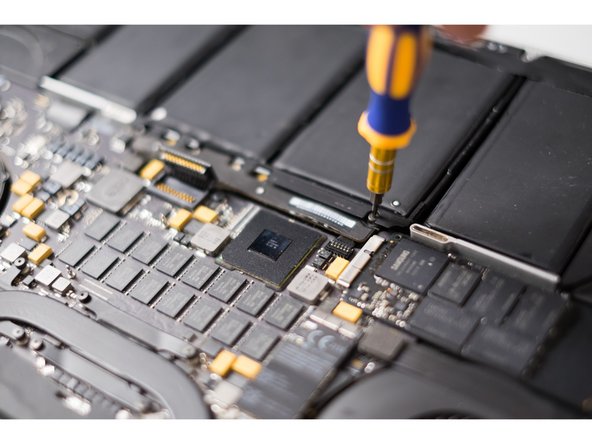
Using the flat end of a spudger, gently pry the battery connector straight up out of its socket on the logic board.
-
Bend the battery cables back and out of the way, ensuring that the battery connector doesn't accidentally make contact with the logic board.
-
-
-
이 단계는 번역되지 않았습니다. 번역을 도와주십시오
-
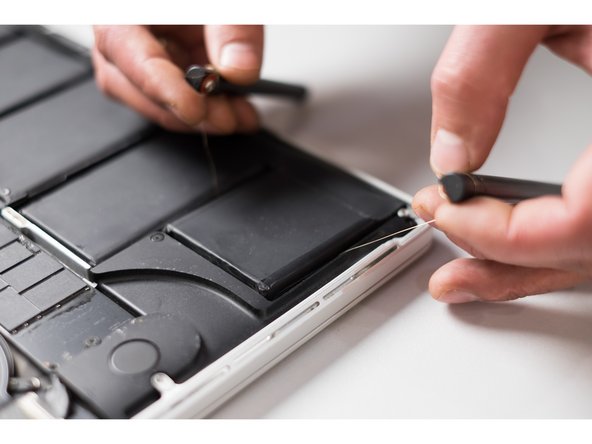
Please note: carefully cut the duct tape layer under the battery with thin wire string. Pull back and forth slowly. Do not pry up with any metal tools.
-


다른 53명이 해당 안내서를 완성하였습니다.

팀

댓글 54개
You are welcome!
Hi, Could I just ask where did you get your 'Handles' for the wire string? I bought some titanium wire a while ago but literally cant grip it. I have searched ebay etc but nothing is comeing up - Maybe my search terms aren't correct.
Thanks
Hello! You can use any strong jaws. We ordered holders in China.
Hi, Thanks for that, sorry for the late reply. I have ordered a set from china so I'll see what they're like, in the meantime if anyone is interested I had some random parts laying around, I made a set out of a couple of plastic spudgers, some polymorph to enlarge the top which I sank a motherboard peg into which I can then screw some screws with the large heads into. Seems to do a pretty good job, i'll upload a pic if any1 is interested.