주요 콘텐츠로 건너뛰기

Beats Studio 3 Ear Cushion Replacement

필요한 것

  1. Beats Studio 3 Ear Cushion Replacement, Ear Cushion: 1 단계, 이미지 1/2 Beats Studio 3 Ear Cushion Replacement, Ear Cushion: 1 단계, 이미지 2/2
    • Gently use the spudger to pry the cushions from the headphones.

  2. Beats Studio 3 Ear Cushion Replacement: 2 단계, 이미지 1/2 Beats Studio 3 Ear Cushion Replacement: 2 단계, 이미지 2/2
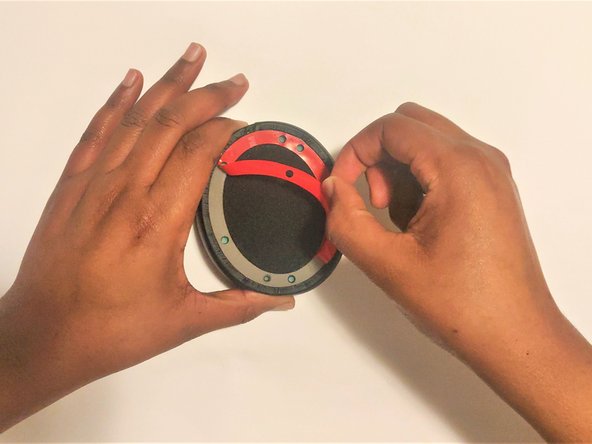
    • Remove the remaining adhesive by making circular movements around the rim of the headset with the provided Isopropyl Alcohol wipe.

    • This step is key. If the removal of the adhesive is not thorough, you may have issues with the new adhesive.

  3. Beats Studio 3 Ear Cushion Replacement: 3 단계, 이미지 1/2 Beats Studio 3 Ear Cushion Replacement: 3 단계, 이미지 2/2
    • The line indicates that the side is supposed to represent the bottom when attaching to your headphones.

    • Please also remember that the right ear cushion is unique because it makes space for the USB charging port.

  4. Beats Studio 3 Ear Cushion Replacement: 4 단계, 이미지 1/3 Beats Studio 3 Ear Cushion Replacement: 4 단계, 이미지 2/3 Beats Studio 3 Ear Cushion Replacement: 4 단계, 이미지 3/3
    • Remove the sticker on the new pair of cushions to reveal the adhesive by pulling on the red tab to the side.

    • Do not touch the adhesive ring or lay it on a surface facing downwards. This could cause the adhesive to obtain fingerprints or, collect dust which could make it less effective at attaching to your headphones.

  5. Beats Studio 3 Ear Cushion Replacement: 5 단계, 이미지 1/3 Beats Studio 3 Ear Cushion Replacement: 5 단계, 이미지 2/3 Beats Studio 3 Ear Cushion Replacement: 5 단계, 이미지 3/3
    • Realign and move as needed to match the circles on the adhesive on the earpad with the screws on your headphones.

  6. Beats Studio 3 Ear Cushion Replacement: 6 단계, 이미지 1/3 Beats Studio 3 Ear Cushion Replacement: 6 단계, 이미지 2/3 Beats Studio 3 Ear Cushion Replacement: 6 단계, 이미지 3/3
    • Once aligned and placed properly, push on your pad for 1 minute to activate the adhesive by clamping your hands together as tight as possible.

  7. Beats Studio 3 Ear Cushion Replacement: 7 단계, 이미지 1/1
    • Put an object between your headphones to apply pressure for 24 hours to close any gaps.

    • Do not overstretch your headphones. This can break them. Please apply a decent amount of compression, nothing excessive.

결론

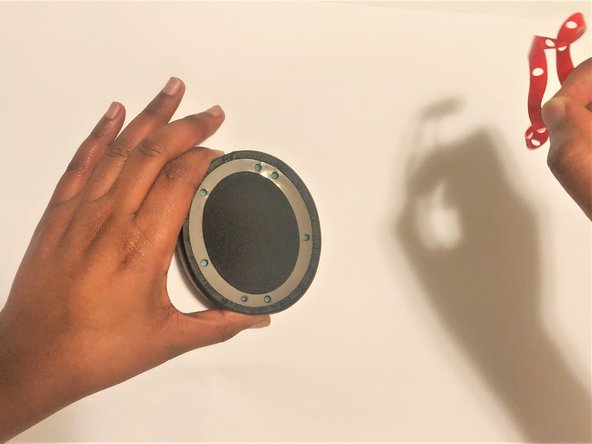
There you go! You have completed the guide. You are able to wear the headphones as usual after the 24 hour period. Please dispose of the old ear cushions and clean up your mess!

다른 9명이 해당 안내서를 완성하였습니다.

Haydar

회원 가입일: 01/26/21

379 평판

안내서 1개 작성함

York University, Team S2-G1, O'Regan Winter 2021 York University, Team S2-G1, O'Regan Winter 2021 회원

YORK-O'REGAN-W21S2G1

2 회원들

안내서 2개 작성하였습니다

댓글 2개

Muchas gracias tanto al autor de la guía de reparación como al traductor de la misma.

Angel Manuel - 답글

Hola!! Donde puedo comprar el recambio de auriculares?? Gracias!!

Adriana García - 답글

댓글 쓰기

조회 통계:

24 시간 전: 11

7일 전: 72

30일 전: 397

전체 시간: 15,759