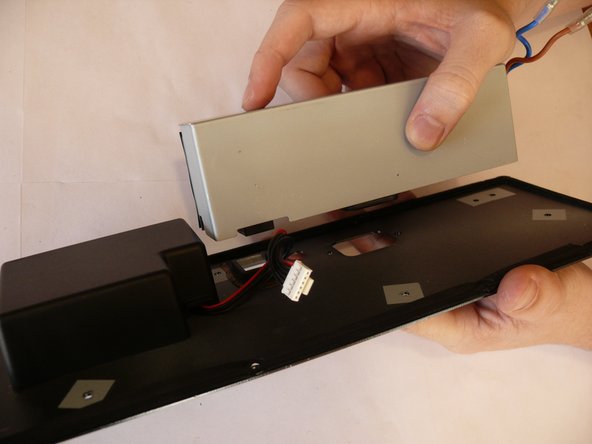
주요 콘텐츠로 건너뛰기

Behringer Eurolive B212D Power PCB Replacement

필요한 것

  1. Behringer Eurolive B212D Power PCB Replacement, Removing the Behringer Eurolive B212D Electronics Box: 1 단계, 이미지 1/1
    • CAUTION: Unplug your speaker from the power outlet.

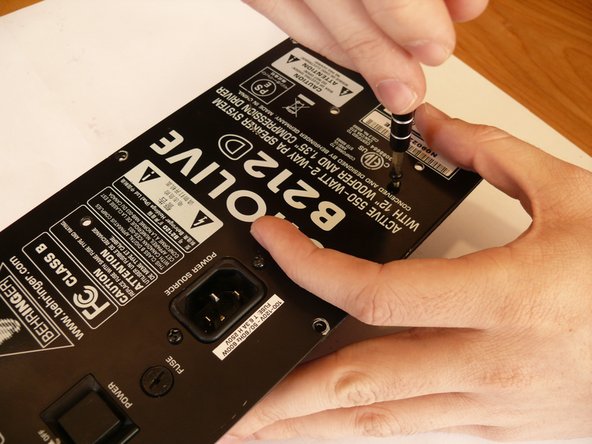
    • Remove the 8 Phillips screws from the back of the speaker.

    Eurolive B212d back plate requirement

    Ashok Ahlawat - 답글

  2. Behringer Eurolive B212D Power PCB Replacement: 2 단계, 이미지 1/1
    • Carefully remove the back panel, lifting out the metal electronics-box with it.

    • To avoid damaging your speaker, remove slowly, as there is still a wire attached from the electronics box to the speaker.

  3. Behringer Eurolive B212D Power PCB Replacement, Detach the Behringer Eurolive B212D Electronics Box: 3 단계, 이미지 1/3 Behringer Eurolive B212D Power PCB Replacement, Detach the Behringer Eurolive B212D Electronics Box: 3 단계, 이미지 2/3 Behringer Eurolive B212D Power PCB Replacement, Detach the Behringer Eurolive B212D Electronics Box: 3 단계, 이미지 3/3
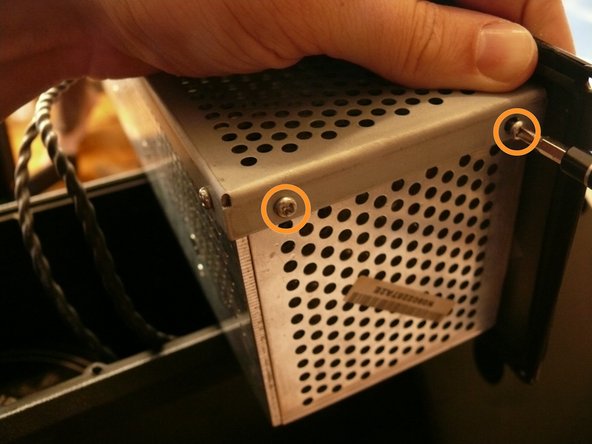
    • There are two silver, 6 mm-long machine screws with two 1/8" inner-diameter washers on the exterior of the metal electronics box; remove these first using a #2 philips screwdriver.

    • There are five of the same type of machine screw (silver, 6 mm-long) remaining around the metal electronics box's exterior; remove these as well.

    • You should have removed a total of 7 machine screws and 2 washers.

    • The reason for removing the two screws with the two washers first (or replacing them last when reassembling) is that their holes are actually slots. They are designed as slots to accommodate slop in the assembly, and if unscrewed out of order, you may have difficulty while removing - or possibly even damage - the other five screws.

  4. Behringer Eurolive B212D Power PCB Replacement: 4 단계, 이미지 1/1
    • Remove the portion of the metal housing that you freed with the 7 screws in the previous step.

  5. Behringer Eurolive B212D Power PCB Replacement: 5 단계, 이미지 1/3 Behringer Eurolive B212D Power PCB Replacement: 5 단계, 이미지 2/3 Behringer Eurolive B212D Power PCB Replacement: 5 단계, 이미지 3/3
    • Inside the metal electronics box housing is a white clip attached to a small PCB; remove this.

    • The white clip in this image has been glued, indicating that the manufacturer may not expect the end user to remove this clip; it is difficult to proceed with the disassembling without doing so, however, because the rest of the speaker does not provide a sufficient surface on which to work.

    • Snake the clip head through the hole in the metal electronics box casing.

  6. Behringer Eurolive B212D Power PCB Replacement, Disassembling Behringer Eurolive B212D Power & Control Panel: 6 단계, 이미지 1/2 Behringer Eurolive B212D Power PCB Replacement, Disassembling Behringer Eurolive B212D Power & Control Panel: 6 단계, 이미지 2/2
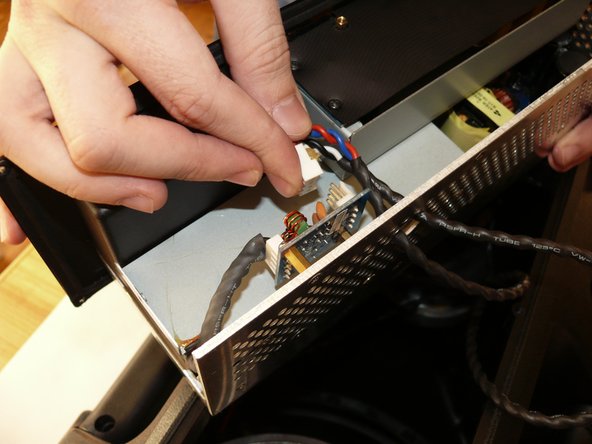
    • Remove the 4, 7/32" long machine screws with a #2 phillips head screwdriver.

  7. Behringer Eurolive B212D Power PCB Replacement: 7 단계, 이미지 1/2 Behringer Eurolive B212D Power PCB Replacement: 7 단계, 이미지 2/2
    • Caution: The circuit board contains many capacitors that could cause serious injury if touched. If possible, use a capacitor discharge probe to safely rid the capacitors of dangerous charges.

    • Rotate the back panel so you can view the interior; note the three wires attached.

    • Remove the wires to you can fully remove the back panel.

  8. Behringer Eurolive B212D Power PCB Replacement, Power PCB: 8 단계, 이미지 1/3 Behringer Eurolive B212D Power PCB Replacement, Power PCB: 8 단계, 이미지 2/3 Behringer Eurolive B212D Power PCB Replacement, Power PCB: 8 단계, 이미지 3/3
    • Remove the 4 indicated 7/32" long machine screws with a #1 phillips head screwdriver.

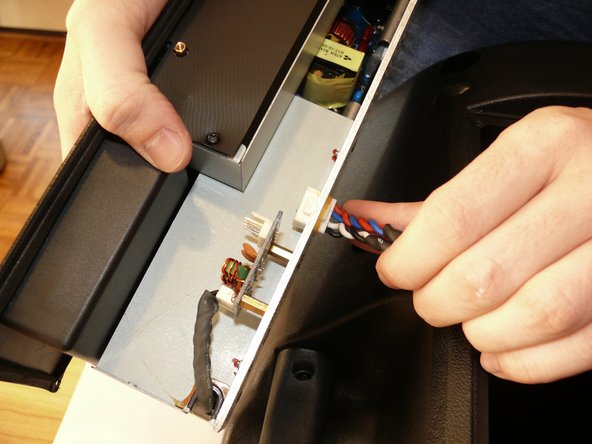
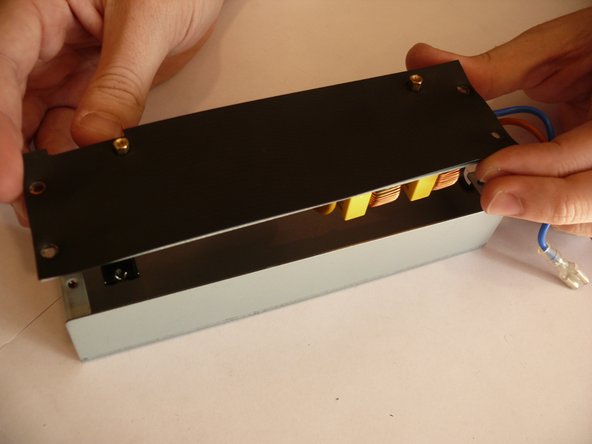
    • Remove the box containing the power PCB.

  9. Behringer Eurolive B212D Power PCB Replacement: 9 단계, 이미지 1/2 Behringer Eurolive B212D Power PCB Replacement: 9 단계, 이미지 2/2
    • There are 4 remaining 7/32" long machine screws holding the power PCB to the box which contains it; remove these with a #1 phillips head screwdriver.

    • Remove the power PCB.

결론

To reassemble your device, follow these instructions in reverse order.

다른 6명이 해당 안내서를 완성하였습니다.

Troy W. Weber

회원 가입일: 03/29/12

1,431 평판

안내서 6개 작성하였습니다

댓글 13개

This PCB does not convert electricity, and is rarely what fails. AC leaves this board and gets converted to DC at the rectifier bridge, which is part of the main amp PCB. This main amp board is where 99.9% of issues arise...

Gabriel Talamantes - 답글

Do you know where I can find replacement boards for this speaker? It takes about 20 times of cycling the power button for it to finally come on. Can't seem to find parts anywhere. May not be financially smart to replace the board, but if it's not that expensive, I feel it's worth it.

Justin -

Hi. Why dont you fix the board?

riaandd - 답글

Has anyone got a circuit diagram for the power board. Is it a switch mode power supply - the power plug indicates 240V or 110 V AC which would normally indicate it uses a switch mode power supply at the front end

Jonathon - 답글

my fuse holder the plastic broke because there is not enough pressure to hold in the fuse and turns on and off

Jeffrey Martinez - 답글

Test esr of all small electrolytic caps eg. 100uf in primary side of ps. In area or 16 and 8 pin dips. Have had this problem cured with caps replaced , often several, small ones in this supply. Especially units that have ran a long time and have heat stressed those elcos. Presently having a problem that is not caps but i suspect theViper22a ic as there is no standby voltage at all and this chip can be “sneaky", sometimes working and sometimes just not firing up.hope you have access to an esr tester as these little caps don't always bloat to show their failure.

Pesh Madscientist - 답글

Thanks for your detailed explanation. How can I simply replace the fuses? I have new ones but the fuses don’t seem to just screw out to be replaced. Thanks in advance for your prompt response.

ReggieSmith770@gmail.com

Reggie Smith - 답글

I have two of these that are not passing AC power from the first power supply. I assume its AC? I have the schematic for others if you still need. it doesnt list part numbers/types. Anyone know what this should measure on the blue and brown wires? Listed as X7 and X8

Donald moats - 답글

I need the speaker input/output board.if anyone knows where I can get one please let me know. Fchazz@gmail.com

Frank Hazzard - 답글

Hi

Does anyone have a schematic of the P0563 with a parts list? The parts are burned and unidentifiable . Thank You

francis sheehan - 답글

Hello please some one help to find this part where go fuse Behringer Eurolive B212D Power PCB Replacement Thank you

Sabi nagra - 답글

댓글 쓰기

조회 통계:

24 시간 전: 6

7일 전: 39

30일 전: 119

전체 시간: 19,268