주요 콘텐츠로 건너뛰기

Bem Wireless HL2739B Speaker Motherboard Replacement

필요한 것

  1. Bem Wireless HL2739B  Speaker Motherboard Replacement, Speaker Battery: 1 단계, 이미지 1/1
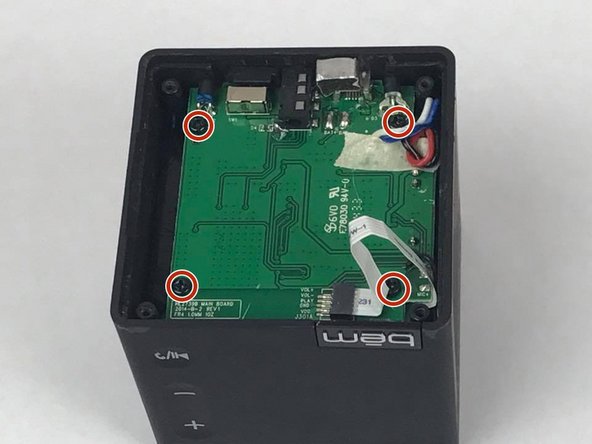
    • Peel the rubber cover back from the corner of the speaker to reveal the screw.

    • Repeat for the three remaining corners.

  2. Bem Wireless HL2739B  Speaker Motherboard Replacement: 2 단계, 이미지 1/3 Bem Wireless HL2739B  Speaker Motherboard Replacement: 2 단계, 이미지 2/3 Bem Wireless HL2739B  Speaker Motherboard Replacement: 2 단계, 이미지 3/3
    • Use the J1 bit attached to the screwdriver to remove the four 10mm screws from the bottom of the speaker.

  3. Bem Wireless HL2739B  Speaker Motherboard Replacement: 3 단계, 이미지 1/1
    • Lift the bottom cover away from the rest of the speaker.

    • There are wires connecting the battery and cover to the rest of the speaker. Be careful when removing the base cover.

    • Using the tweezers, pull the wires from the speaker's internal chip.

    • Be careful not to damage the chip when you remove the wires.

    • It will likely require soldering to reassemble the speaker after this step.

  4. Bem Wireless HL2739B  Speaker Motherboard Replacement: 4 단계, 이미지 1/1
    • Using a plastic opening tool, gently pry the battery from the metal base.

  5. Bem Wireless HL2739B  Speaker Motherboard Replacement: 5 단계, 이미지 1/1
    • Using tweezers, pull the wires from the metal base connection.

  6. Bem Wireless HL2739B  Speaker Motherboard Replacement, Speaker Motherboard: 6 단계, 이미지 1/2 Bem Wireless HL2739B  Speaker Motherboard Replacement, Speaker Motherboard: 6 단계, 이미지 2/2
    • Unscrew the four 10mm screws from the motherboard.

  7. Bem Wireless HL2739B  Speaker Motherboard Replacement: 7 단계, 이미지 1/2 Bem Wireless HL2739B  Speaker Motherboard Replacement: 7 단계, 이미지 2/2
    • Using tweezers, remove the blue/white and red/black wires from motherboard.

  8. Bem Wireless HL2739B  Speaker Motherboard Replacement: 8 단계, 이미지 1/2 Bem Wireless HL2739B  Speaker Motherboard Replacement: 8 단계, 이미지 2/2
    • Gently re-position the motherboard so you can access the bus wire connected to the speaker.

    • Remove bus wire from the speaker and lift out the motherboard.

결론

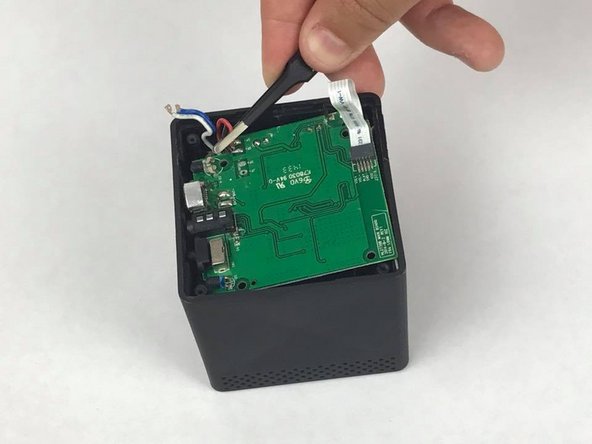
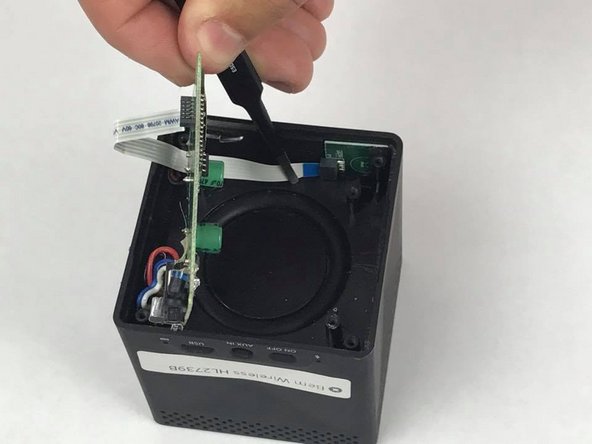
To reassemble your device, follow these instructions in reverse order.

다른 3명이 해당 안내서를 완성하였습니다.

Ryan McQueeney

회원 가입일: 02/28/17

446 평판

안내서 4개 작성하였습니다

USF Tampa, Team S2-G4, Nance Spring 2017 USF Tampa, Team S2-G4, Nance Spring 2017 회원

USFT-NANCE-S17S2G4

4 회원들

안내서 5개 작성하였습니다

댓글 0개

댓글 쓰기

조회 통계:

24 시간 전: 0

7일 전: 0

30일 전: 0

전체 시간: 915