주요 콘텐츠로 건너뛰기

Bissell OptiClean Cyclonic Vacuum Cord w/ Reel Replacement

필요한 것

  1. Bissell OptiClean Cyclonic Vacuum Cord w/ Reel Replacement, Flex Hose with Handle: 1 단계, 이미지 1/2 Bissell OptiClean Cyclonic Vacuum Cord w/ Reel Replacement, Flex Hose with Handle: 1 단계, 이미지 2/2
    • Grab hold of both the flex hose handle and the extension wand.

    • Pull straight out to detach the handle from the extension wand.

  2. Bissell OptiClean Cyclonic Vacuum Cord w/ Reel Replacement: 2 단계, 이미지 1/1
    • Locate the lock clip on the other end of the flex hose.

  3. Bissell OptiClean Cyclonic Vacuum Cord w/ Reel Replacement: 3 단계, 이미지 1/2 Bissell OptiClean Cyclonic Vacuum Cord w/ Reel Replacement: 3 단계, 이미지 2/2
    • Hold down the lock clip to unlock the flex hose from the vacuum.

    • Remove the flex hose from the vacuum.

  4. Bissell OptiClean Cyclonic Vacuum Cord w/ Reel Replacement, Filters: 4 단계, 이미지 1/3 Bissell OptiClean Cyclonic Vacuum Cord w/ Reel Replacement, Filters: 4 단계, 이미지 2/3 Bissell OptiClean Cyclonic Vacuum Cord w/ Reel Replacement, Filters: 4 단계, 이미지 3/3
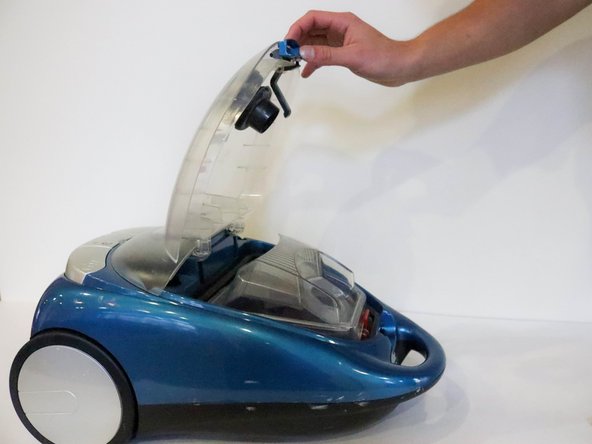
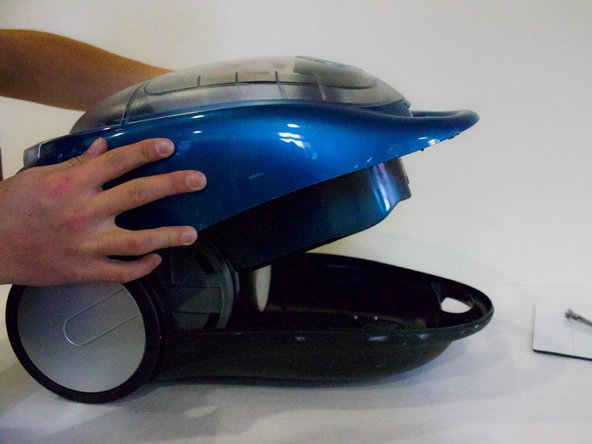
    • After removing hose, place vacuum on back and unclip the top compartment.

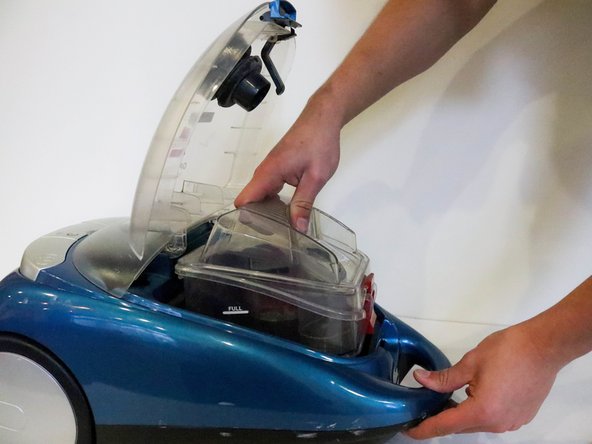
    • Open the compartment.

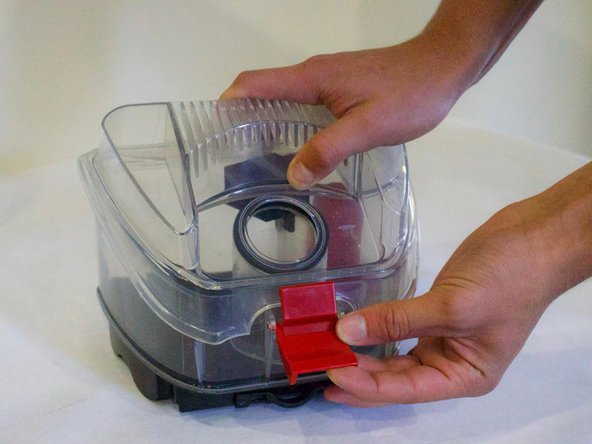
    • Pull the dirt collection box out of the vacuum.

  5. Bissell OptiClean Cyclonic Vacuum Cord w/ Reel Replacement: 5 단계, 이미지 1/3 Bissell OptiClean Cyclonic Vacuum Cord w/ Reel Replacement: 5 단계, 이미지 2/3 Bissell OptiClean Cyclonic Vacuum Cord w/ Reel Replacement: 5 단계, 이미지 3/3
    • Place dirt collection box to the side.

    • Locate the Pre-Motor Filter.

    • Pull the filter out by grabbing the pull tab on top.

  6. Bissell OptiClean Cyclonic Vacuum Cord w/ Reel Replacement: 6 단계, 이미지 1/3 Bissell OptiClean Cyclonic Vacuum Cord w/ Reel Replacement: 6 단계, 이미지 2/3 Bissell OptiClean Cyclonic Vacuum Cord w/ Reel Replacement: 6 단계, 이미지 3/3
    • Turn vacuum around and locate the filter cover on the bottom.

    • Place fingers in the opening and pull off the filter cover.

    • Place fingers on each tab on the Post-Motor HEPA Media Filter and pull out.

  7. Bissell OptiClean Cyclonic Vacuum Cord w/ Reel Replacement: 7 단계, 이미지 1/3 Bissell OptiClean Cyclonic Vacuum Cord w/ Reel Replacement: 7 단계, 이미지 2/3 Bissell OptiClean Cyclonic Vacuum Cord w/ Reel Replacement: 7 단계, 이미지 3/3
    • Take filter out to clean or replace.

    • To clean Dirt Collection Box, unlatch lid and take off.

  8. Bissell OptiClean Cyclonic Vacuum Cord w/ Reel Replacement: 8 단계, 이미지 1/3 Bissell OptiClean Cyclonic Vacuum Cord w/ Reel Replacement: 8 단계, 이미지 2/3 Bissell OptiClean Cyclonic Vacuum Cord w/ Reel Replacement: 8 단계, 이미지 3/3
    • Flip Dirt Collection Box over and locate the push tab.

    • Push the Dirt Cup HEPA Media Filter up to take it off.

    • Picture 3 Shows all the filters taken out of the vacuum.

  9. Bissell OptiClean Cyclonic Vacuum Cord w/ Reel Replacement, Motor and Circuit Board: 9 단계, 이미지 1/2 Bissell OptiClean Cyclonic Vacuum Cord w/ Reel Replacement, Motor and Circuit Board: 9 단계, 이미지 2/2
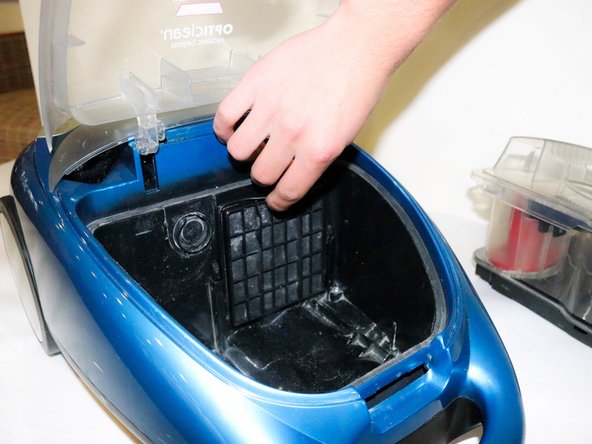
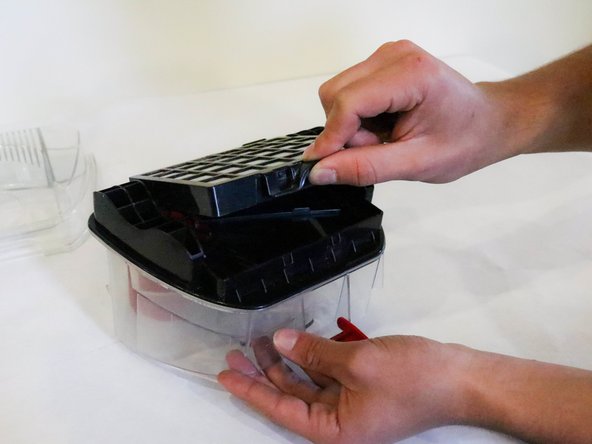
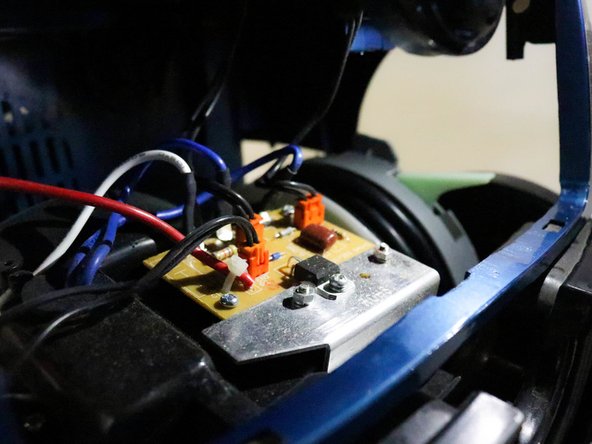
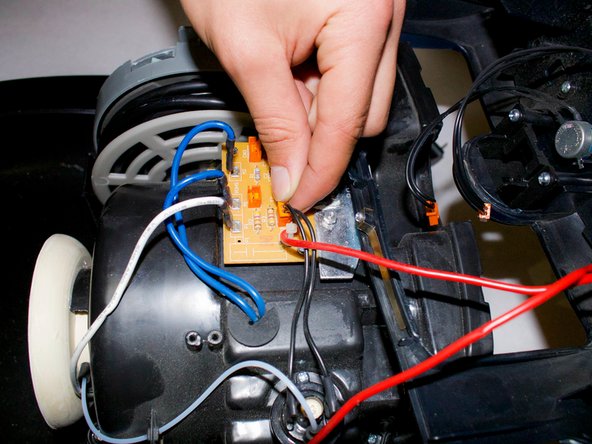
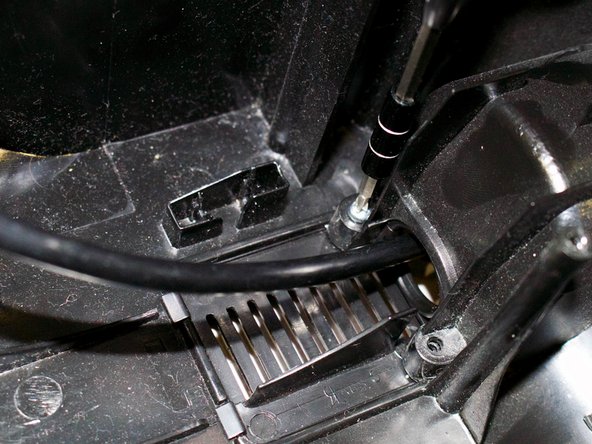
    • Unscrew the two screws underneath the dirt collection box inside the vacuum.

  10. Bissell OptiClean Cyclonic Vacuum Cord w/ Reel Replacement: 10 단계, 이미지 1/1
    • Flip over vacuum.

  11. Bissell OptiClean Cyclonic Vacuum Cord w/ Reel Replacement: 11 단계, 이미지 1/2 Bissell OptiClean Cyclonic Vacuum Cord w/ Reel Replacement: 11 단계, 이미지 2/2
    • Unscrew both screws on the bottom of the handle.

  12. Bissell OptiClean Cyclonic Vacuum Cord w/ Reel Replacement: 12 단계, 이미지 1/2 Bissell OptiClean Cyclonic Vacuum Cord w/ Reel Replacement: 12 단계, 이미지 2/2
    • Unscrew both screws near the wheels.

  13. Bissell OptiClean Cyclonic Vacuum Cord w/ Reel Replacement: 13 단계, 이미지 1/3 Bissell OptiClean Cyclonic Vacuum Cord w/ Reel Replacement: 13 단계, 이미지 2/3 Bissell OptiClean Cyclonic Vacuum Cord w/ Reel Replacement: 13 단계, 이미지 3/3
    • Flip over vacuum.

    • Gently lift off top.

    • Do not try to take off completely. There are still wires attached to the hull.

  14. Bissell OptiClean Cyclonic Vacuum Cord w/ Reel Replacement: 14 단계, 이미지 1/2 Bissell OptiClean Cyclonic Vacuum Cord w/ Reel Replacement: 14 단계, 이미지 2/2
    • Locate the circuit board.

  15. Bissell OptiClean Cyclonic Vacuum Cord w/ Reel Replacement: 15 단계, 이미지 1/3 Bissell OptiClean Cyclonic Vacuum Cord w/ Reel Replacement: 15 단계, 이미지 2/3 Bissell OptiClean Cyclonic Vacuum Cord w/ Reel Replacement: 15 단계, 이미지 3/3
    • Unplug each orange plug.

    • Make sure you remember which orange plug goes where!

  16. Bissell OptiClean Cyclonic Vacuum Cord w/ Reel Replacement: 16 단계, 이미지 1/2 Bissell OptiClean Cyclonic Vacuum Cord w/ Reel Replacement: 16 단계, 이미지 2/2
    • Unplug the red wires. The wires may be a little difficult to take off. If they are, you may use a pair of pliers to pull the wires off.

    • Make sure not to wiggle the wires, as that may break the metal holding them.

  17. Bissell OptiClean Cyclonic Vacuum Cord w/ Reel Replacement: 17 단계, 이미지 1/1
    • Remove the top.

  18. Bissell OptiClean Cyclonic Vacuum Cord w/ Reel Replacement: 18 단계, 이미지 1/2 Bissell OptiClean Cyclonic Vacuum Cord w/ Reel Replacement: 18 단계, 이미지 2/2
    • Unscrew the top two screws on the vacuum.

  19. Bissell OptiClean Cyclonic Vacuum Cord w/ Reel Replacement: 19 단계, 이미지 1/2 Bissell OptiClean Cyclonic Vacuum Cord w/ Reel Replacement: 19 단계, 이미지 2/2
    • Unscrew the back two scews.

  20. Bissell OptiClean Cyclonic Vacuum Cord w/ Reel Replacement: 20 단계, 이미지 1/3 Bissell OptiClean Cyclonic Vacuum Cord w/ Reel Replacement: 20 단계, 이미지 2/3 Bissell OptiClean Cyclonic Vacuum Cord w/ Reel Replacement: 20 단계, 이미지 3/3
    • Lift motor and move it over the gain access to the spool.

    • Unscrew the screw on the spool.

    • Remove the plastic circle.

  21. Bissell OptiClean Cyclonic Vacuum Cord w/ Reel Replacement: 21 단계, 이미지 1/1
    • Remove the motor.

    • And you are done!

  22. Bissell OptiClean Cyclonic Vacuum Cord w/ Reel Replacement, Cord w/ Reel: 22 단계, 이미지 1/1
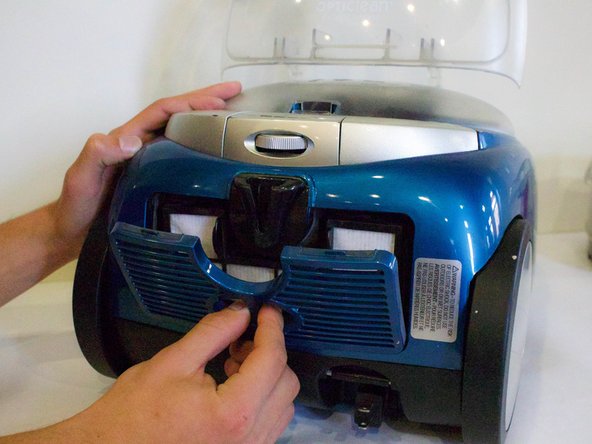
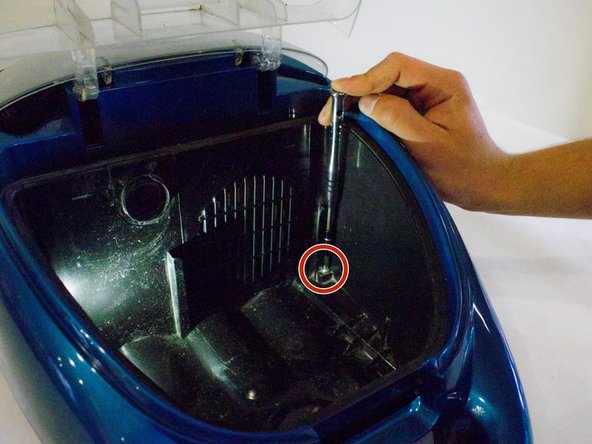
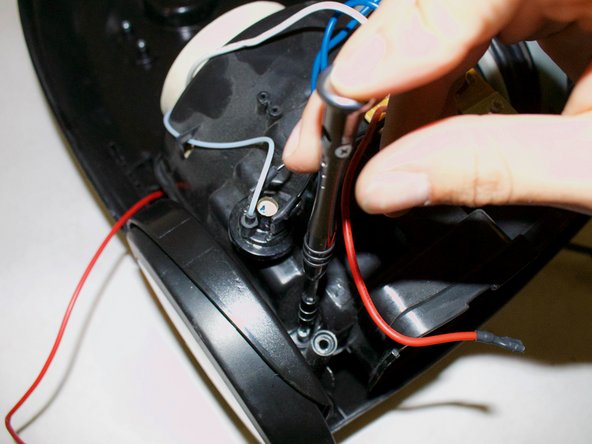
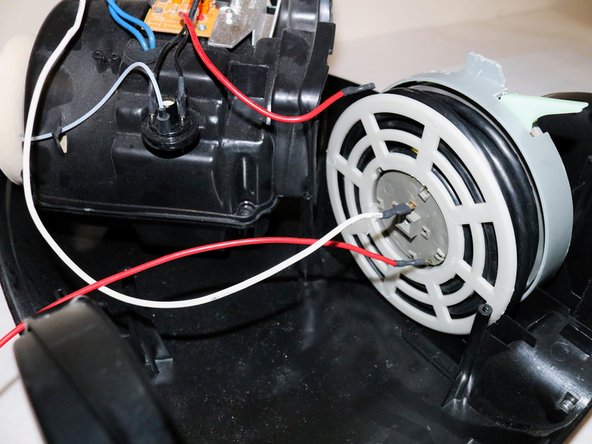
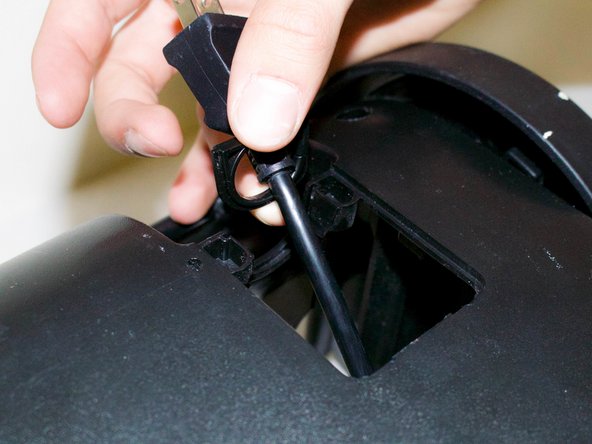
    • Grab hold of the cord reel and cord. Make sure cord is retracted all the way in.

  23. Bissell OptiClean Cyclonic Vacuum Cord w/ Reel Replacement: 23 단계, 이미지 1/1
    • Pull on cord reel to remove it. You should hear a click indicating it has detached from the area indicated in the picture.

  24. Bissell OptiClean Cyclonic Vacuum Cord w/ Reel Replacement: 24 단계, 이미지 1/2 Bissell OptiClean Cyclonic Vacuum Cord w/ Reel Replacement: 24 단계, 이미지 2/2
    • Use screwdriver to remove screws from either side of the cord.

  25. Bissell OptiClean Cyclonic Vacuum Cord w/ Reel Replacement: 25 단계, 이미지 1/2 Bissell OptiClean Cyclonic Vacuum Cord w/ Reel Replacement: 25 단계, 이미지 2/2
    • Flip over vacuum.

    • Remove grate that holds the power cord as pictured.

  26. Bissell OptiClean Cyclonic Vacuum Cord w/ Reel Replacement: 26 단계, 이미지 1/2 Bissell OptiClean Cyclonic Vacuum Cord w/ Reel Replacement: 26 단계, 이미지 2/2
    • Grab hold of head of power cord and pull up.

    • Power cord should disconnect from vacuum body as pictured.

  27. Bissell OptiClean Cyclonic Vacuum Cord w/ Reel Replacement: 27 단계, 이미지 1/1
    • Remove the cord reel and cord from the vacuum body.

결론

To reassemble your device, follow these instructions in reverse order.

다른 한 분이 해당 안내서를 완성하였습니다.

Rianne Paracuelles

회원 가입일: 01/18/18

163 평판

안내서 1개 작성함

Cal Poly, Team S12-G1, Banghart Winter 2018 Cal Poly, Team S12-G1, Banghart Winter 2018 회원

CPSU-BANGHART-W18S12G1

5 회원들

안내서 5개 작성하였습니다

댓글 한 개

댓글 쓰기

조회 통계:

24 시간 전: 1

7일 전: 2

30일 전: 8

전체 시간: 582