주요 콘텐츠로 건너뛰기

Black and Decker BDEDMT Trigger Device Replacement

필요한 것

  1. Black and Decker BDEDMT Trigger Device Replacement, Detach Matrix Attachment: 1 단계, 이미지 1/2 Black and Decker BDEDMT Trigger Device Replacement, Detach Matrix Attachment: 1 단계, 이미지 2/2
    • Remember to disconnect the device from all external power sources.

    • To detach the matrix attachment piece, press down on the attachment release button located at the top of the device.

    • Leaving your finger pressed down on the button, simply pull on the attachment to release it.

  2. Black and Decker BDEDMT Trigger Device Replacement, Remove Mounting Hardware: 2 단계, 이미지 1/3 Black and Decker BDEDMT Trigger Device Replacement, Remove Mounting Hardware: 2 단계, 이미지 2/3 Black and Decker BDEDMT Trigger Device Replacement, Remove Mounting Hardware: 2 단계, 이미지 3/3
    • Using a JIS 1 screwdriver, unscrew seven 19mm outer screws located on the armature.

    • Using the same screwdriver, unscrew the 12mm outer screw located on the armature.

  3. Black and Decker BDEDMT Trigger Device Replacement, Trigger Device: 3 단계, 이미지 1/1
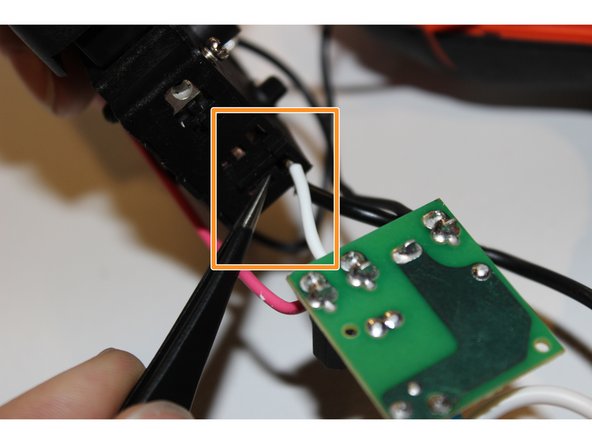
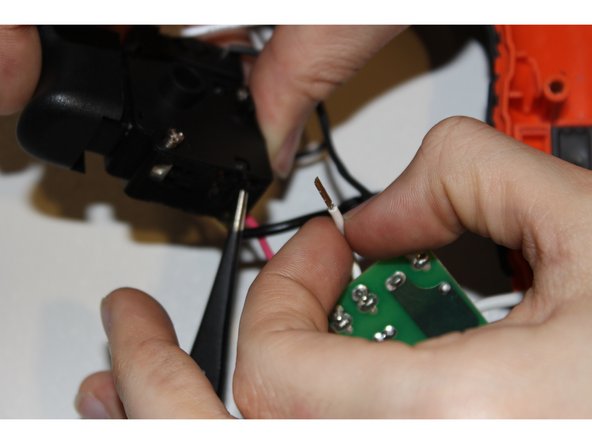
    • Grab a hold of the trigger module. Gently lift the module out of the armature.

    • Be gentle with the module to ensure that the reverse switch is unaffected.

  4. Black and Decker BDEDMT Trigger Device Replacement: 4 단계, 이미지 1/3 Black and Decker BDEDMT Trigger Device Replacement: 4 단계, 이미지 2/3 Black and Decker BDEDMT Trigger Device Replacement: 4 단계, 이미지 3/3
    • Simply roll the trigger module onto its back.

    • Located on on the bottom left of the module there will be a screw with the label 3.

    • Use your a JIS 0 screwdriver. After the screw is released, gently pull out the black wire.

    • The power cord is released from the trigger module.

  5. Black and Decker BDEDMT Trigger Device Replacement: 5 단계, 이미지 1/3 Black and Decker BDEDMT Trigger Device Replacement: 5 단계, 이미지 2/3 Black and Decker BDEDMT Trigger Device Replacement: 5 단계, 이미지 3/3
    • Located on the bottom side there will be a labeled area with a number 2. Below the two there will be a short white wire.

    • Using your needle nose tweezers insert one of the ends into the release slot below the white wire.

    • Make sure aim the tweezers toward the wire.

    • Lift the end of the tweezers to release the wire.

    • Do not force the removal of the wire.

  6. Black and Decker BDEDMT Trigger Device Replacement: 6 단계, 이미지 1/3 Black and Decker BDEDMT Trigger Device Replacement: 6 단계, 이미지 2/3 Black and Decker BDEDMT Trigger Device Replacement: 6 단계, 이미지 3/3
    • Located on the top of the trigger module you will see four more wires entering the module. There will be two thin black wires, a thin white wire and a thin red wire.

    • The steps for the removal of these four wires is the same as seen in step number five.

    • Remember to reinsert the wires to their corresponding slots when reassembling.

    • The trigger module is now completely free from the rest of the device and can be replaced.

결론

To reassemble your device, follow these instructions in reverse order.

cayla dahl

회원 가입일: 02/01/16

247 평판

안내서 2개 작성하였습니다

UW Tacoma, Team 1-2, Rose Winter 2016 UW Tacoma, Team 1-2, Rose Winter 2016 회원

UWT-ROSE-W16S1G2

4 회원들

안내서 11개 작성하였습니다

댓글 0개

댓글 쓰기

조회 통계:

24 시간 전: 0

7일 전: 2

30일 전: 14

전체 시간: 1,051