주요 콘텐츠로 건너뛰기

Black and Decker BDERO100 Motor Replacement

필요한 것

  1. Black and Decker BDERO100 Motor Replacement, Hook and Loop System: 1 단계, 이미지 1/1
    • Remove the sanding paper from the velcro.

  2. Black and Decker BDERO100 Motor Replacement: 2 단계, 이미지 1/1
    • Select the JIS - J1 bit or the most appropriate bit to match the screws for your model.

  3. Black and Decker BDERO100 Motor Replacement: 3 단계, 이미지 1/2 Black and Decker BDERO100 Motor Replacement: 3 단계, 이미지 2/2
    • Use the Bit Driver to take off the four 12.5 mm Phillips screws at the base of the hook-and-loop system.

    • Be careful not to lose the lock washers (black rings).

  4. Black and Decker BDERO100 Motor Replacement: 4 단계, 이미지 1/2 Black and Decker BDERO100 Motor Replacement: 4 단계, 이미지 2/2
    • Once all screws and washers have been removed, hold the hook and loop system and separate it from the device.

  5. Black and Decker BDERO100 Motor Replacement, Chassis: 5 단계, 이미지 1/2 Black and Decker BDERO100 Motor Replacement, Chassis: 5 단계, 이미지 2/2
    • Use the nylon spudger to remove the rubber ring from the filter attachment section.

    • The easiest way to do this is to place the spudger sideways and pulling out the ring.

  6. Black and Decker BDERO100 Motor Replacement: 6 단계, 이미지 1/2 Black and Decker BDERO100 Motor Replacement: 6 단계, 이미지 2/2
    • Use the TR20 Torx Security bit driver to unscrew the five 18.75mm Phillips screws from the warning label side of the chassis.

  7. Black and Decker BDERO100 Motor Replacement: 7 단계, 이미지 1/2 Black and Decker BDERO100 Motor Replacement: 7 단계, 이미지 2/2
    • Grab the plastic opening tool and place it on the separation line between both sides of the chassis.

    • Separate both sides and open the device.

    • Be careful not to lose or detach any internal parts while opening the sander.

  8. Black and Decker BDERO100 Motor Replacement: 8 단계, 이미지 1/2 Black and Decker BDERO100 Motor Replacement: 8 단계, 이미지 2/2
    • Hold the chassis and separate it from the device.

  9. Black and Decker BDERO100 Motor Replacement, Motor: 9 단계, 이미지 1/3 Black and Decker BDERO100 Motor Replacement, Motor: 9 단계, 이미지 2/3 Black and Decker BDERO100 Motor Replacement, Motor: 9 단계, 이미지 3/3
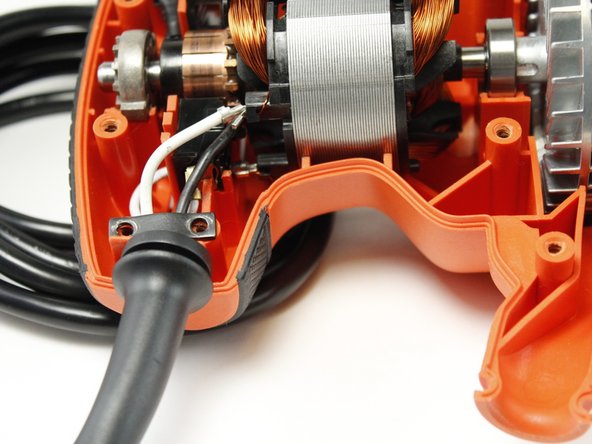
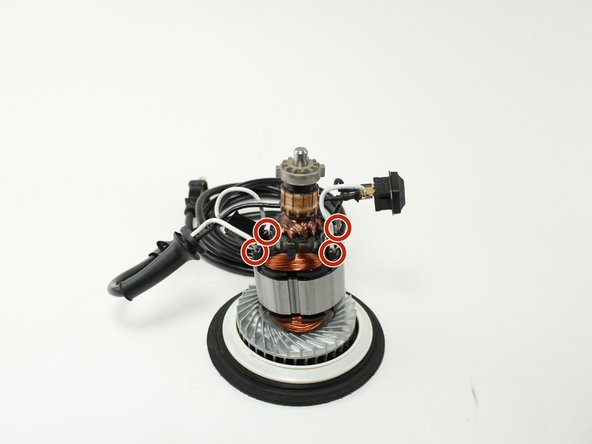
    • Use the bit driver with the JIS - J1 bit to remove the two 12.5 mm phillips screws holding the cord clamp to the chassis.

  10. Black and Decker BDERO100 Motor Replacement: 10 단계, 이미지 1/2 Black and Decker BDERO100 Motor Replacement: 10 단계, 이미지 2/2
    • With yout hands, hold and separate the power button from the external case by pulling gently.

  11. Black and Decker BDERO100 Motor Replacement: 11 단계, 이미지 1/2 Black and Decker BDERO100 Motor Replacement: 11 단계, 이미지 2/2
    • Hold the motor and gently pull to remove from chassis.

  12. Black and Decker BDERO100 Motor Replacement: 12 단계, 이미지 1/3 Black and Decker BDERO100 Motor Replacement: 12 단계, 이미지 2/3 Black and Decker BDERO100 Motor Replacement: 12 단계, 이미지 3/3
    • Gently pull on all cables connected to the motor to remove.

  13. Black and Decker BDERO100 Motor Replacement: 13 단계, 이미지 1/2 Black and Decker BDERO100 Motor Replacement: 13 단계, 이미지 2/2
    • Once all cables are disconnected, you can proceed to replace the motor.

결론

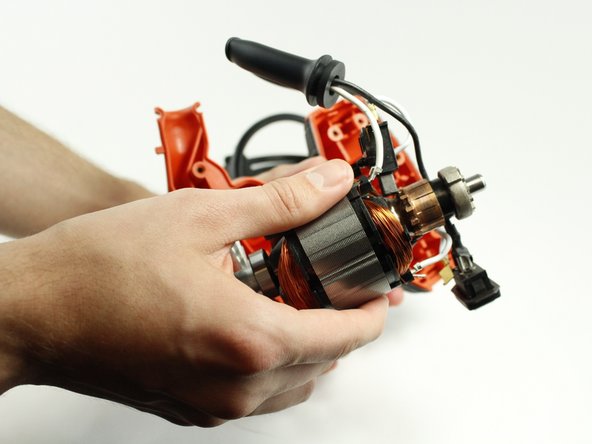
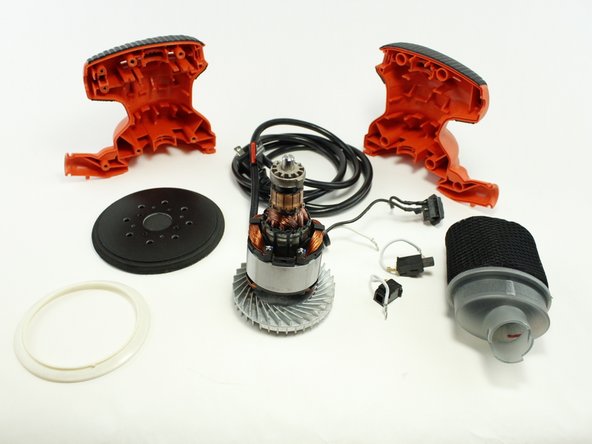
To reassemble your device, follow these instructions in reverse order.

Irene Zubillaga

회원 가입일: 02/10/16

617 평판

안내서 5개 작성하였습니다

USF Tampa, Team 1-5, Sullivan Spring 2016 USF Tampa, Team 1-5, Sullivan Spring 2016 회원

USFT-SULLIVAN-S16S1G5

4 회원들

안내서 6개 작성하였습니다

댓글 한 개

Hey, I’m planning on changing the motor on my B+D 20V Sander and it seems to be the same (or at least very similar) procedure, but I’d like to know the type of motor it needs. Do you know how can I know the specs of the motor? or is that more of a open and see kind of thing?

Thanks!

Diego Alejandro, Avilan Franco - 답글

댓글 쓰기

조회 통계:

24 시간 전: 0

7일 전: 6

30일 전: 15

전체 시간: 1,634