주요 콘텐츠로 건너뛰기

Black and Decker PS1800 Switch Replacement

필요한 것

  1. Black and Decker PS1800  Switch Replacement, Open the Outer Drill Case: 1 단계, 이미지 1/2 Black and Decker PS1800  Switch Replacement, Open the Outer Drill Case: 1 단계, 이미지 2/2
    • Lay the drill on its side, assuring that the screw holes are facing upwards.

    • Remove seven 12 mm screws using a Phillips #00 screwdriver.

  2. Black and Decker PS1800  Switch Replacement: 2 단계, 이미지 1/1
    • Separate the outer drill case to expose the components and switch.

  3. Black and Decker PS1800  Switch Replacement, Switch: 3 단계, 이미지 1/2 Black and Decker PS1800  Switch Replacement, Switch: 3 단계, 이미지 2/2
    • Identify the switch in center of the drill.

    • Remove the screws from the switch.

    • Remove the switch cover.

  4. Black and Decker PS1800  Switch Replacement: 4 단계, 이미지 1/1
    • Locate the switch inside the drill.

    • Remove the switch from the drill.

  5. Black and Decker PS1800  Switch Replacement: 5 단계, 이미지 1/2 Black and Decker PS1800  Switch Replacement: 5 단계, 이미지 2/2
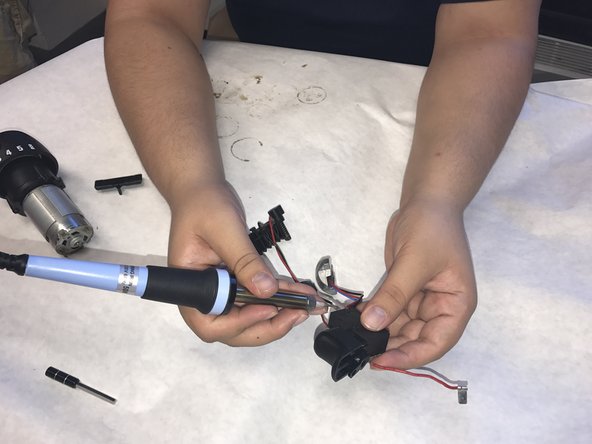
    • Solder off all the joints.

    • Remove the switch assembly.

결론

To reassemble your device, follow these instructions in reverse order.

다른 한 분이 해당 안내서를 완성하였습니다.

Hamza Nawaz

회원 가입일: 11/20/16

247 평판

안내서 2개 작성하였습니다

IUPUI, Team 2-3, Baechle Fall 2016 IUPUI, Team 2-3, Baechle Fall 2016 회원

IUPUI-BAECHLE-F16S2G3

5 회원들

안내서 6개 작성하였습니다

댓글 0개

댓글 쓰기

조회 통계:

24 시간 전: 0

7일 전: 0

30일 전: 4

전체 시간: 902