이 버전에는 잘못된 편집 사항이 있을 수 있습니다. 최신 확인된 스냅샷으로 전환하십시오.
필요한 것
-
이 단계는 번역되지 않았습니다. 번역을 도와주십시오
-
Remove the six T6 Torx screws on the back of the phone.
-
Make sure to keep the screws somewhere that they will not get lost.
-
-
이 단계는 번역되지 않았습니다. 번역을 도와주십시오
-
Using your finger nail or a spudger, carefully pry up the back cover.
-
Begin in one spot and slowly circle around the device as you pry up all of the back cover.
-
-
-
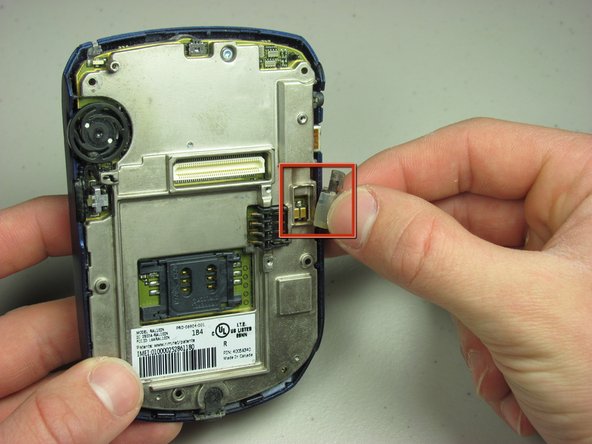
이 단계는 번역되지 않았습니다. 번역을 도와주십시오
-
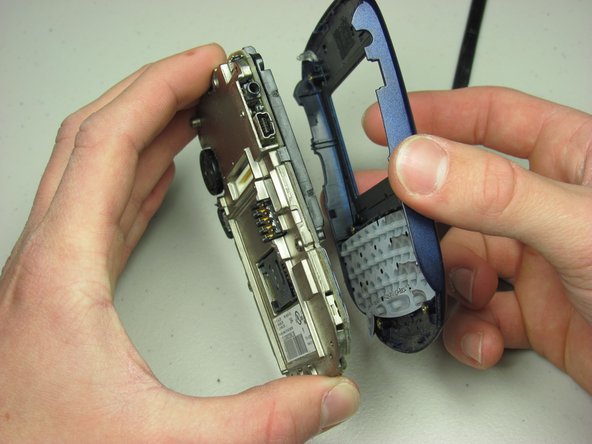
Carefully pry off front cover. Make sure the plastic clips are unlatched before applying force.
-
Lift off front cover from metal plate.
-


팀

Cal Poly, Team 14-44, Regan Winter 2010 Cal Poly, Team 14-44, Regan Winter 2010 회원
CPSU-REGAN-W10S14G44
4 회원들
안내서 8개 작성하였습니다